How to Draw a Sword

July 22, 2026
5 Steps
AR Drawing Logo

AR Drawing

Drawing Tutorials

There's something deeply satisfying about drawing a sword — that long, tapering blade catching an imaginary light, a dramatic curved crossguard, and a grip wrapped and ready to be held. It's the kind of drawing that looks like it belongs on the cover of a fantasy novel, and yet it comes together from just a few clean, confident shapes: two long lines for the blade, a couple of curved wings for the guard, and a simple wrapped handle. Once the proportions click into place, the whole thing reads as a genuinely formidable weapon. Let's get drawing!

How to Draw a Sword
What You Will Need
  • Pencil
  • Eraser
  • White paper
  • Black marker or fine-liner (optional)
  • Colored pencils, crayons, or markers
1

Draw the Blade Outline

Step 1: Draw the Blade Outline

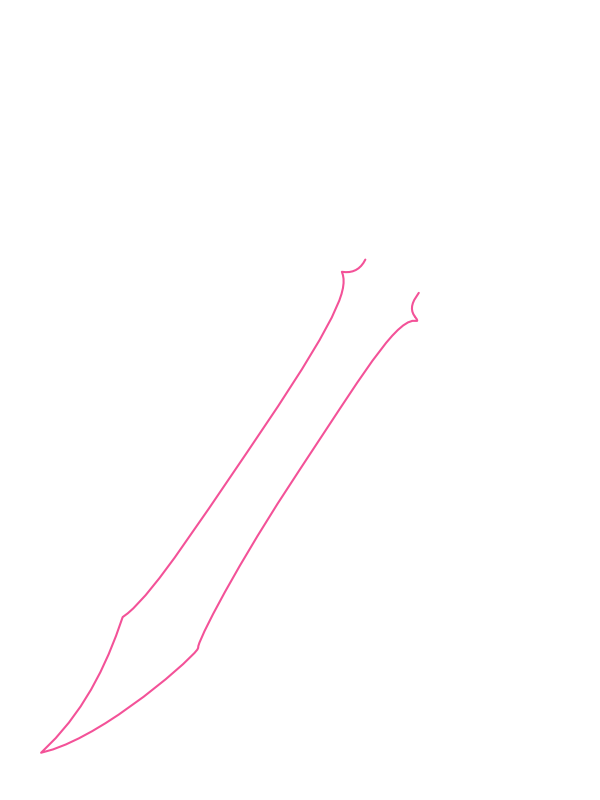
Starting from the lower-left of your page, draw two long lines running diagonally up toward the upper right, angling slightly toward each other as they rise so the blade tapers gently along its length. At the bottom, let the two lines curve inward and meet at a sharp point rather than a blunt end, forming the tip of the blade. At the top, leave both lines open with a small hooked flick outward, since this is where the crossguard will attach in a later step. Keep the blade nice and long — a longer, more dramatic taper reads as far more impressive than a short, stubby shape.

2

Add the Blade Detail

Step 2: Add the Blade Detail

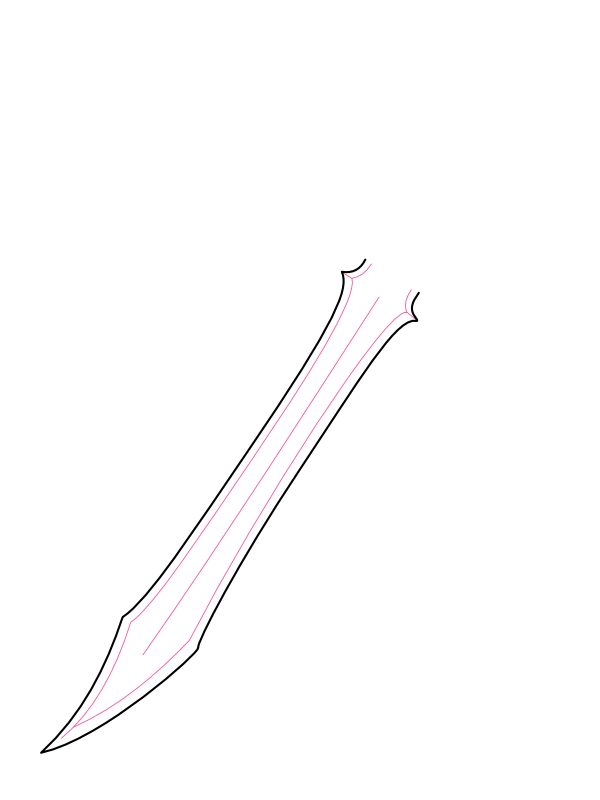
Down the center of the blade, running roughly parallel to the two outer edges, draw one or two thinner lines to suggest the fuller — the shallow groove running down the middle of many real sword blades that lightens the weight without weakening the edge. Keep these inner lines a little shorter than the outer edges, stopping just before the very tip and just before the base, so the detail feels embedded in the blade rather than floating independently on top of it.

3

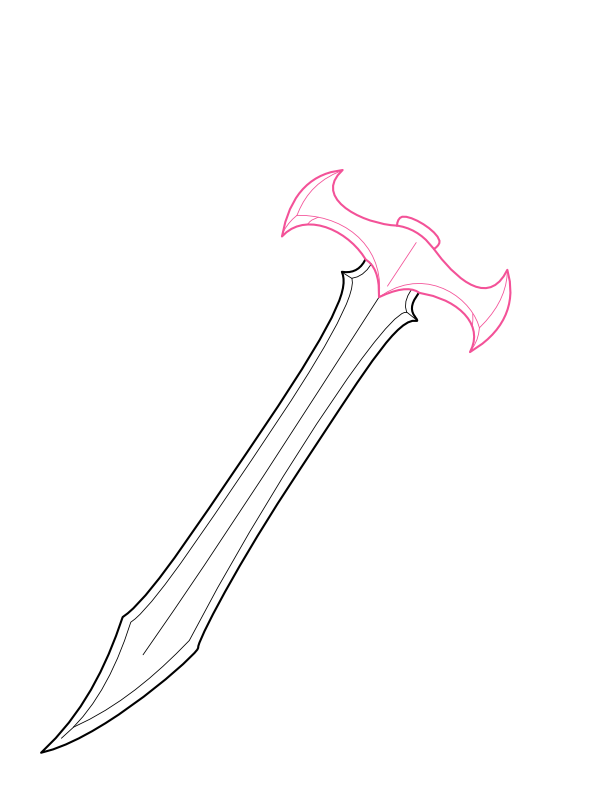
Draw the Crossguard

Step 3: Draw the Crossguard

At the top of the blade, where you left that small hooked flick in Step 1, draw two curved, wing-like shapes sweeping outward and slightly upward in opposite directions, like a pair of stylized bat wings or curling flames. This is the crossguard, the piece that protects the hand and gives the whole sword its dramatic silhouette. Let the curves swoop and taper to points rather than staying blocky and rectangular, since that flowing shape is what pushes the design from a plain utility blade into something that feels distinctly fantasy-inspired.

4

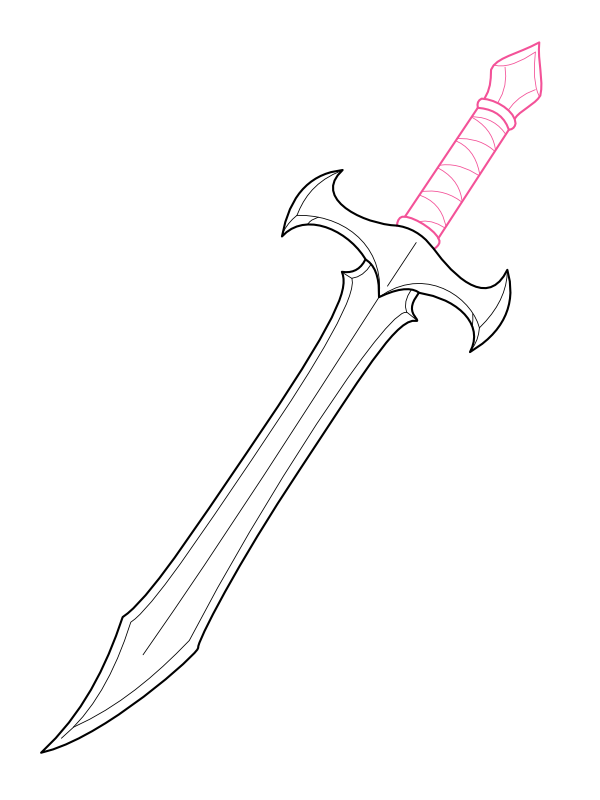
Draw the Handle and Pommel

Step 4: Draw the Handle and Pommel

From the center of the crossguard, draw two parallel lines extending upward to form the grip, adding a few short diagonal lines wrapping around it to suggest leather or cord winding around the handle. At the very top, draw a small angular shape — the pommel — wider than the grip itself, which balances the weight of the blade and gives the hilt a finished, deliberate look rather than trailing off into nothing.

5

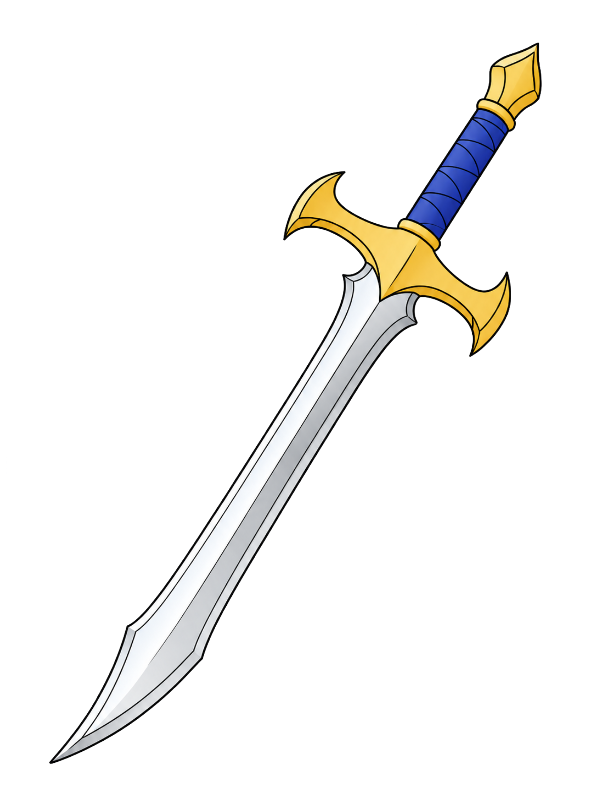
Color Your Sword

Step 5: Color Your Sword

Now for the most satisfying part!

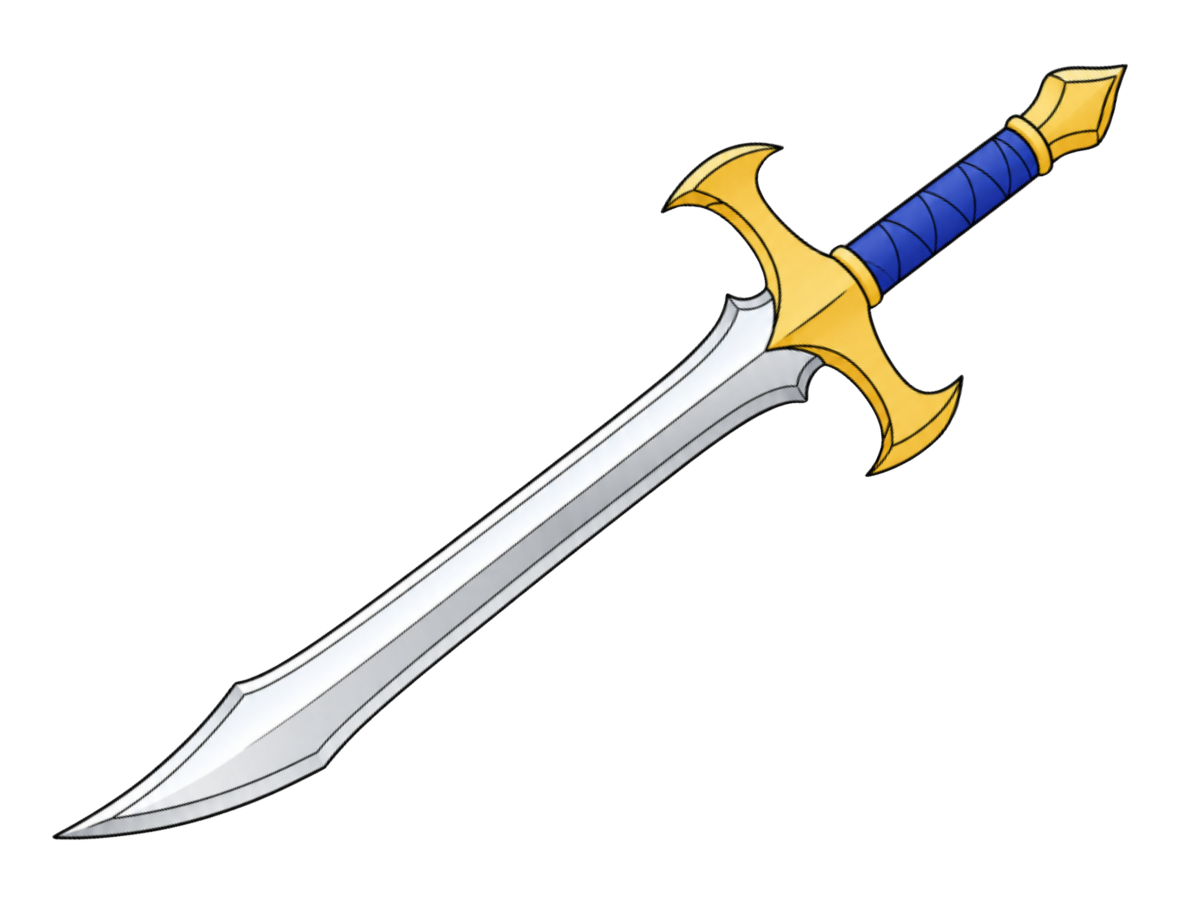
  • Blade: Cool silver-grey, with the two outer edges shaded slightly darker and a bright streak of near-white running down the center to suggest the shine of polished steel
  • Fuller lines: A slightly deeper grey than the surrounding blade, just enough to show the groove without flattening the metallic shine
  • Crossguard: Warm, rich gold, with a deeper amber-gold in the recessed curves for dimension
  • Grip: Deep blue or another bold contrasting color, with the wrap lines shown as a slightly darker shade of the same tone
  • Pommel: Matching gold to the crossguard, with a bright highlight near the top to suggest a polished, faceted surface

Once the color goes on, that gleaming silver blade paired with the rich gold hilt and a bold-colored grip gives the sword real presence — the kind of weapon that looks like it has a story behind it. ⚔️

Final Thoughts

The step people tend to spend the most time adjusting is Step 1, since the whole sword's proportions hinge on how that initial taper is drawn — too wide near the tip and the blade loses its elegant, dangerous point; too narrow near the base and it starts to look flimsy rather than substantial. It's worth sketching the two blade lines lightly first and stepping back to check the overall taper before committing to a firmer outline. Everything that follows, from the fuller lines to the crossguard's curling wings, is much more forgiving and mostly about confident, flowing strokes rather than precise measurements.

Once this version feels comfortable, try designing a second sword with a completely different guard shape — a simple straight crossbar instead of curling wings, or a rounded basket-style guard — since the blade and handle techniques stay exactly the same no matter how the guard is styled.