How to Draw a Spider

July 13, 2026
9 Steps
AR Drawing Logo

AR Drawing

Drawing Tutorials

Spiders get a bad reputation, but drawn the right way, they turn into one of the most charming little creatures you can put on paper — round and fuzzy, with a cluster of curious eyes and eight bendy legs that give the whole thing a surprising amount of personality. What makes this drawing so approachable is that it builds from just two simple shapes stacked together, and everything else — the eyes, the fangs, the legs, even the pattern on its back — gets added on top in small, manageable pieces. By the end, you've got a spider that looks more curious than creepy, the kind you'd be happy to find doodled in the corner of a notebook. Let's get drawing!

How to Draw a Spider
What You Will Need
  • Pencil
  • Eraser
  • White paper
  • Black marker or fine-liner (optional)
  • Colored pencils, crayons, or markers
1

Draw the Head

Step 1: Draw the Head

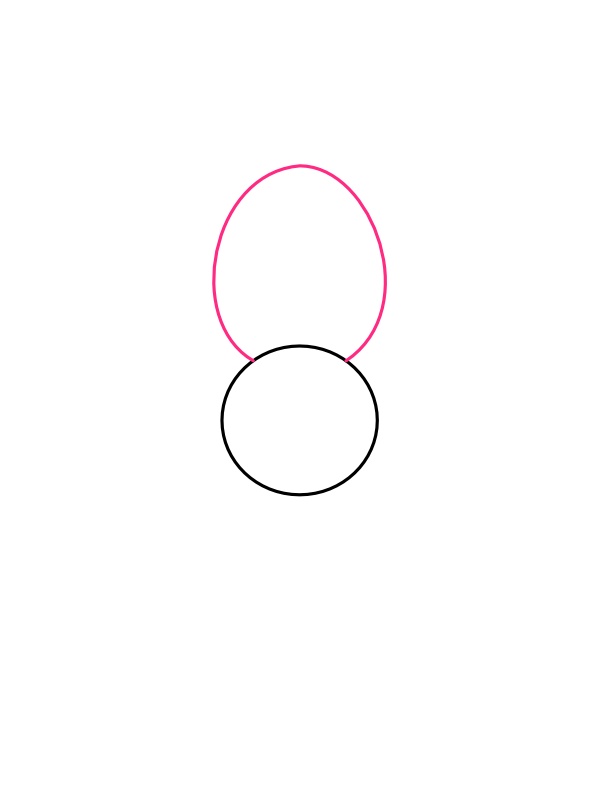
Near the center of your page, draw a small, simple circle. This will become the spider's head, or more precisely its cephalothorax — the front section where the eyes, fangs, and all eight legs will eventually attach. Keep it modest in size, since the abdomen you're about to add above it will end up being noticeably larger, and a head that's too big will throw off that balance right from the start.

2

Draw the Abdomen

Step 2: Draw the Abdomen

Directly above the head circle, draw a larger oval shape, wider through the middle and rounding off gently at the top — this is the spider's abdomen, the plump rounded body that sits behind the head. Let the bottom of the oval rest right against the top of the head circle so the two shapes connect naturally, almost like a rounded figure-eight. This is the moment the drawing stops being two random shapes and starts looking like the beginning of a creature.

3

Add the Eyes

Step 3: Add the Eyes

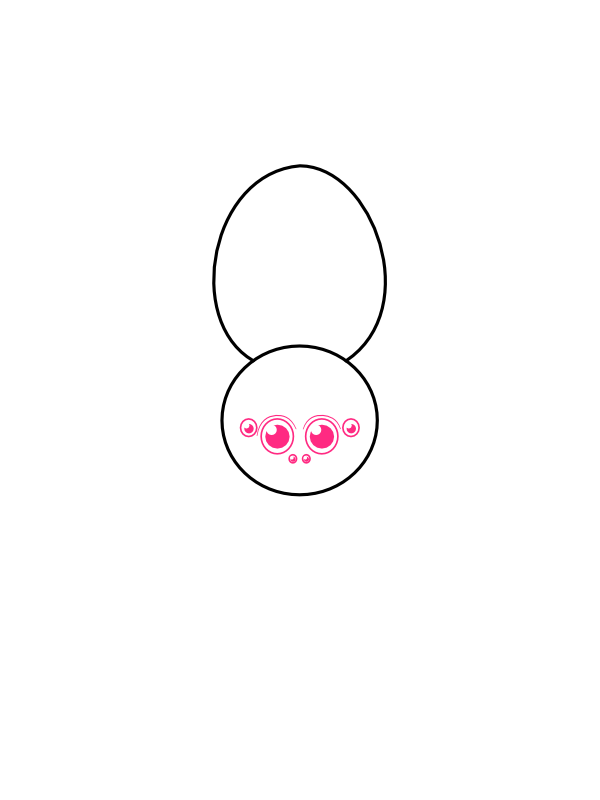
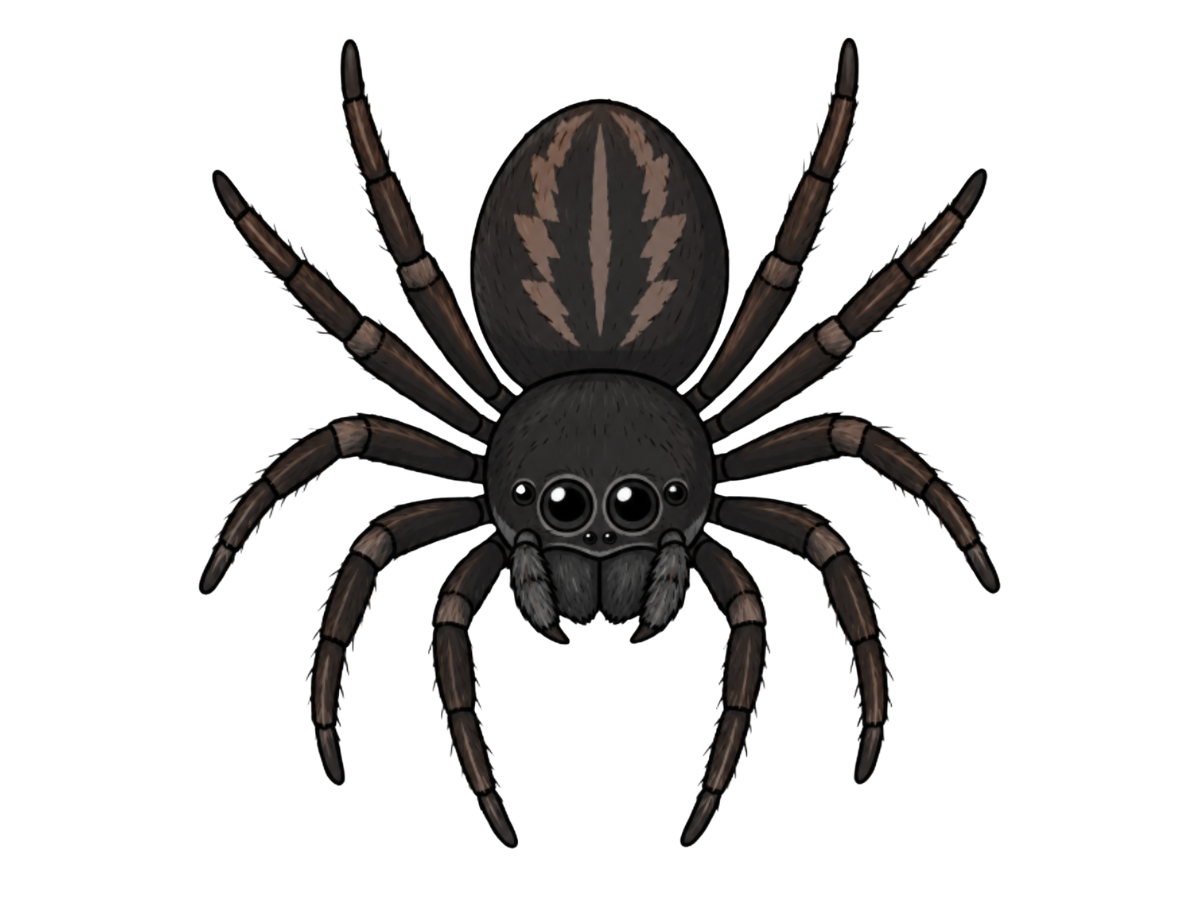
On the front of the head circle, draw a cluster of six small circles to form the eyes — most spiders have far more than two, so don't hold back here. Place two larger eyes side by side near the center, each with a tiny curved highlight left uncolored for that glassy, alert look, then add one medium eye just outside each of the large ones, and finally two tiny dot-sized eyes below, in between the pair. This mix of eye sizes, all bunched close together, is exactly what gives the spider that wide-eyed, curious expression rather than a blank stare.

4

Add the Fangs

Step 4: Add the Fangs

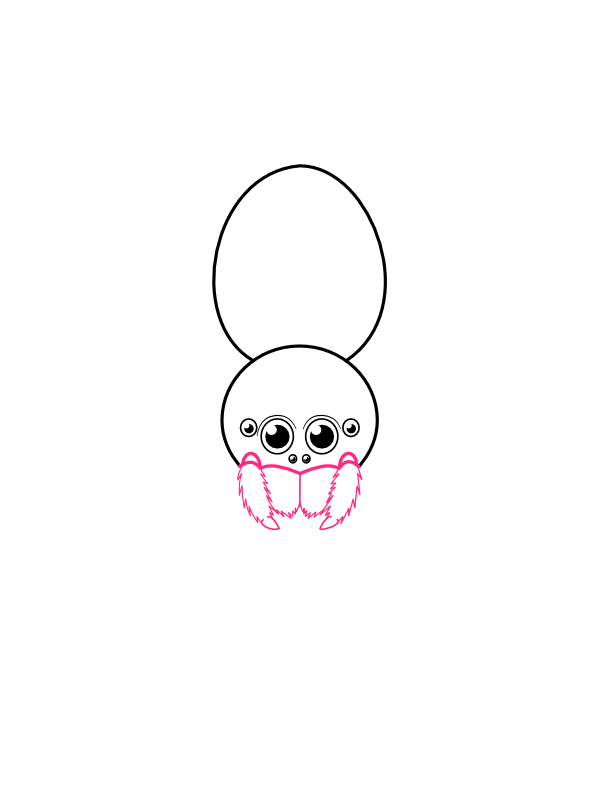
Just below the eye cluster, draw two small, fuzzy shapes meeting in the middle like a pair of closed pincers — these are the spider's chelicerae, the fanged mouthparts it uses to grip and bite. Give the outer edges a slightly rough, bristly texture rather than a clean smooth line, since real spider mouthparts are covered in short hairs, and that texture is what sells the fuzzy, tactile feel of the whole creature. Keep this shape fairly small and tucked close under the eyes rather than letting it spread too wide.

5

Draw the Top Pair of Legs

Step 5: Draw the Top Pair of Legs

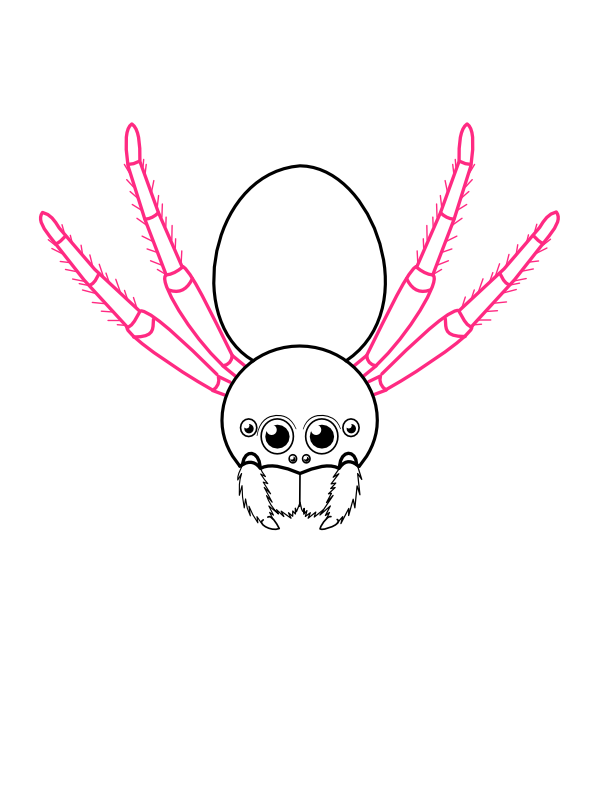
From the upper sides of the head, draw one long, jointed leg on each side, angling steeply upward and outward toward the top corners of the page. Each leg should bend at two or three points along its length, getting slightly narrower as it goes, with short bristly hair-strokes running along the edges as you go — the texture is easiest to add right away rather than saving it for later. These are the tallest-reaching legs on the spider, so give them plenty of length.

6

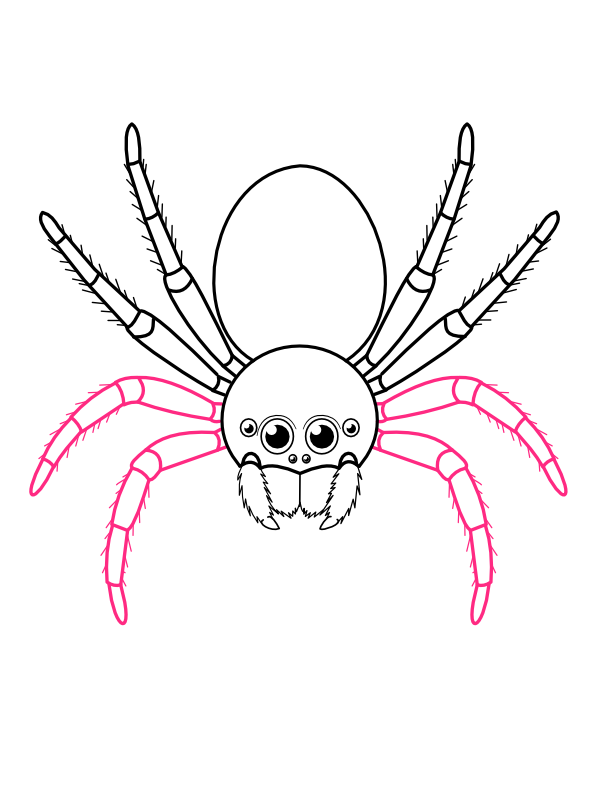
Draw the Middle Pair of Legs

Step 6: Draw the Middle Pair of Legs

Just below the first pair, add one more jointed leg on each side, angled outward more toward the sides than upward. Keep the same bristly texture along each segment and the same joint pattern as the legs above. With this pair added, the spider now has six legs total, three on each side, and the shape is already starting to feel busy and full of motion.

7

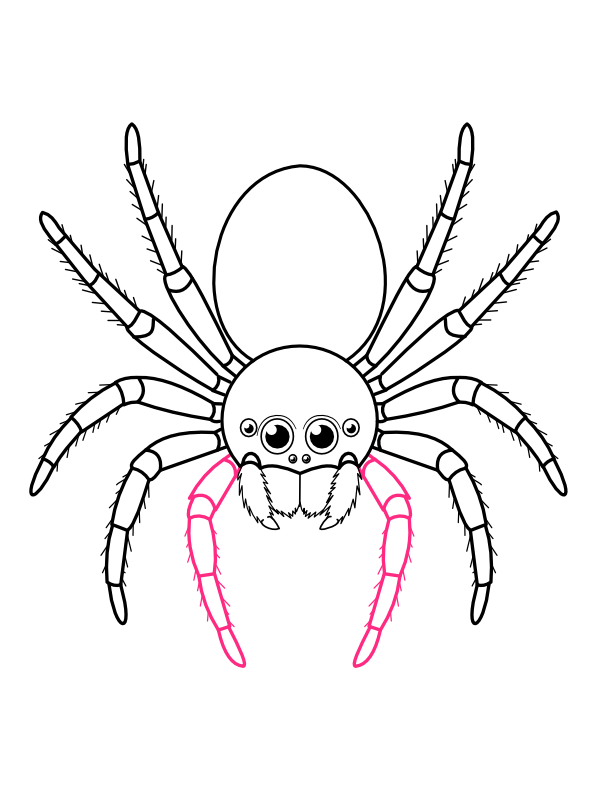
Draw the Front Pair of Legs

Step 7: Draw the Front Pair of Legs

Add one final leg on each side, positioned lowest and closest to the fangs, angled more sharply forward and down rather than out to the sides. This completes the full set of eight legs — four on each side — which is the detail most people associate with spiders more than almost anything else. Let this front-most pair extend forward a little more tightly than the rest, since that closer, more gathered stance is often how a spider's front legs sit as it feels its way around.

8

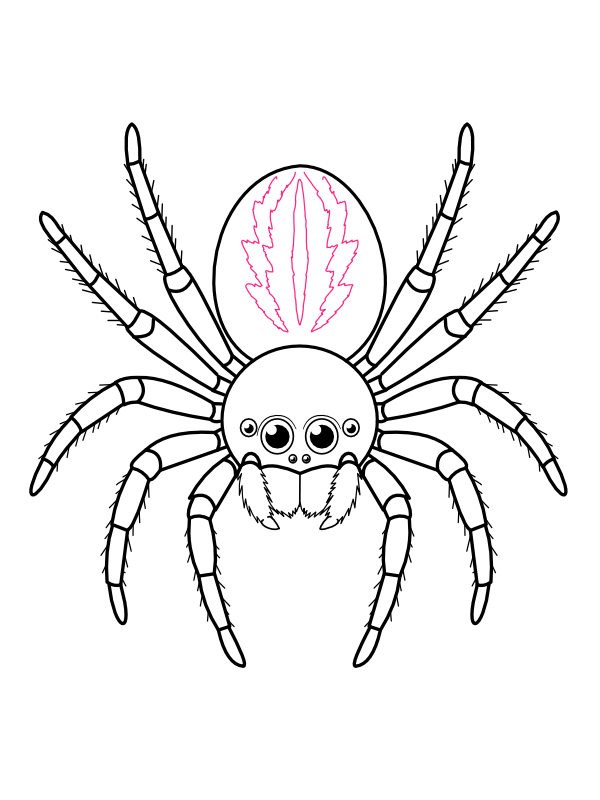
Add the Abdomen Pattern

Step 8: Add the Abdomen Pattern

On the large oval abdomen, draw a leaf-shaped or zigzagging marking running down the center, wider near the top and tapering as it goes, with a thin line splitting it lengthwise down the middle. Many real spiders carry a marking just like this across their backs, and it's a small addition that adds a surprising amount of visual interest to what would otherwise be a plain, empty oval. Keep the edges of the pattern slightly jagged rather than perfectly smooth, since a crisp, clean shape here can end up looking more like a sticker than a natural marking.

9

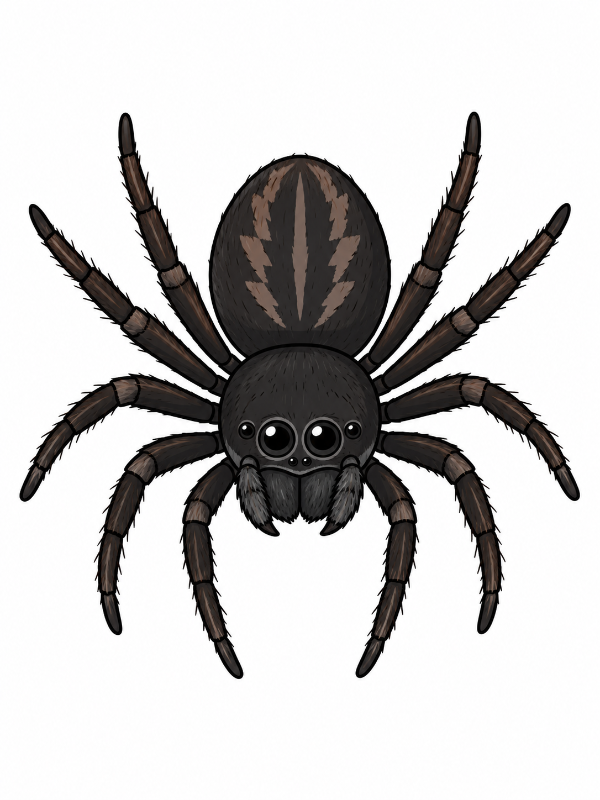
Color Your Spider

Step 9: Color Your Spider

Now for the most satisfying part!

  • Head and legs: Deep charcoal black or very dark brown, covering the head and all eight legs as the base color
  • Leg segments: A slightly lighter warm brown at the joints and along one edge of each leg, to suggest rounded, three-dimensional form
  • Abdomen: The same dark base color as the head, but slightly softer in tone
  • Abdomen pattern: A warm tan or dusty brown for the leaf-shaped marking, standing out clearly against the darker abdomen around it
  • Eyes: Deep black for the pupils with a small bright white highlight dot in each, and a thin pale ring around the two larger eyes for extra shine
  • Fangs and mouth area: Soft grey, with a slightly darker grey in the recessed fuzzy texture
  • Leg hair texture: A few lighter grey-brown strokes scattered along the darkest parts of each leg, to catch the light

Once the color is in, that rich near-black body with the warm brown pattern down its back gives the spider a surprisingly handsome, almost velvety look — more like a curious little creature than anything to be afraid of. 🕷️

Final Thoughts

The part that tends to slow people down the most is Steps 5 through 7 together — getting all eight legs to feel balanced and evenly spaced without any one side looking heavier or more crowded than the other. A helpful trick is to lightly mark three small dots on each side of the head before committing to any leg lines, roughly where each leg should land, so you're aiming for guides rather than judging the spread by eye alone as you go. Everything after that, from the eye cluster to the abdomen pattern, is far more forgiving, and small imperfections there tend to read as character rather than mistakes.

Once this spider feels comfortable, try drawing it from a slight top-down angle instead of straight-on, so more of the legs curl visibly around the body — it gives the pose a bit more movement and makes the spider look like it's actively crawling rather than just sitting still.