
How to Draw a Ear

June 27, 2026
7 Steps
AR Drawing Logo

AR Drawing

Drawing Tutorials

Ears have a bit of a reputation for being one of the trickier facial features to draw, mostly because people try to capture every fold and curve at once instead of building it up gradually. In reality, an ear is just one flowing outer line wrapped around a handful of smaller inner curves, and once you see it that way, it stops feeling so intimidating. This is a great little exercise on its own, and it also happens to be one of the most useful things you can practice before attempting a full portrait. Let's get drawing!

How to Draw a Ear
What You Will Need
  • Pencil
  • Eraser
  • White paper
  • Black marker or fine-liner (optional)
  • Colored pencils, crayons, or markers
1

Draw the Outer Ear Outline

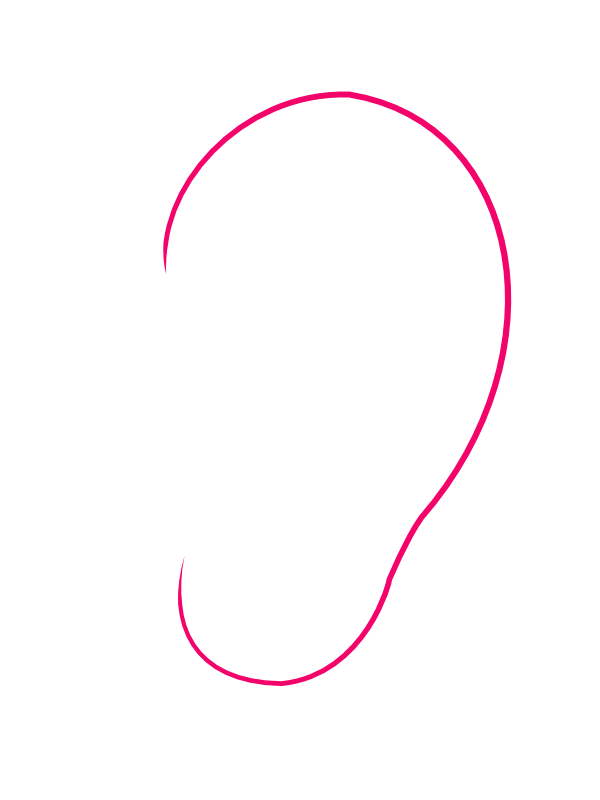
Step 1: Draw the Outer Ear Outline

Starting around the upper-middle of your paper, draw one long, flowing curve that loops gently at the top, almost like a backwards "6" or a wide comma shape. Let it taper down into a small rounded point near the bottom, where the earlobe will sit. This single outer line — called the helix — sets the size, tilt, and overall shape for everything you'll add afterward, so take your time getting the curve smooth.

2

Add the Inner Ridge

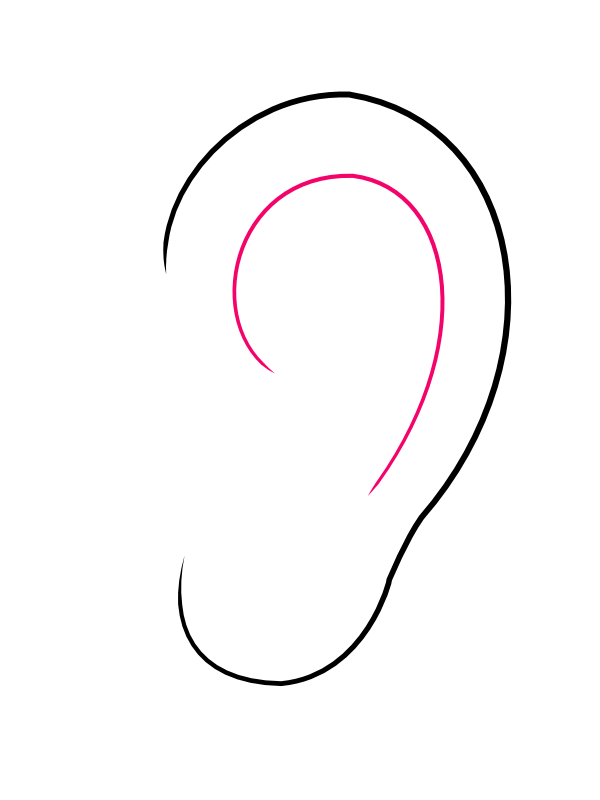
Step 2: Add the Inner Ridge

Inside the outline you just drew, sketch a second curved line that loosely follows the same path as the outer rim, but sits further inward. Start it near the top and let it sweep down through the middle of the ear before curving back out slightly. This inner line begins to suggest the folded ridge structure that gives a real ear its depth, instead of looking like a flat, empty loop.

3

Draw the Upper Swirl

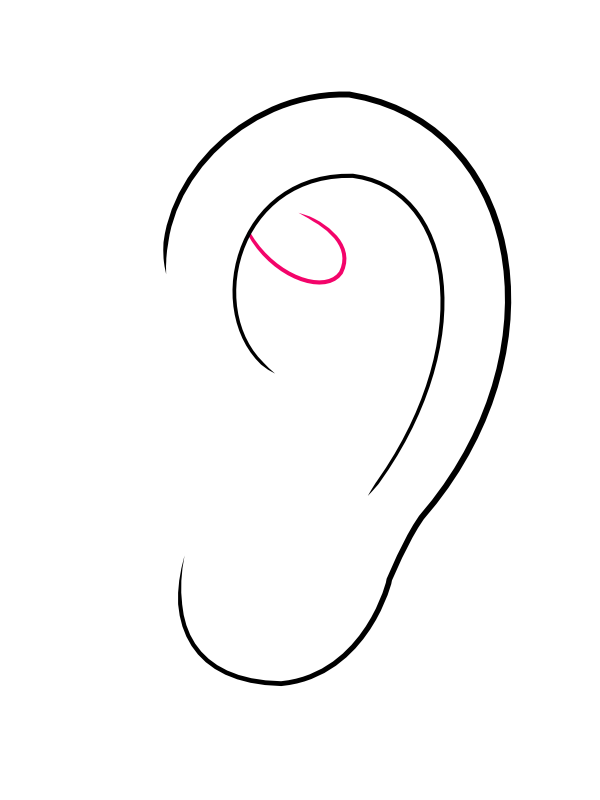
Step 3: Draw the Upper Swirl

Near the top of the inner curve from Step 2, add a small, tightly wound loop, almost like a tiny curled ribbon. This little swirl represents the small fold near the top of the ear's inner ridge, and it's one of those small details that instantly makes the shape read as "ear" rather than just an abstract spiral.

4

Add the Tragus

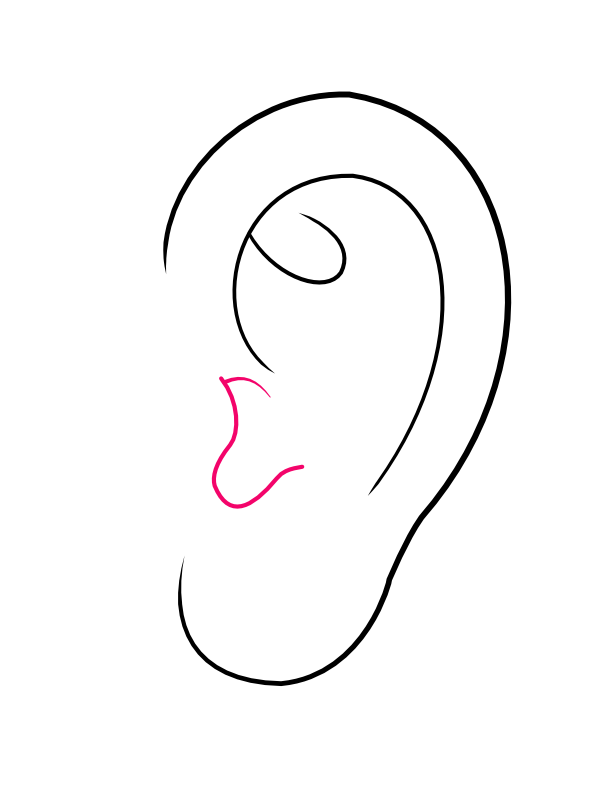
Step 4: Add the Tragus

In the lower-middle area of the ear, just below where the inner curve dips down, draw a small wavy, hook-like shape pointing slightly outward. This little flap is called the tragus, and it sits right in front of where the ear canal opening would be — it's a small shape, but it makes a big difference in how recognizable the ear looks.

5

Connect the Inner Ridge

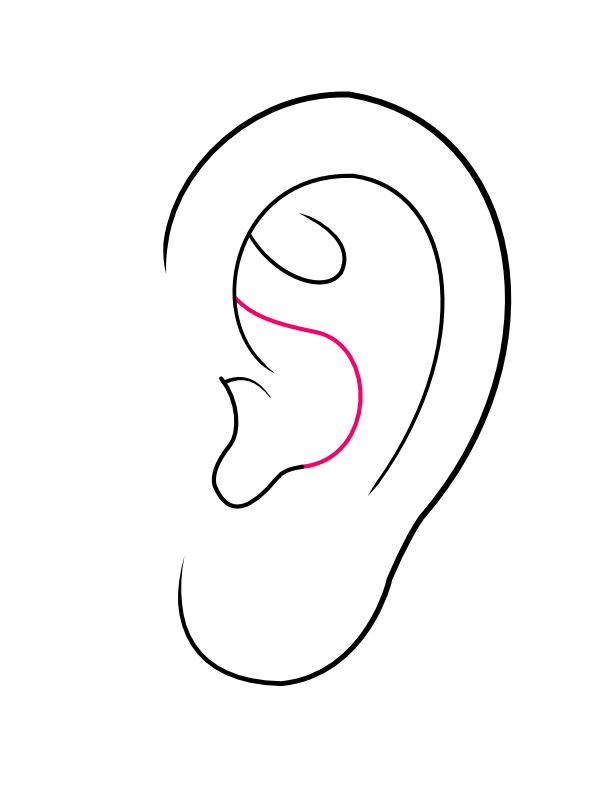
Step 5: Connect the Inner Ridge

Draw one continuous curved line connecting the swirl from Step 3 down to the tragus shape from Step 4, running through the middle of the ear. This line ties the upper and lower halves of the inner ear together into one connected structure, rather than a few separate floating shapes.

6

Add the Lower Fold

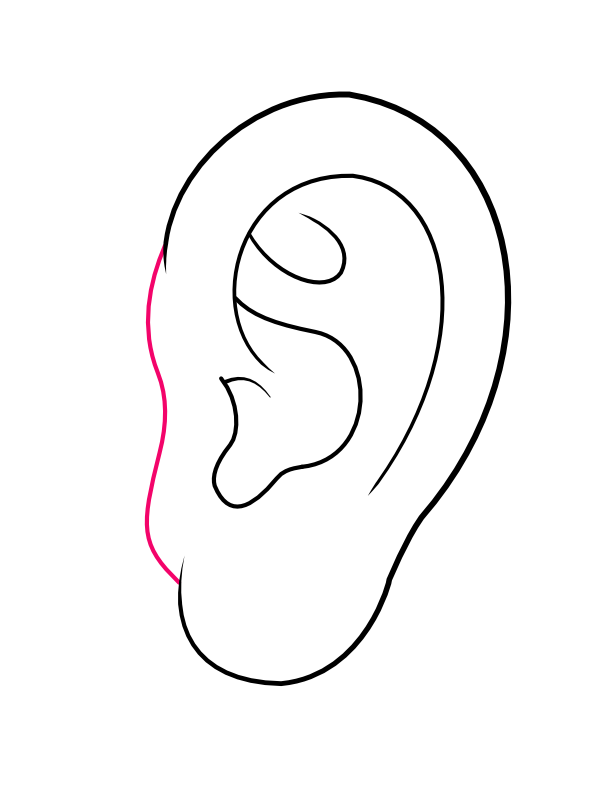
Step 6: Add the Lower Fold

Along the lower-left portion of the ear, just inside the outer rim, draw a short, slightly wavy line running roughly parallel to the outline. This subtle extra fold near the earlobe area keeps that section from looking flat and adds just enough detail to round out the shape.

7

Color Your Ear

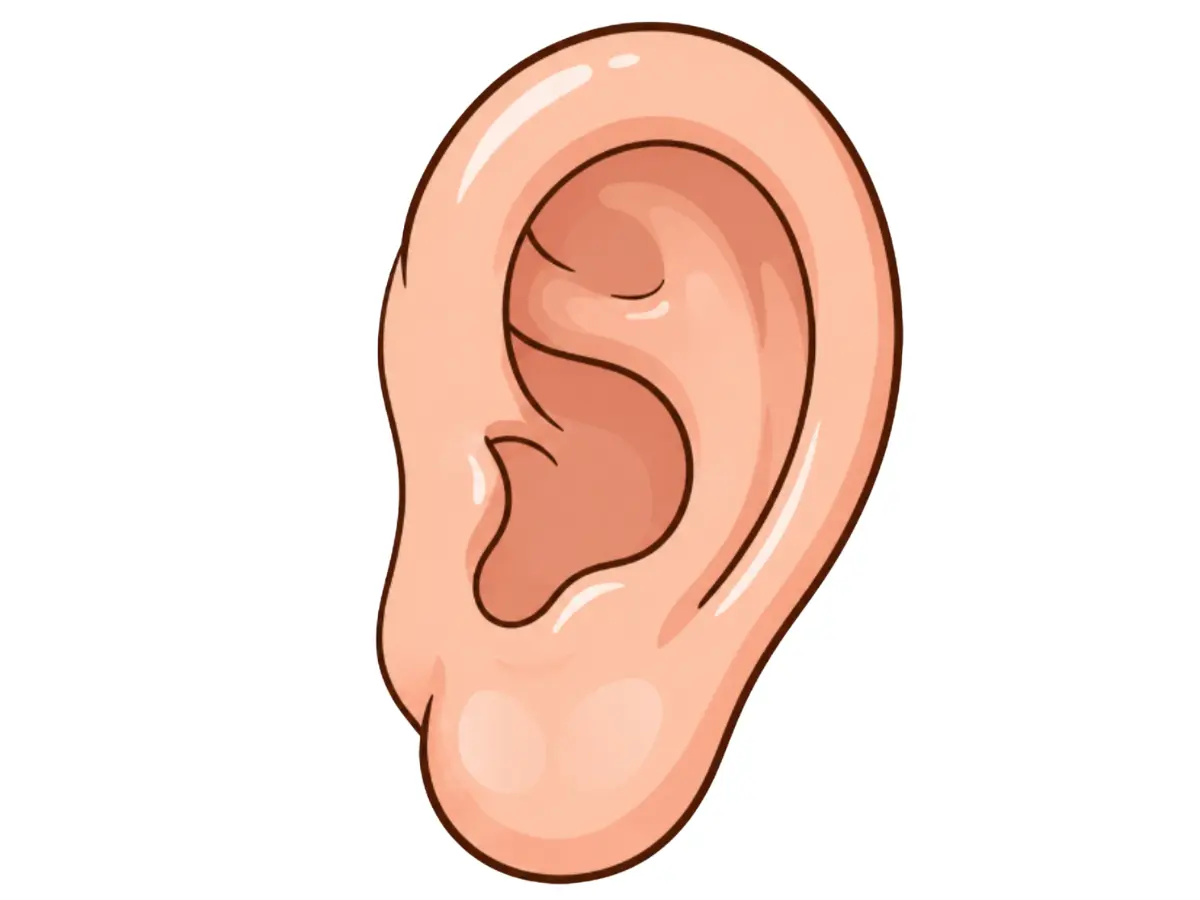
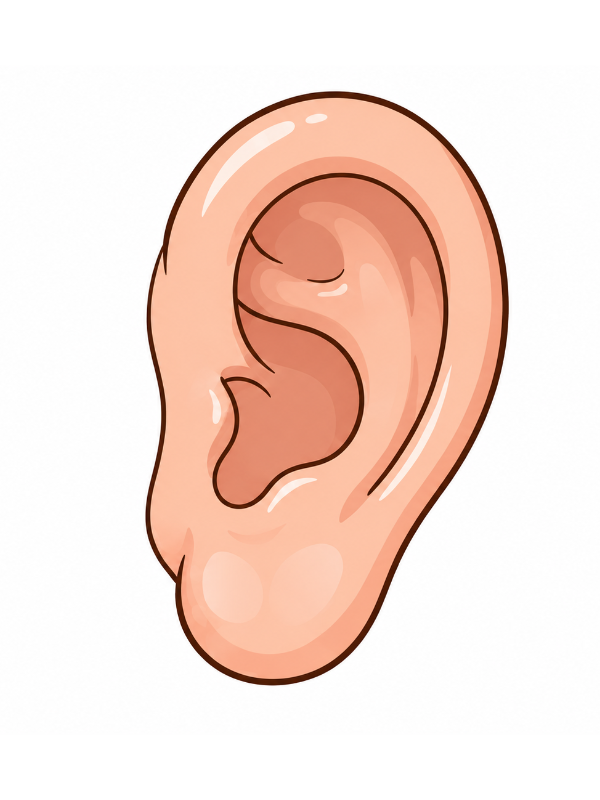
Step 7: Color Your Ear

Now it's time to give the ear some warmth and dimension.

  • Base skin tone: A warm peach or tan, adjusted to whatever shade you're going for
  • Inner ridges and concha (the hollow area): A slightly deeper pink or rose shade to suggest shadow
  • Highlights: A light cream or white along the outer rim and earlobe for a soft, rounded shine
  • Outline: A warm brown rather than pure black, for a softer and more natural finish

A little shading goes a long way here — even just darkening the inner curves and brightening the outer rim is enough to make the ear look like it's curving in and out of the page rather than sitting flat on it.

Final Thoughts

Once you break it down, an ear really is just one outer line and a small handful of inner curves layered in the right order — there's no need to memorize every fold of cartilage to get a convincing result. The swirl and tragus are the two details doing most of the work, so if you only have time to nail two things, focus on those.

When you're ready for more of a challenge, try sketching an ear from a slightly different angle, or add a small earring dangling from the lobe. Real ears also vary a surprising amount from person to person, so don't be afraid to stretch the proportions a little for different characters or styles.