
How to Draw a Ice Cream

June 19, 2026
9 Steps
AR Drawing Logo

AR Drawing

Drawing Tutorials

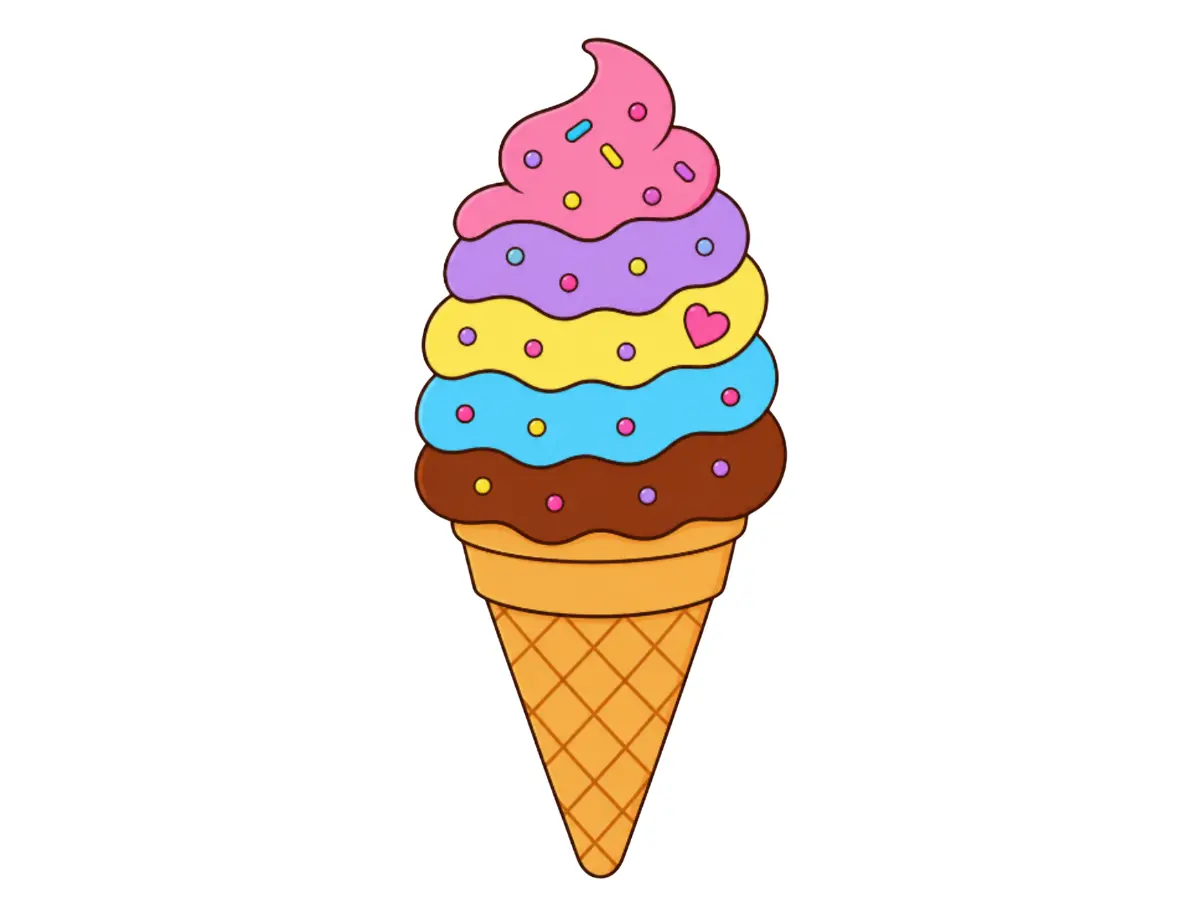
There is nothing quite as fun and colorful to draw as a big swirly ice cream cone. With its soft, wavy layers and the option to fill it with every color of the rainbow, this is one of those drawings that looks impressive but is actually built from just a few repeating curved shapes. Perfect for a relaxing afternoon of drawing, this tutorial will have you creating a delicious-looking treat in no time. Let us dive in!

How to Draw a Ice Cream
What You Will Need
  • Pencil
  • Eraser
  • White paper
  • Black marker or fine-liner (optional)
  • Colored pencils, crayons, or markers
1

Draw the Top Swirl

Step 1: Draw the Top Swirl

Start near the top of your paper. Draw a soft, wavy shape that curls upward on one side, almost like a small flame or a dollop of whipped cream. This swirl should lean slightly to one side and dip down on the right before curving back out. This little curl is the very top of your soft serve ice cream.

2

Add the Second Layer

Step 2: Add the Second Layer

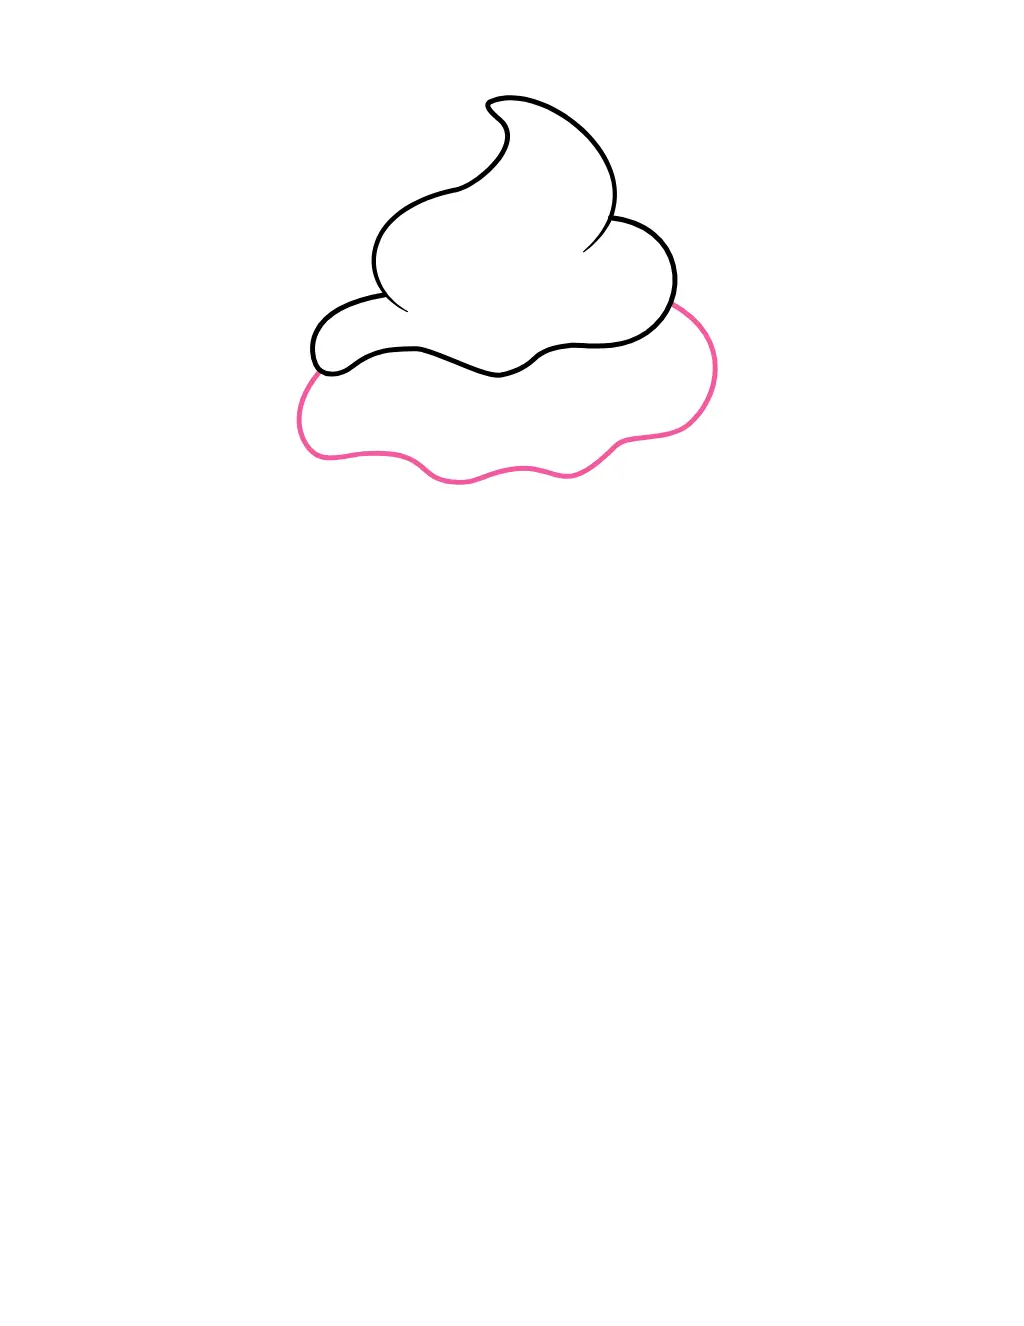
Below the top swirl, draw a wider, wavy line that curves out to both sides and dips gently in the middle. This second layer should be a little wider than the swirl above it, giving the impression that the ice cream is gently expanding as it goes down — just like a real soft serve cone.

3

Add the Third Layer

Step 3: Add the Third Layer

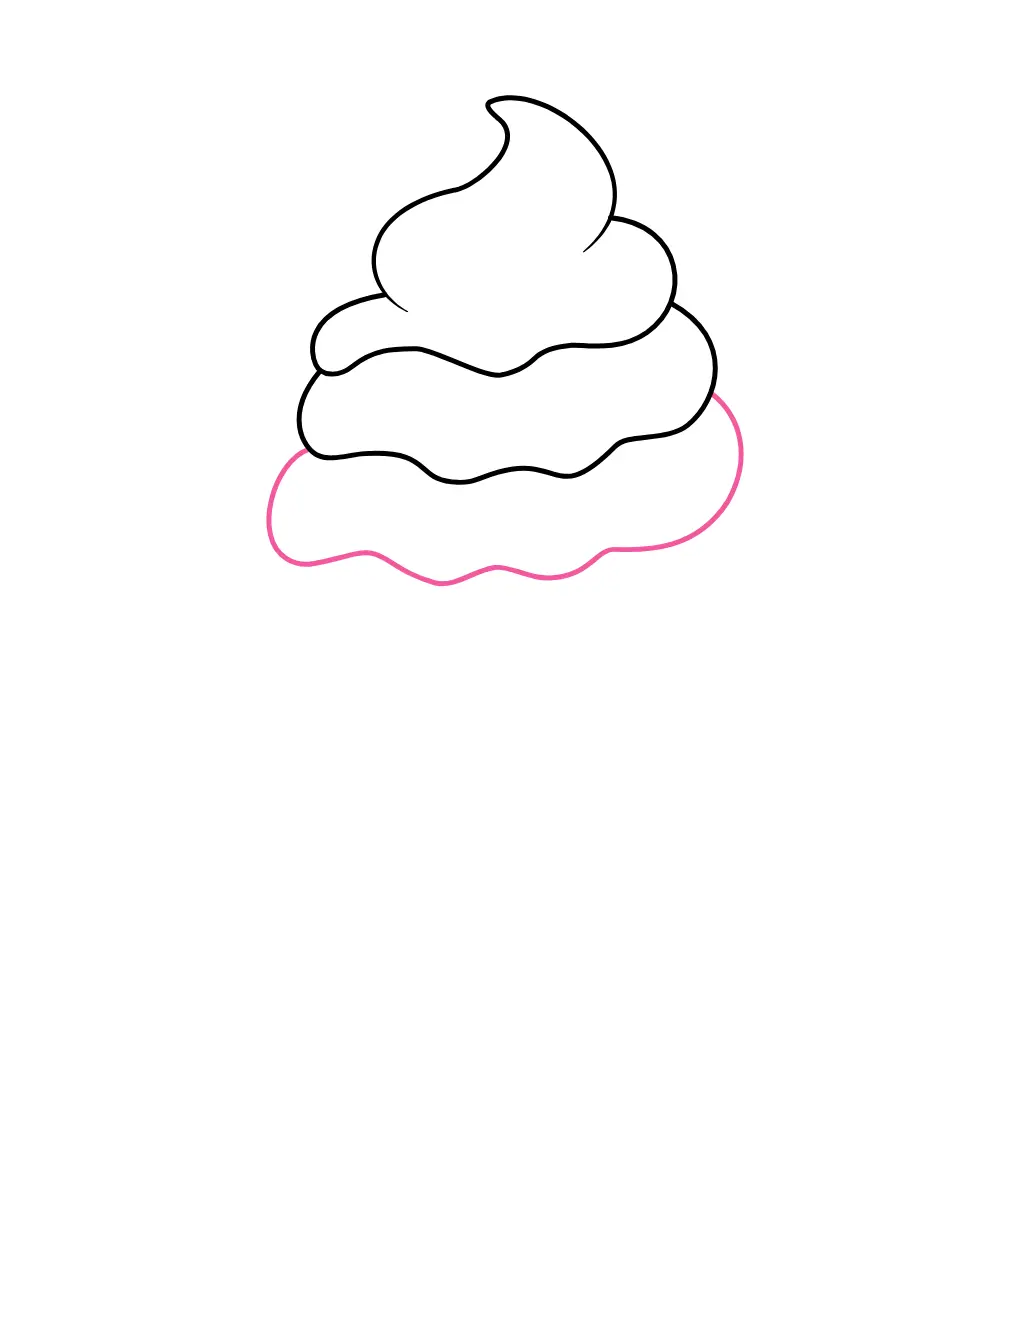
Continue the same pattern by adding another wavy curved line beneath the second layer. Each layer should be slightly wider than the one above it. Keep the waves soft and rounded rather than sharp, since this is what gives the ice cream its smooth, creamy look.

4

Add the Fourth Layer

Step 4: Add the Fourth Layer

Add one more wavy line below the third layer, following the same gentle curve pattern. By now, your ice cream should be taking a nice cone-like shape from top to bottom, with each ripple slightly wider than the last.

5

Add the Fifth Layer

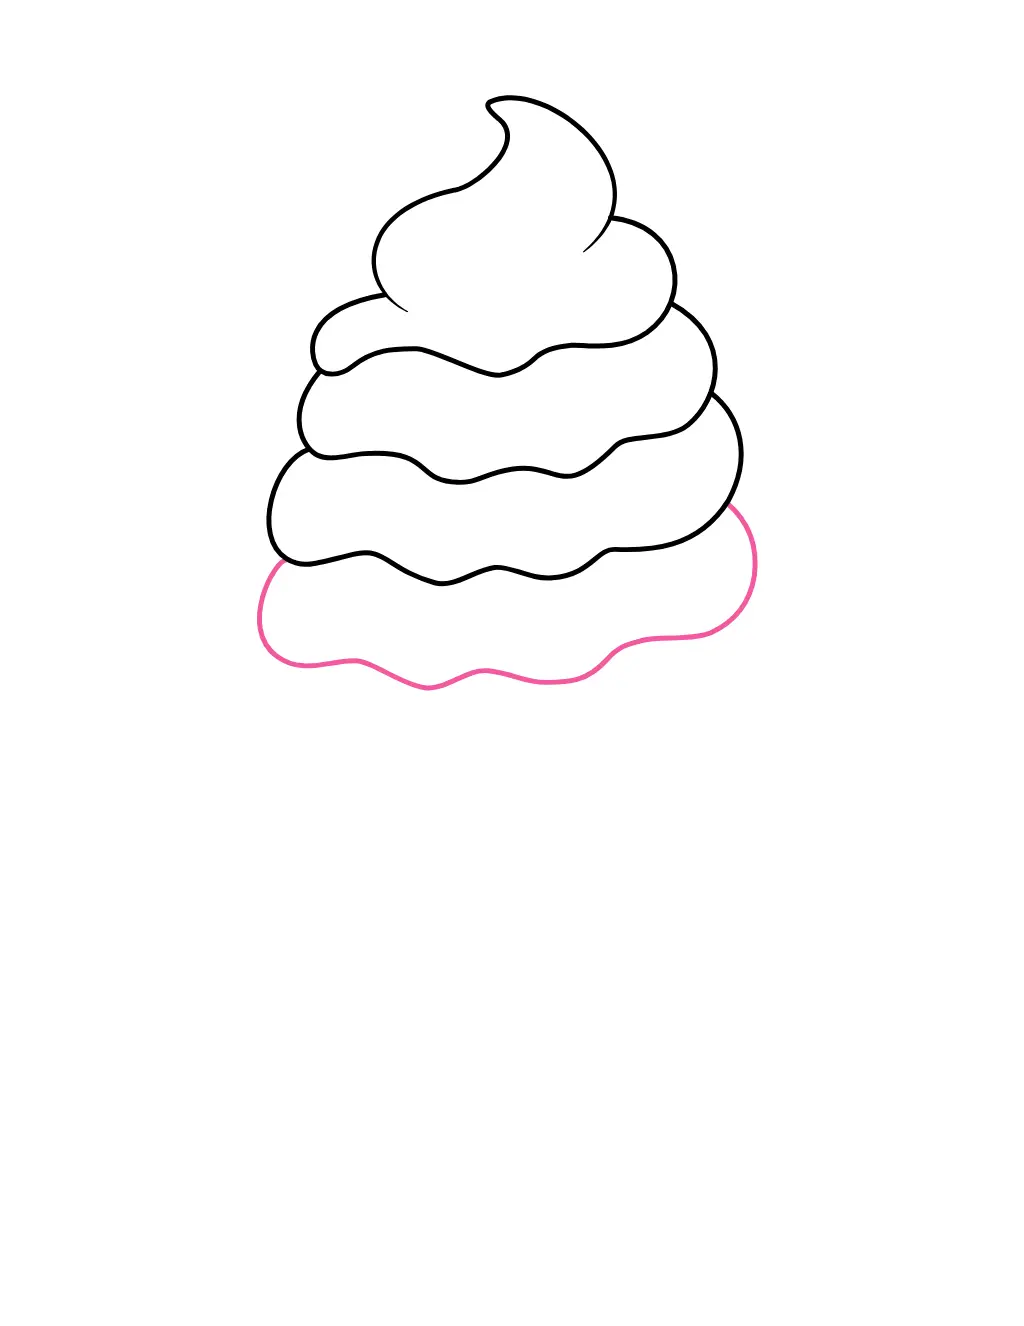
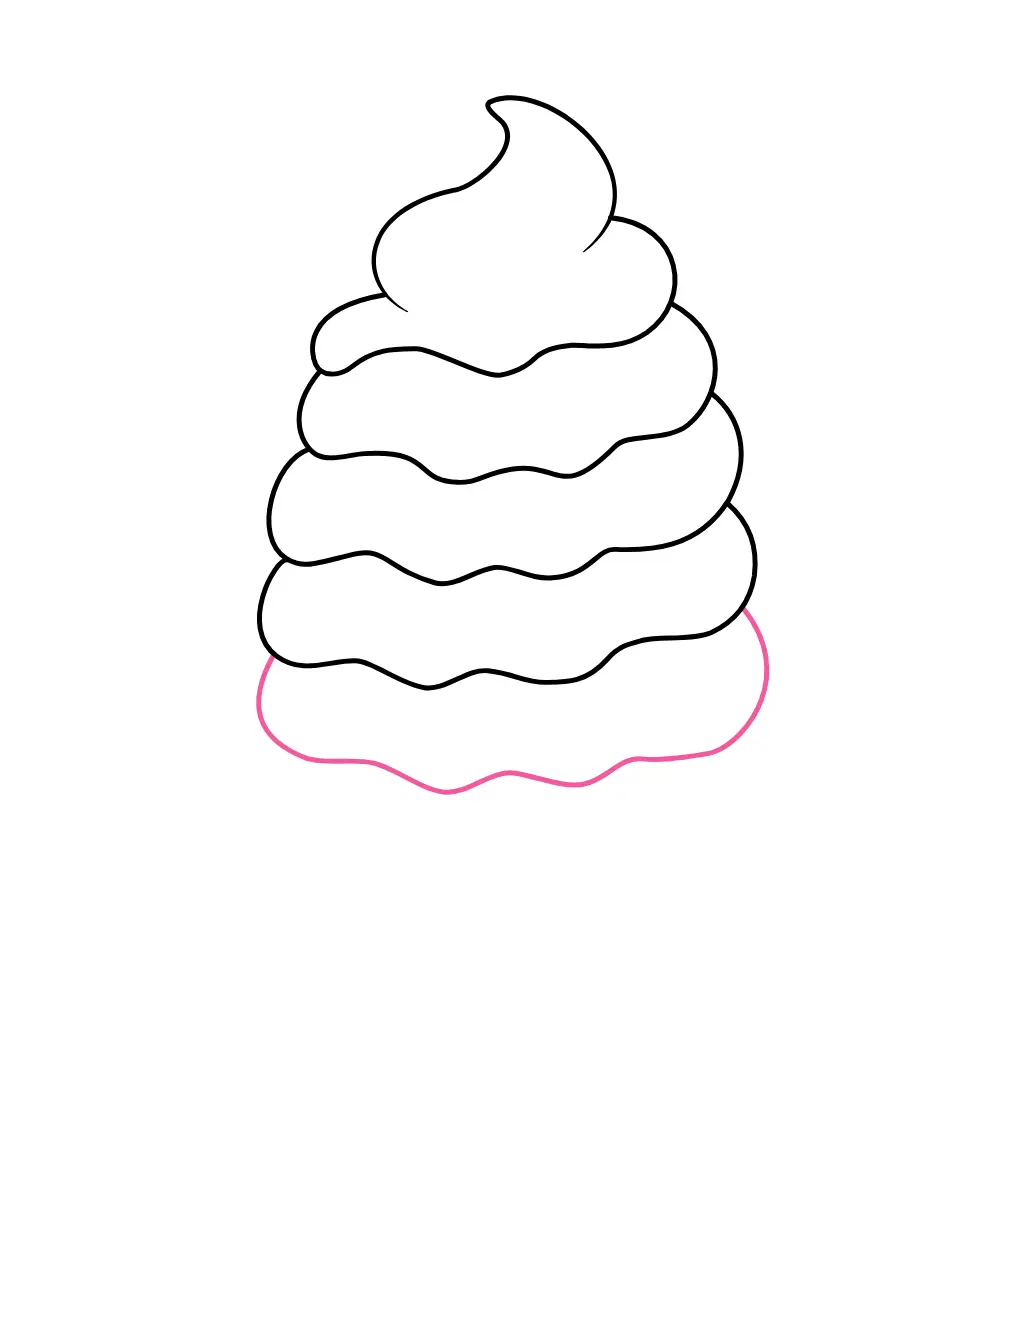
Step 5: Add the Fifth Layer

Draw one final wavy layer at the bottom of the ice cream swirl. This will be the widest layer of all, forming the base of the soft serve where it will eventually meet the cone. Take your time getting each wave even, since this bottom layer needs to look balanced on both sides.

6

Draw the Cone Rim

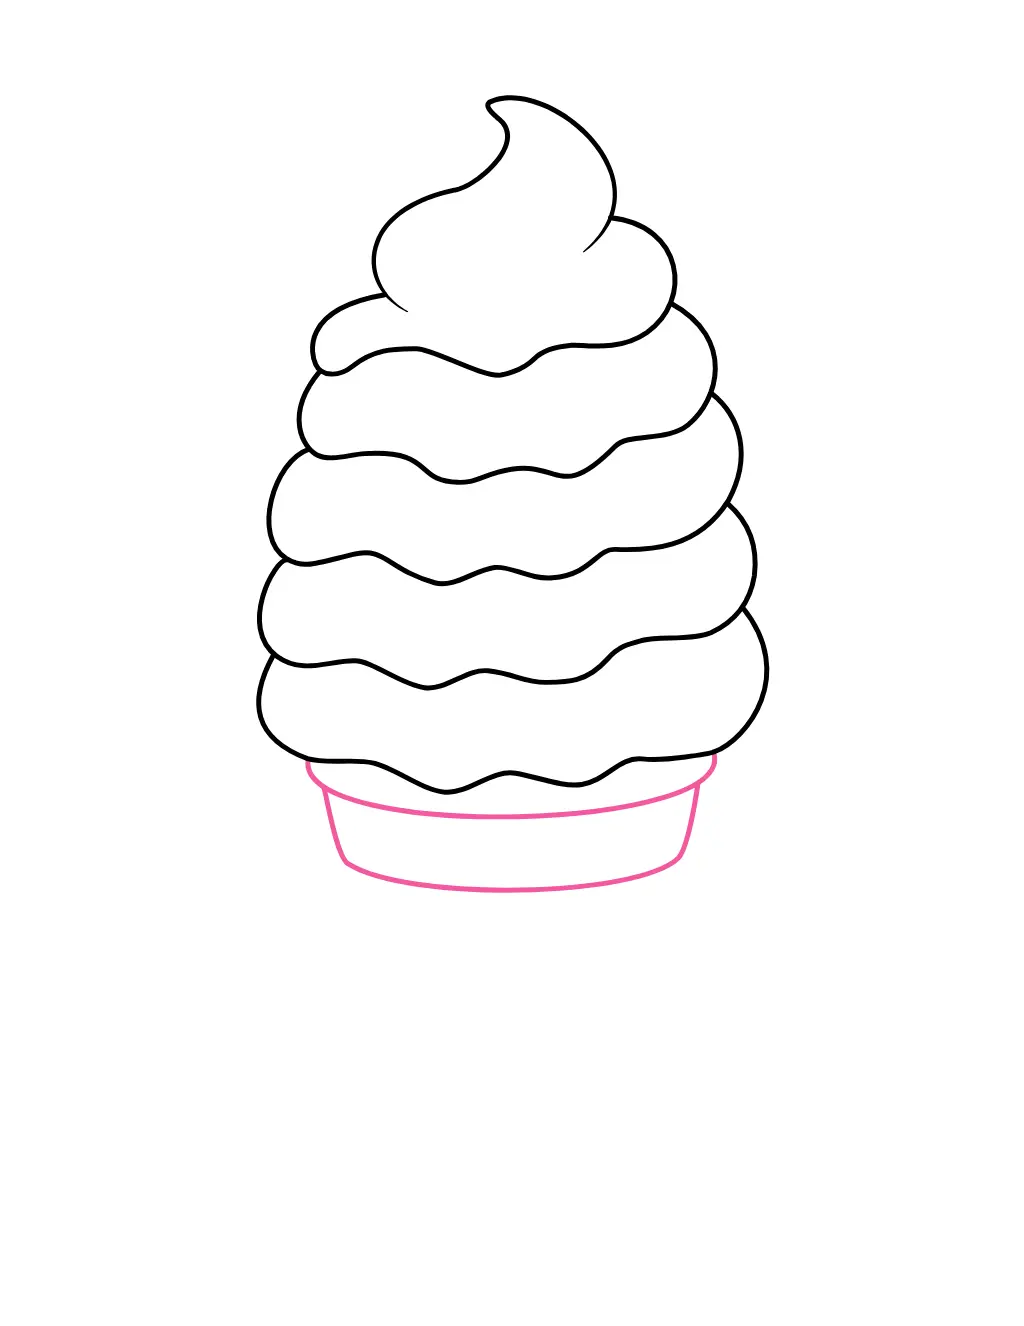
Step 6: Draw the Cone Rim

At the very bottom of the ice cream, draw a short horizontal band — like a small cylinder or ring. This represents the rim of the cone where the ice cream sits. It should be just slightly narrower than the bottom layer of ice cream above it.

7

Draw the Cone

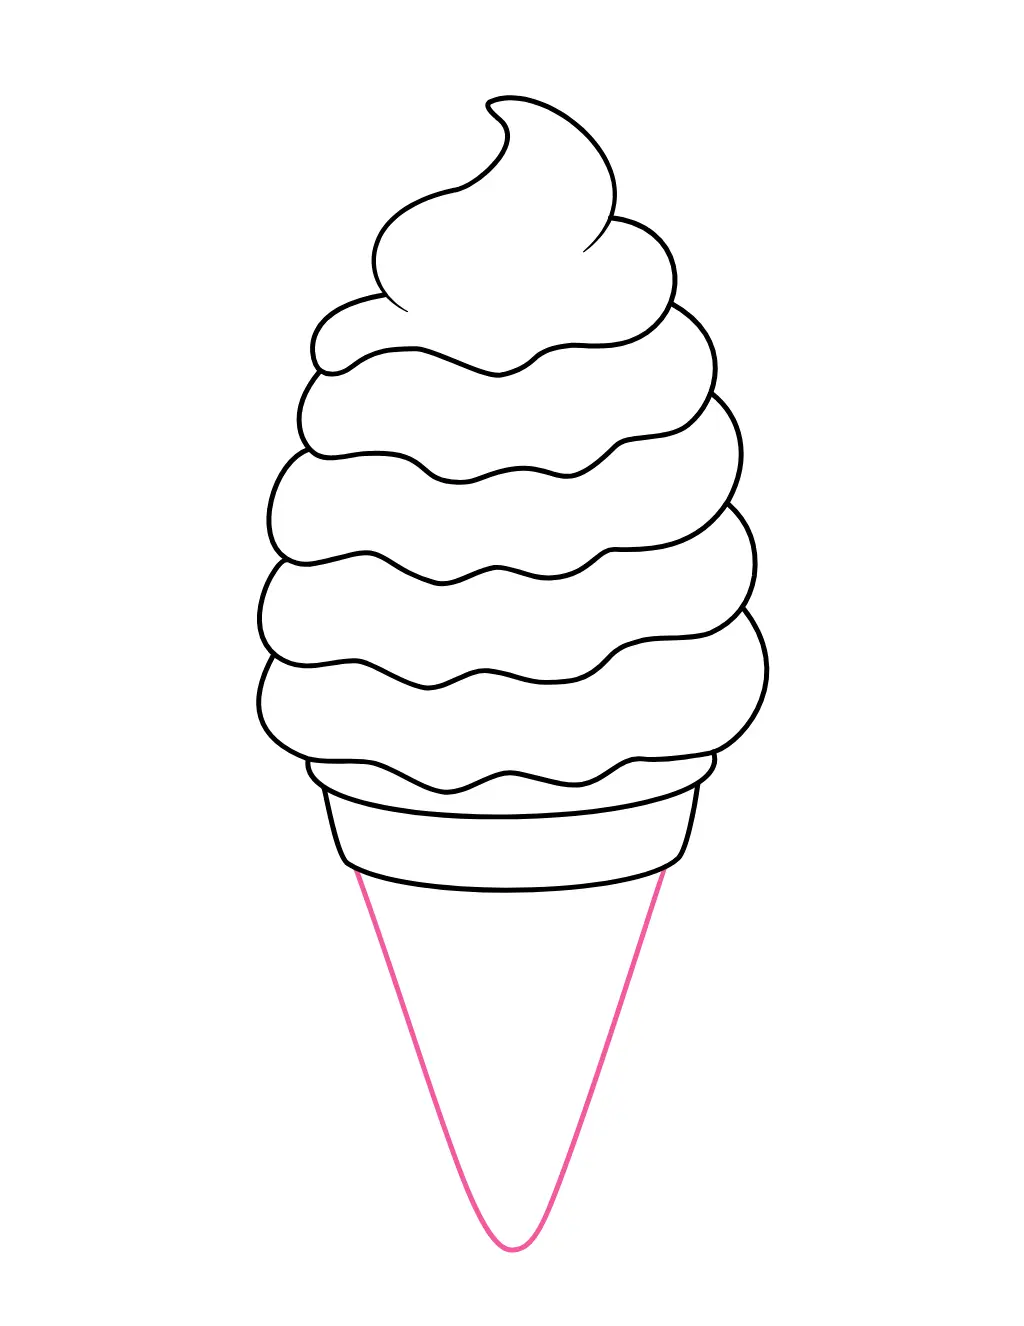
Step 7: Draw the Cone

From the bottom edges of the rim, draw two straight lines that angle inward and meet at a point below. This creates the classic triangular cone shape. Keep the lines fairly straight and make sure they meet neatly at a single point at the bottom.

8

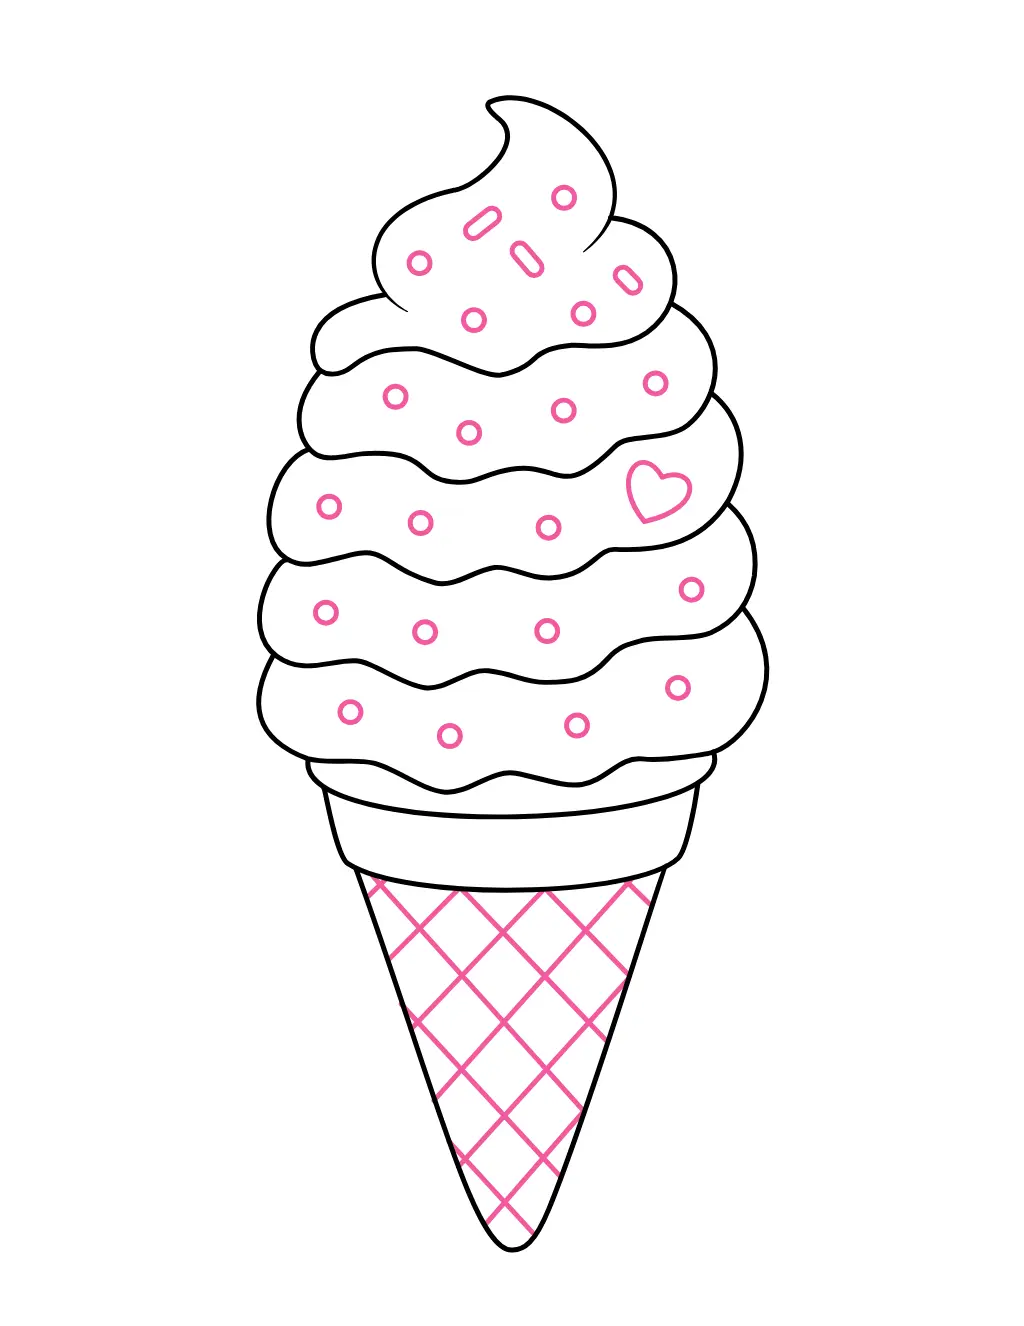
Add Sprinkles, a Heart, and Cone Texture

Step 8: Add Sprinkles, a Heart, and Cone Texture

Now comes the fun part! Across the swirled ice cream layers, scatter small circles, short rectangle shapes, and ovals to represent colorful sprinkles. Add one small heart shape somewhere in the middle layers for an extra cute touch. On the cone itself, draw a crisscross pattern of diagonal lines going both directions to create the waffle cone texture.

9

Color Your Ice Cream Cone

Step 9: Color Your Ice Cream Cone

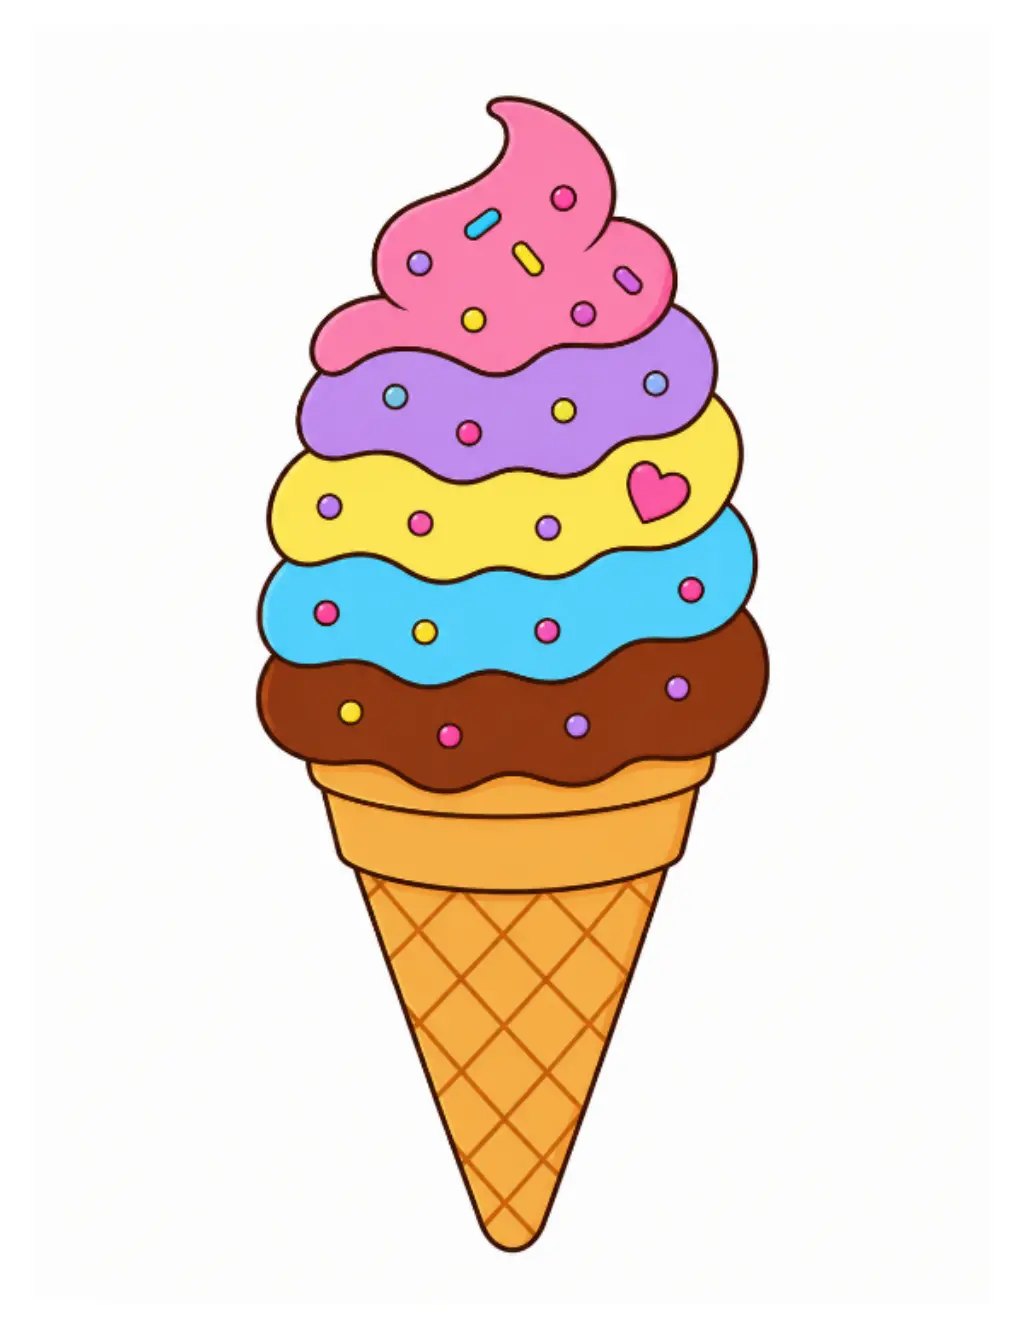
This is where your ice cream truly comes to life! Color each layer a different bright shade for that classic rainbow look:

  • Top swirl: Pink
  • Second layer: Purple
  • Third layer: Yellow
  • Fourth layer: Sky blue
  • Fifth layer: Chocolate brown
  • Sprinkles: Mix of pink, yellow, blue, and purple dots and lines
  • Heart: Bright pink
  • Cone: Warm golden tan with darker brown crisscross lines

Your colorful rainbow ice cream cone is complete and ready to enjoy!

Final Thoughts

Drawing an ice cream cone is one of those projects where repetition really pays off. Each wavy layer uses the exact same technique, so once you get the hang of the first one, the rest come together quickly. The real magic happens at the coloring stage, where a simple outline transforms into a vibrant, mouth-watering treat.

Try mixing up the color combinations every time you draw this — a pastel version, a bold neon version, or even a classic vanilla and chocolate one can all look fantastic. Have fun with it!