How to Draw a Seahorse

July 17, 2026
10 Steps
AR Drawing Logo

AR Drawing

Drawing Tutorials

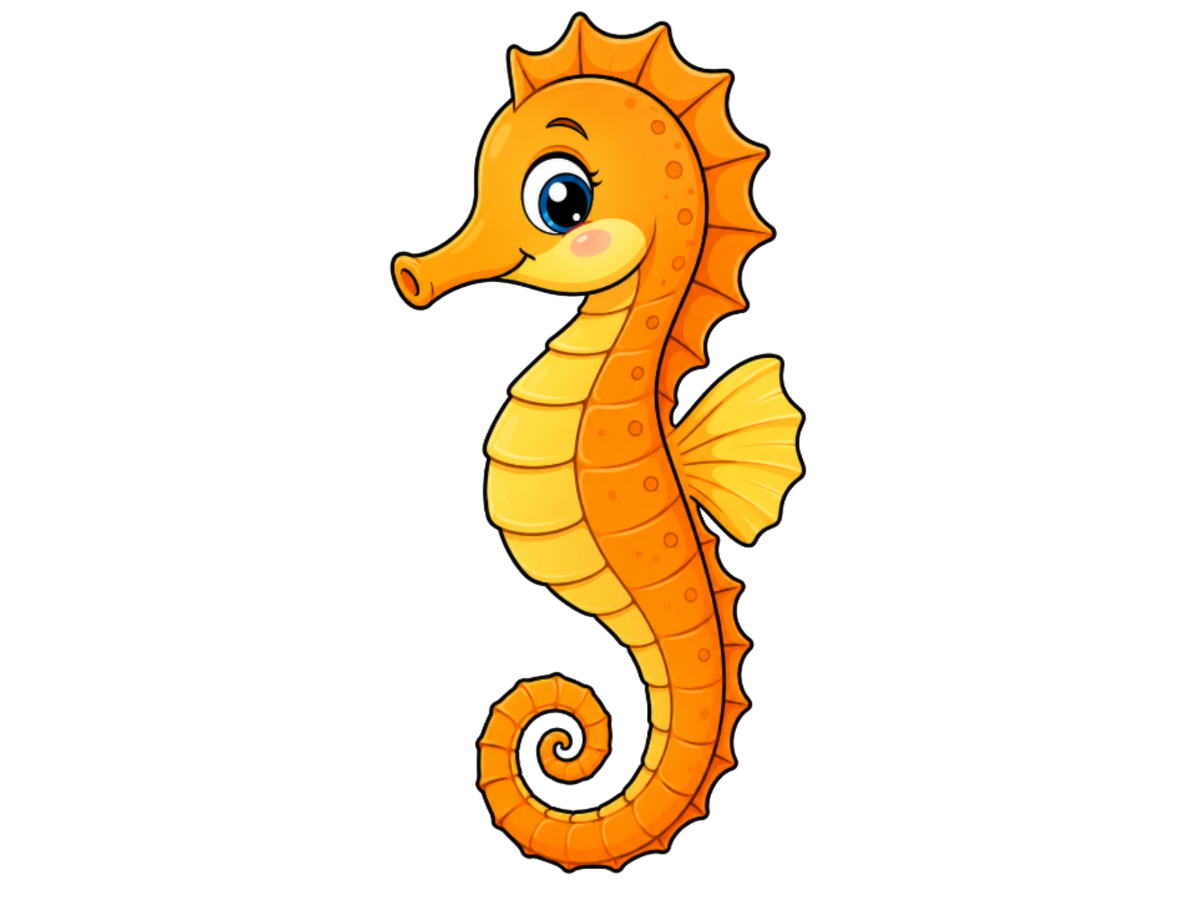
A seahorse might be one of the strangest-looking creatures in the ocean, but on paper it turns into one of the most graceful things you can draw — that curling S-shaped body, the delicate spiky crown running down its head, and a tail that coils into a neat little spiral at the end. It looks intricate at first glance, but every piece builds naturally off the one before it, starting from a single flowing line for the head and neck and slowly working outward into fins, ridges, and a curled tail. By the time it's colored in, it looks like it swam straight out of a coral reef. Let's get drawing!

How to Draw a Seahorse
What You Will Need
  • Pencil
  • Eraser
  • White paper
  • Black marker or fine-liner (optional)
  • Colored pencils, crayons, or markers
1

Draw the Head and Snout

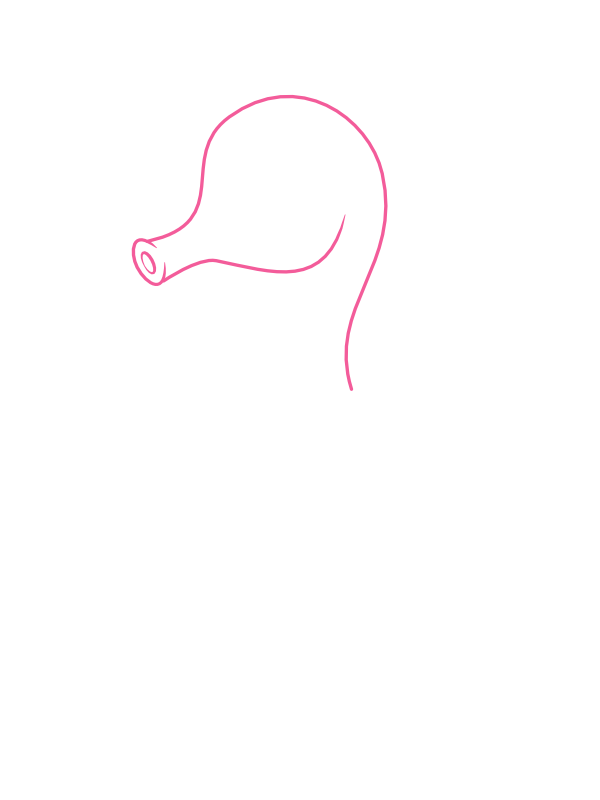
Step 1: Draw the Head and Snout

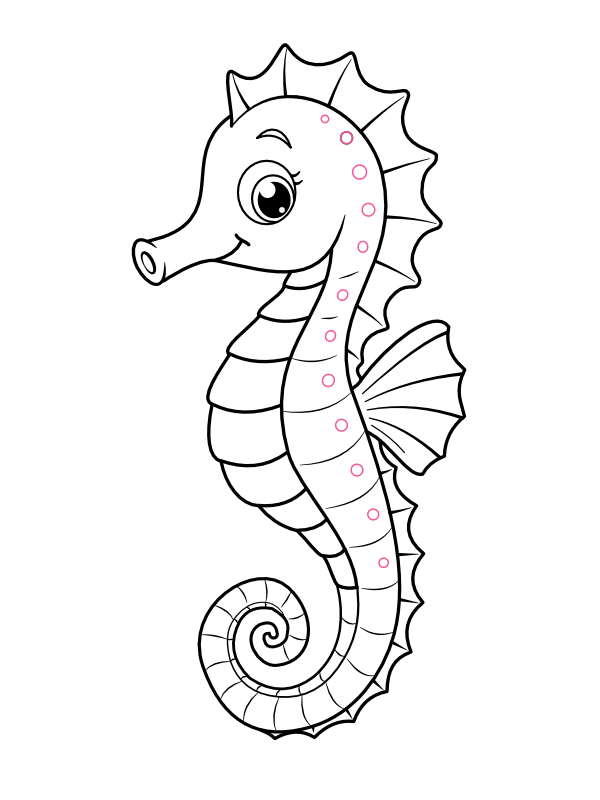
Starting on the left side of your page, draw a long, narrow snout curving gently, then let the line widen and round upward into the head before curving back down into a long neck. The snout should taper to a small rounded tip, almost like a slender little tube, since a seahorse's mouth is famously long and thin compared to the rest of its face. Let the neck line trail downward off the head and curve slightly, since this line is the starting point for the whole body that follows in later steps.

2

Add the Eye and Facial Details

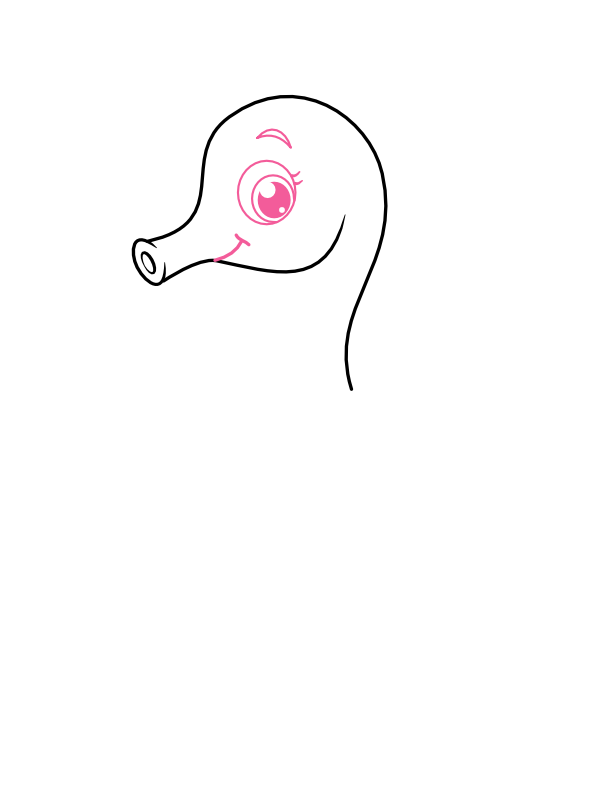
Step 2: Add the Eye and Facial Details

On the upper portion of the head, draw a large round eye with a smaller circle inside it for the pupil, plus a tiny curved highlight left uncolored for that bright, expressive look. Above the eye, add a short curved line for the eyebrow, angled gently, which gives the seahorse an inquisitive, slightly amused expression right away. Near the base of the snout, add a small curved line for a subtle, closed-mouth smile — a tiny detail that makes the whole face feel friendly rather than blank.

3

Draw the Crown

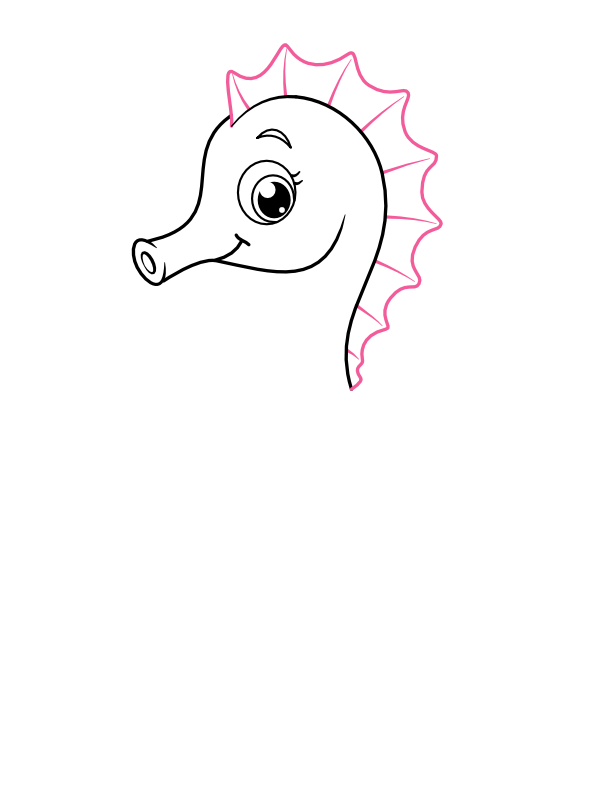
Step 3: Draw the Crown

Along the top and back of the head, draw a row of small, pointed spikes fanning outward like a delicate crown or fin, each one narrow and tapering to a soft point. Vary the spikes slightly in length rather than making them all identical, since real seahorses have a naturally uneven, feathery coronet rather than a perfectly symmetrical one. This crown is one of the most recognizable features of a seahorse, and it's what turns a simple curved head shape into something unmistakably seahorse-like.

4

Draw the Body Down to the Tail

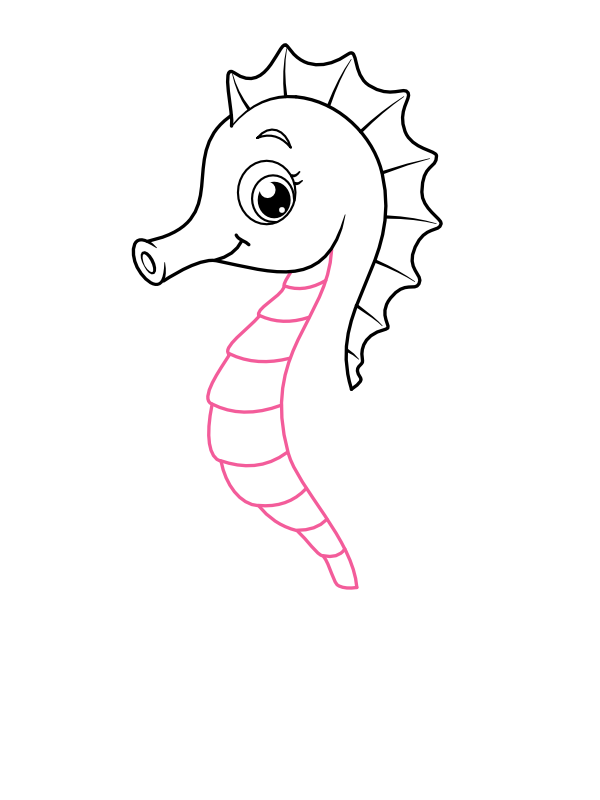
Step 4: Draw the Body Down to the Tail

From the base of the neck, continue the outline downward into a long, curving body that gradually narrows as it descends, following a gentle S-curve rather than a straight line. Add a series of curved horizontal ridge lines running across the body at regular intervals along its length, since a seahorse's body is made up of distinct bony segments rather than smooth skin, and these ridge lines are what suggest that armored, plated texture.

5

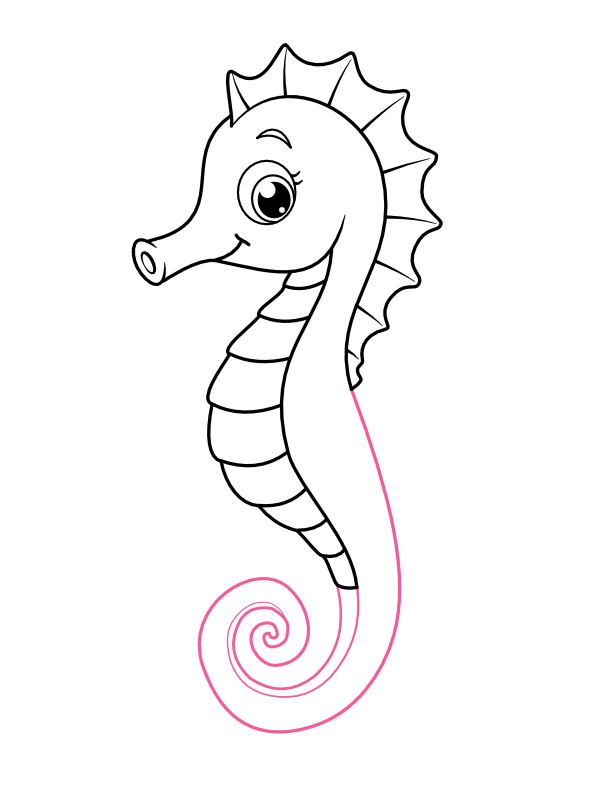
Curl the Tail

Step 5: Curl the Tail

At the bottom end of the body, continue the line curving inward and around itself, spiraling into a tight, gentle coil rather than ending abruptly. A seahorse's tail is prehensile, meaning it's built for gripping onto coral and seagrass, and that natural curling shape is exactly what gives the whole drawing its graceful, almost calligraphic quality. Let the spiral tighten gradually as it winds inward, rather than curling at a single fixed radius the whole way.

6

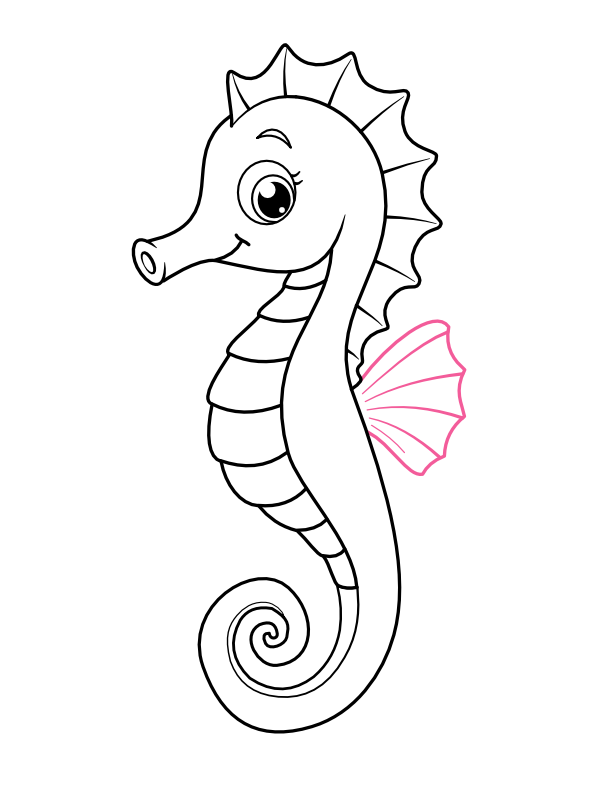
Add the Fin

Step 6: Add the Fin

On the back of the body, roughly where the neck meets the upper body, draw a small fan-shaped fin made up of several thin, ribbed sections spreading outward from a narrow base. This dorsal fin is what a seahorse actually uses to propel itself through the water, and its delicate, almost lace-like structure makes for a nice contrast against the smoother curves of the body around it.

7

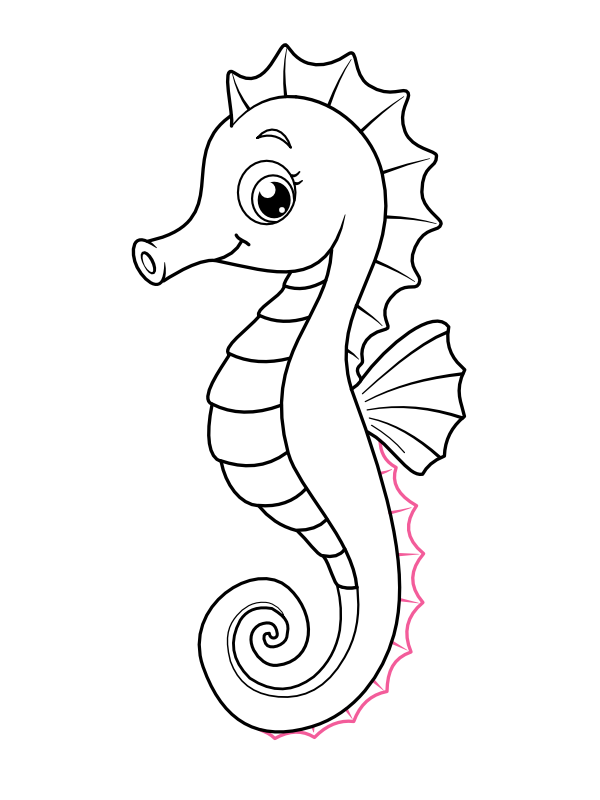
Add the Back Ridge

Step 7: Add the Back Ridge

Running from the base of the crown, down along the back edge of the body, and all the way to the tip of the curled tail, draw a thin zigzagging line tracing just outside the main body outline. This represents the small bony ridge running along a seahorse's spine, adding one more layer of that armored, segmented texture that makes the creature so visually distinct from a typical fish.

8

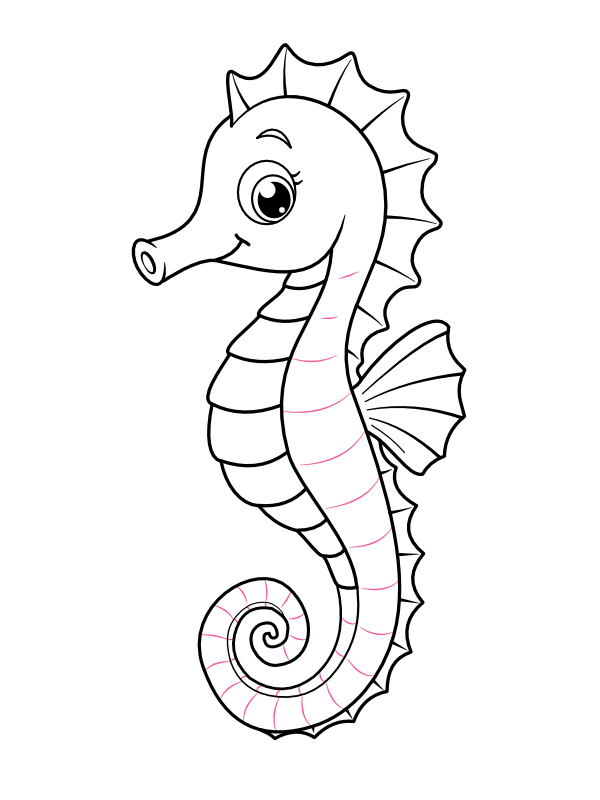
Add the Belly Stripes

Step 8: Add the Belly Stripes

Down the front of the body, following the same segment lines you drew back in Step 4, add a series of short curved marks tracing along each ridge on the belly side. These lines emphasize the plated, ringed structure of the body even further, giving the impression that the seahorse's whole body is built from stacked bony rings rather than being one smooth continuous shape.

9

Add Small Body Spots

Step 9: Add Small Body Spots

Scattered along the back of the body, between the crown and the tail, add a handful of tiny circles — small, delicate markings similar to the freckled spots you might see on other sea creatures. Keep them small, sparse, and irregularly placed rather than lining them up in neat rows, since these subtle spots are meant to add a touch of natural texture without turning the whole body into a busy pattern.

10

Color Your Seahorse

Step 10: Color Your Seahorse

Now for the most satisfying part!

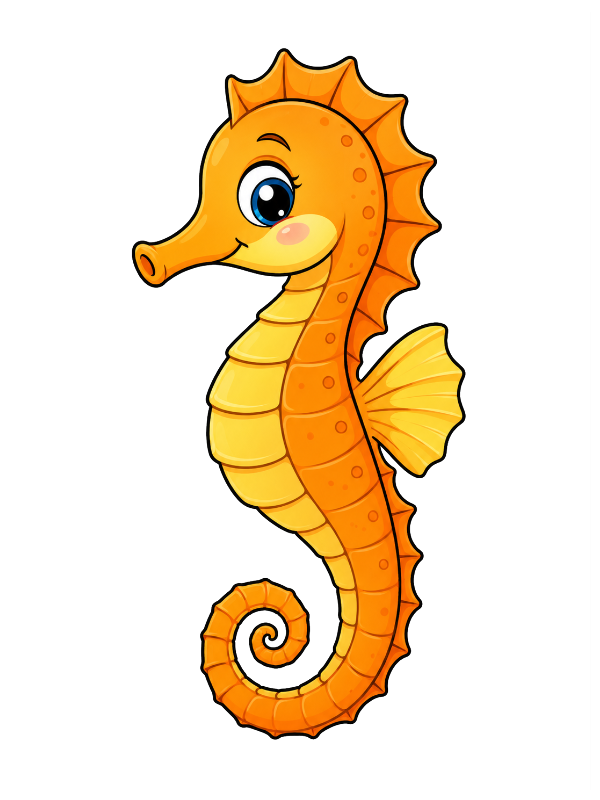
  • Body and crown: Warm golden orange, covering the head, neck, body, and curled tail as the main base color
  • Belly and lower body: A softer, lighter yellow, filling the area along the belly stripes so the segmented lines stand out clearly against the paler tone
  • Ridge and spine line: A slightly deeper orange than the main body, following the zigzag line along the back
  • Body spots: A muted orange-brown, just a touch darker than the base color, like faint natural markings
  • Eye: Bright blue with a black pupil and a small white highlight dot
  • Cheek: A soft, gentle blush of pale pink or peach along the cheek area beneath the eye, for a touch of warmth in the expression
  • Fin: The same golden orange as the body, with a slightly lighter tone along the very edges of the ribbed fan shape

Once the color goes on, that warm golden-orange body with its pale belly and bright blue eye gives the seahorse a friendly, sun-kissed glow — like it just drifted up from a shallow, sunlit reef. 🐴

Final Thoughts

The part of this drawing that takes the most patience is Step 5, curling the tail into a clean, gradually tightening spiral rather than a loose loop or an awkward hook. It helps to draw the spiral slowly and lightly at first, working from the outside in, and checking every so often that the coil is tightening evenly rather than flattening out partway through. Everything else in this drawing, from the crown spikes to the body spots, is much more forgiving, and small irregularities in those details genuinely add to the hand-drawn charm rather than taking away from it.

Once this seahorse feels comfortable, try drawing a small cluster of seagrass or coral around the base of the tail, as if it's gripping onto something beneath it — it's a simple addition that instantly places the seahorse in its natural underwater setting.