
How to Draw a Mushroom

July 14, 2026
9 Steps
AR Drawing Logo

AR Drawing

Drawing Tutorials

There's something instantly storybook about a mushroom drawing — that round, domed cap sitting proudly on a plump little stem, dotted with pale spots like something straight out of a fairy tale forest. It's a shape most people recognize the moment the first curve goes down, and yet it's built from nothing more complicated than an arch, an oval, and a rounded rectangle. Add a few gill lines, a scattering of spots, and a little patch of grass underneath, and suddenly you've got a toadstool that looks like it belongs tucked at the base of an old tree. Let's get drawing!

How to Draw a Mushroom
What You Will Need
  • Pencil
  • Eraser
  • White paper
  • Black marker or fine-liner (optional)
  • Colored pencils, crayons, or markers
1

Draw the Top of the Cap

Step 1: Draw the Top of the Cap

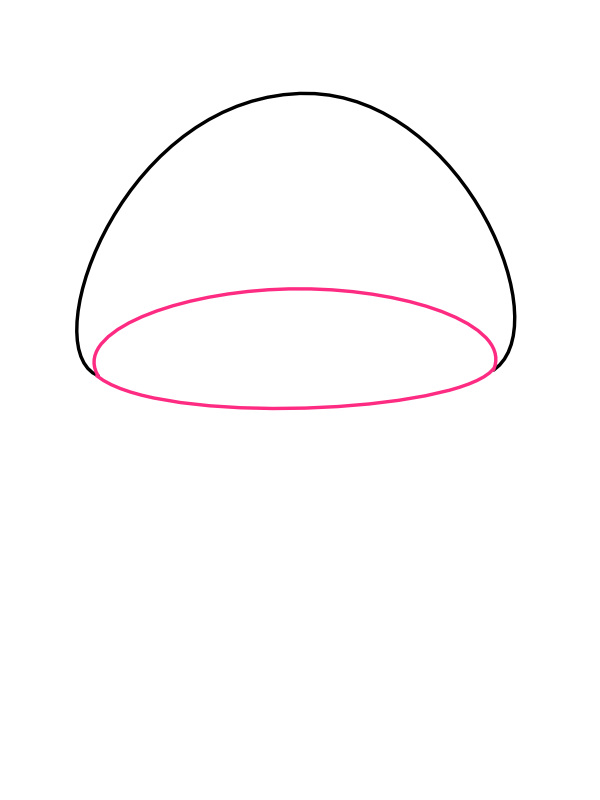
Near the upper-center of your page, draw a single curved arch — wide and rounded like the top half of a dome, starting low on one side, rising up smoothly through the middle, and coming back down on the other side. Keep both ends of the arch roughly level with each other so the shape doesn't lean, and don't worry yet about closing off the bottom, since that comes in the very next step. This one curve is already doing most of the work of defining how big and how rounded your final mushroom cap is going to look.

2

Close Off the Cap and Add the Rim

Step 2: Close Off the Cap and Add the Rim

Beneath the arch you just drew, add a long, flattened oval running the full width of the cap to close the shape off and form the underside rim. Let the two ends of this oval meet the two ends of the arch above it, so the whole cap reads as one solid, rounded dome resting on a thin ledge. This rim is what gives the cap its structure — without it, you'd just have a plain hill shape, but with it, the cap suddenly has a proper underside where the stem is about to attach.

3

Draw the Stem

Step 3: Draw the Stem

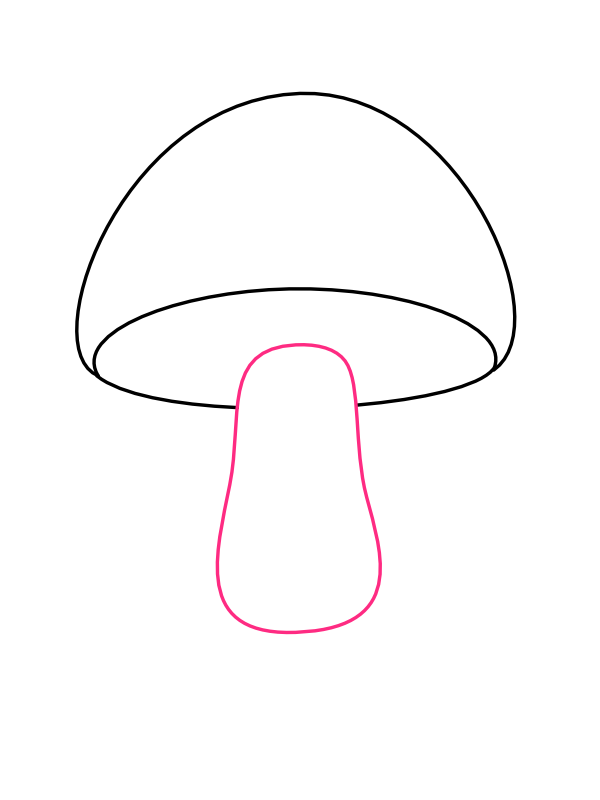
From the center of the rim, draw the stem hanging downward — a soft, slightly curved rectangle that's a little narrower at the top where it meets the cap and gently widens as it goes, rounding off at the base rather than ending in a sharp corner. Real mushroom stems are rarely perfectly straight-sided, so let the two edges bow out and in very slightly rather than running as two rigid parallel lines. This plump, slightly irregular shape is what gives the stem its soft, fleshy character.

4

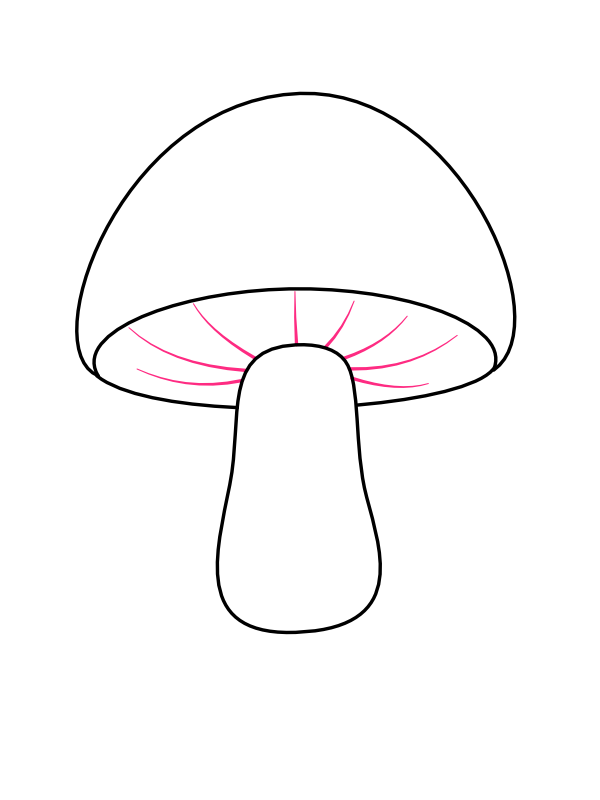
Add the Gill Lines

Step 4: Add the Gill Lines

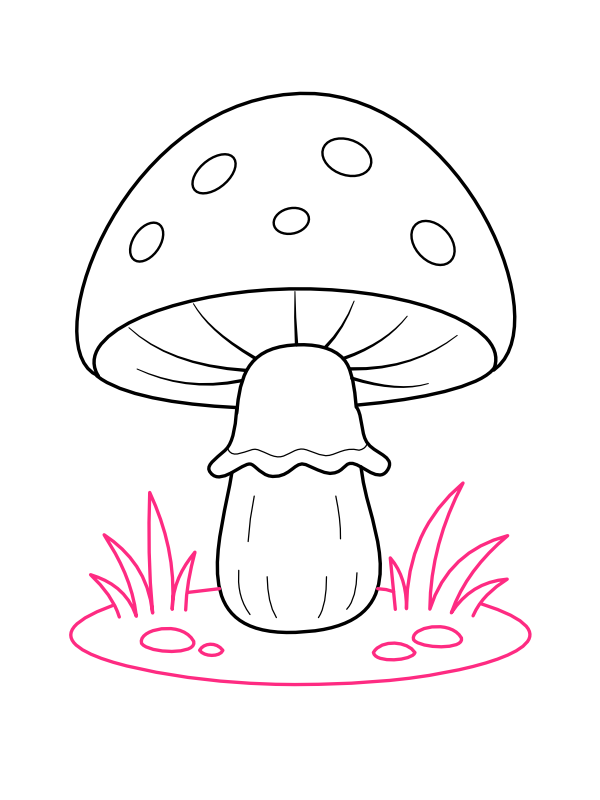
On the underside of the cap, in the space between the rim and the top of the stem, draw a series of thin lines radiating outward from the stem toward the outer edge of the rim, like the spokes of a fan or the ribs of an umbrella. These represent the gills — the thin, papery folds found on the underside of a real mushroom cap where its spores are held. Space the lines a little unevenly rather than perfectly symmetrically, since that natural irregularity is part of what makes the underside look convincingly organic rather than mechanically drawn.

5

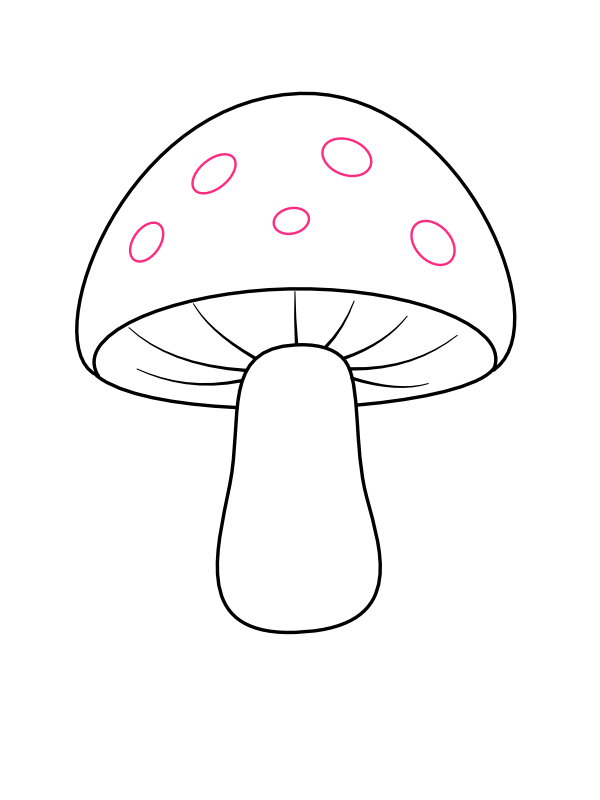
Add the Spots

Step 5: Add the Spots

Across the top of the cap, scatter a handful of small oval spots of varying sizes — a few larger ones near the top and sides, and one or two smaller ones filling in the gaps between them. Keep the spacing loose and a little random rather than lining them up in a neat grid, since real toadstool spots never fall into a tidy pattern. This is the detail most people associate instantly with a classic storybook mushroom, and it's a small addition that has an outsized effect on how charming the final drawing feels.

6

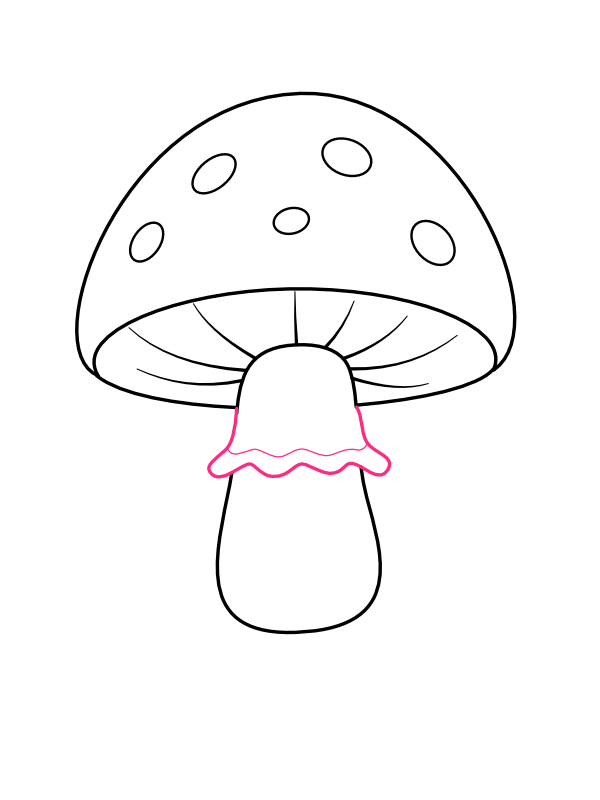
Add the Ring Around the Stem

Step 6: Add the Ring Around the Stem

Just below where the stem meets the underside of the cap, draw a thin, wavy band wrapping around the top of the stem like a little skirt or collar. This is the ring, a delicate membrane found on many real mushrooms where a protective layer once covered the young gills before the cap fully opened. Keep the wave gentle and loose rather than sharp and zigzagging, since a soft, relaxed wobble reads much more naturally than a jagged one.

7

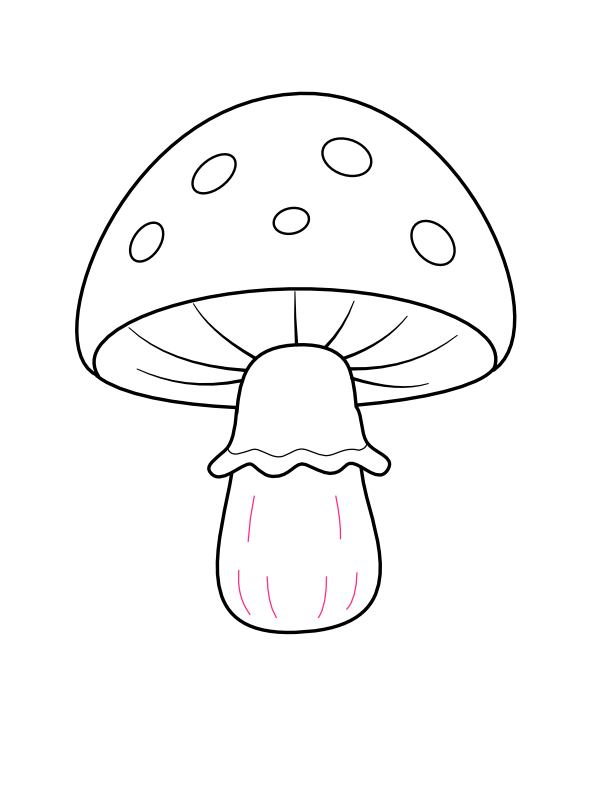
Add Texture to the Stem

Step 7: Add Texture to the Stem

Down the length of the stem, below the ring, draw a few thin vertical lines with soft, slightly curved paths rather than perfectly straight ones. These lines suggest the natural fibrous texture running down a mushroom's stalk, and just like the gill lines above, a little unevenness in their spacing and length makes the stem look far more convincing than a perfectly smooth, featureless column. A handful of lines is plenty here — this detail works best kept subtle.

8

Add the Ground and Grass

Step 8: Add the Ground and Grass

At the base of the stem, draw a low, flattened oval to represent a small patch of ground, and scatter a few simple blades of grass rising up from it on either side of the stem — short, upward-curving lines gathered in small clusters, with a couple of small rounded pebbles tucked into the grass for good measure. This little patch of ground is what finally roots the mushroom in a setting, turning it from a floating shape into a small scene, as if you just stumbled across it while walking through the woods.

9

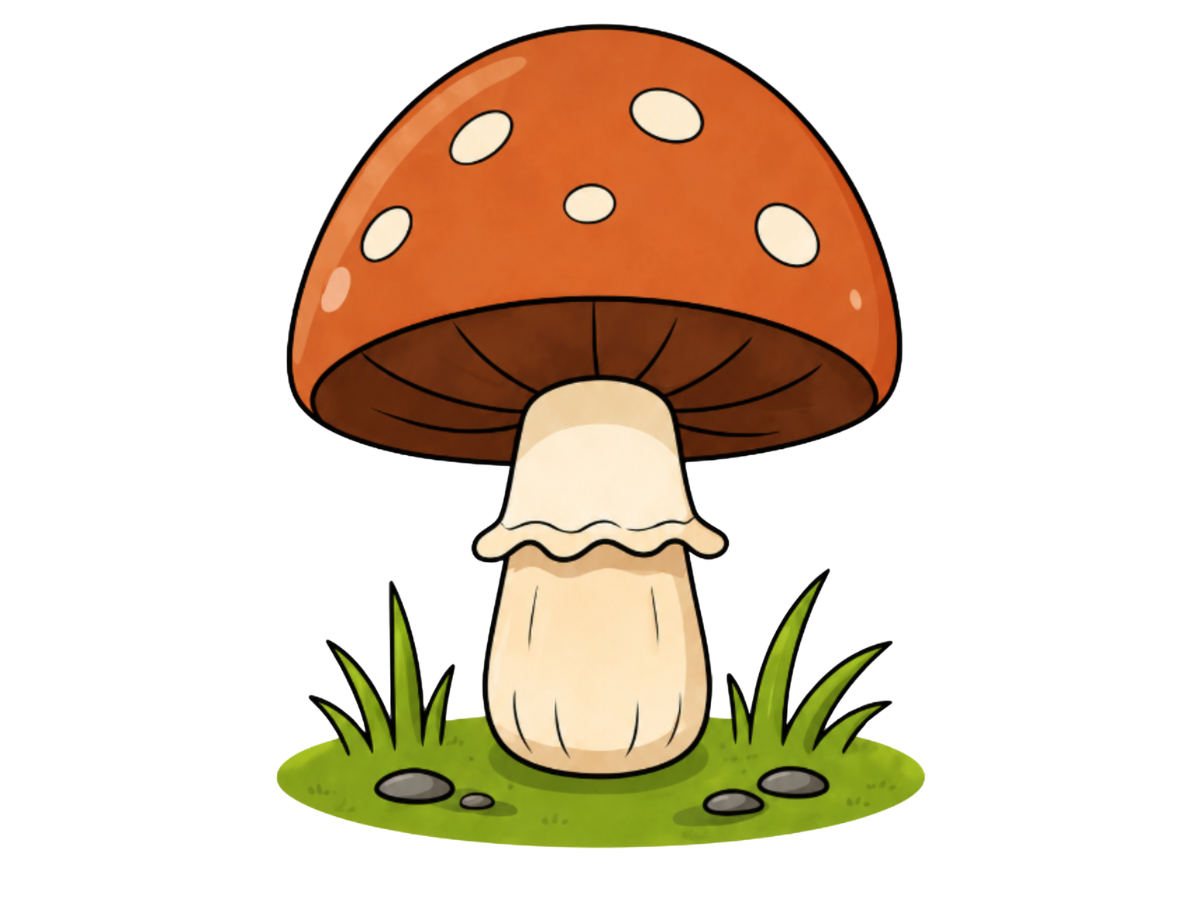
Color Your Mushroom

Step 9: Color Your Mushroom

Now for the most satisfying part!

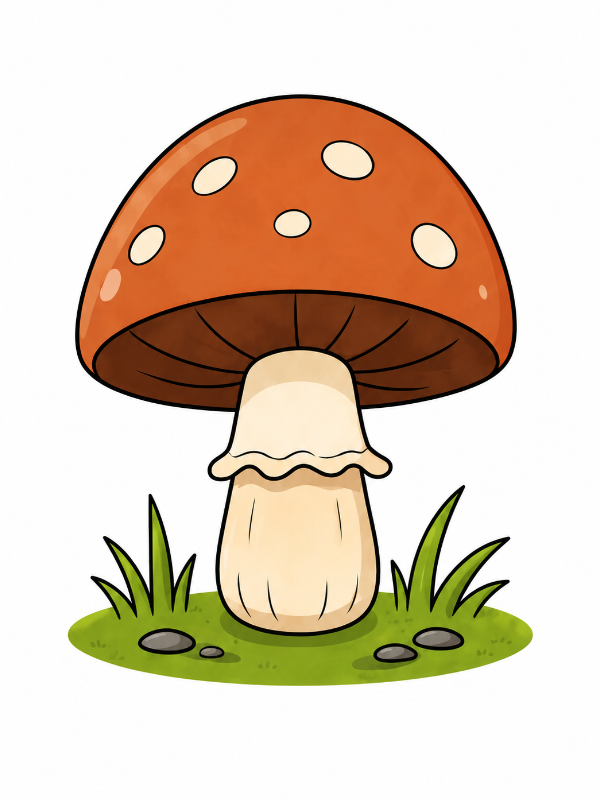
  • Cap (top): Warm, vivid burnt orange or reddish-brown, rich and slightly darker toward the outer edges of the dome
  • Cap highlight: A soft, lighter orange patch near the upper-left of the cap to suggest sunlight catching the rounded top
  • Spots: Pale cream or off-white, standing out clearly against the darker cap color
  • Underside rim and gills: Deep reddish-brown, darker than the cap itself, with the gill lines showing as slightly darker creases fanning out from the stem
  • Stem: Soft warm cream or pale ivory, with a gentle golden-tan shadow along one side for roundness
  • Ring: A slightly deeper cream than the stem, so it reads as a distinct little collar rather than blending in
  • Ground patch: Fresh green, with a slightly darker green shadow directly beneath the stem
  • Grass blades: Bright, lively green, with one or two blades a shade darker for depth
  • Pebbles: Cool grey, with a small lighter highlight on the roundest part of each stone

Once the color is in, that deep orange cap with its pale cream spots sitting on a soft ivory stem gives the whole drawing that unmistakable storybook toadstool look — the kind of mushroom you half expect a tiny frog to be sitting on. 🍄

Final Thoughts

The step people tend to slow down on most is Step 1 and Step 2 together — getting the arch of the cap and the flattened rim beneath it to line up so the dome sits evenly rather than leaning to one side. It helps to sketch both shapes lightly at first and check that the two ends of the arch land roughly above the two ends of the rim before pressing down with a firmer line. Everything that follows, from the gills to the spots to the grass at the base, is much more forgiving, and a little unevenness in those later details is honestly part of what makes the mushroom feel hand-drawn rather than traced.

Once this version feels comfortable, try clustering two or three mushrooms of different sizes together on the same patch of ground — it's a natural next step that turns a single toadstool into a small woodland scene with very little extra effort.