




How to Draw a Lotus Flower

June 16, 2026
9 Steps
AR Drawing Logo

AR Drawing

Drawing Tutorials

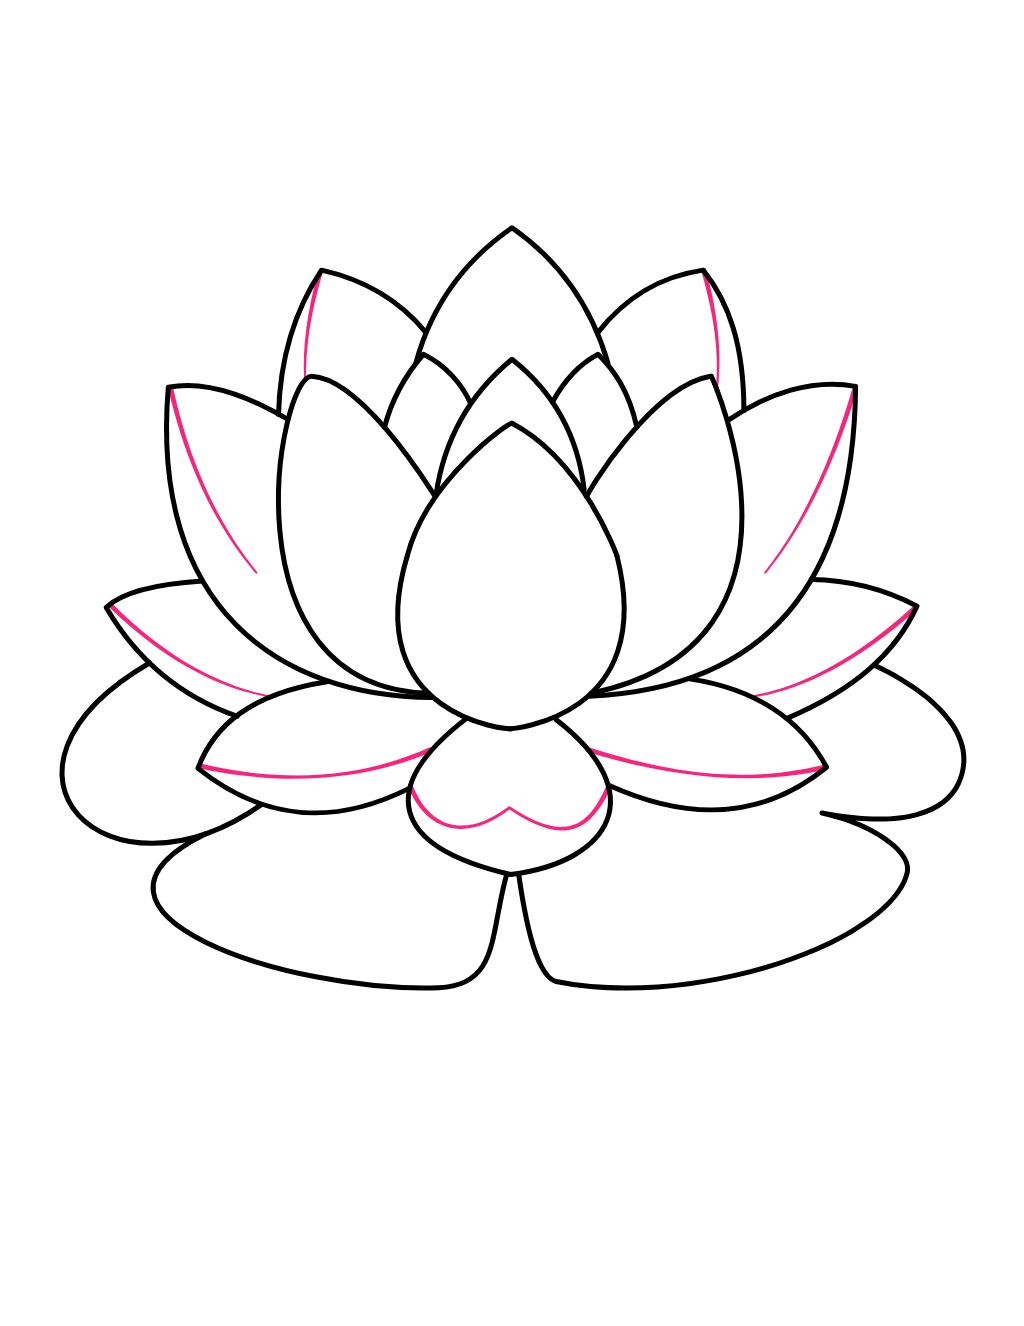
The lotus flower is one of the most beautiful and peaceful flowers in the world. It grows in calm water and is loved for its soft, layered petals and gentle colors. The good news is that drawing a lotus flower is much easier than it looks! By breaking it down into simple shapes, anyone can draw a stunning lotus — even if you are picking up a pencil for the very first time. In this step-by-step tutorial, we will guide you through drawing a full lotus flower sitting on a lily pad with water ripples around it. Let us get started!

How to Draw a Lotus Flower
What You Will Need
  • Pencil
  • Eraser
  • White paper
  • Black marker or fine-liner (optional)
  • Colored pencils, crayons, or markers
1

Draw the Center Petal

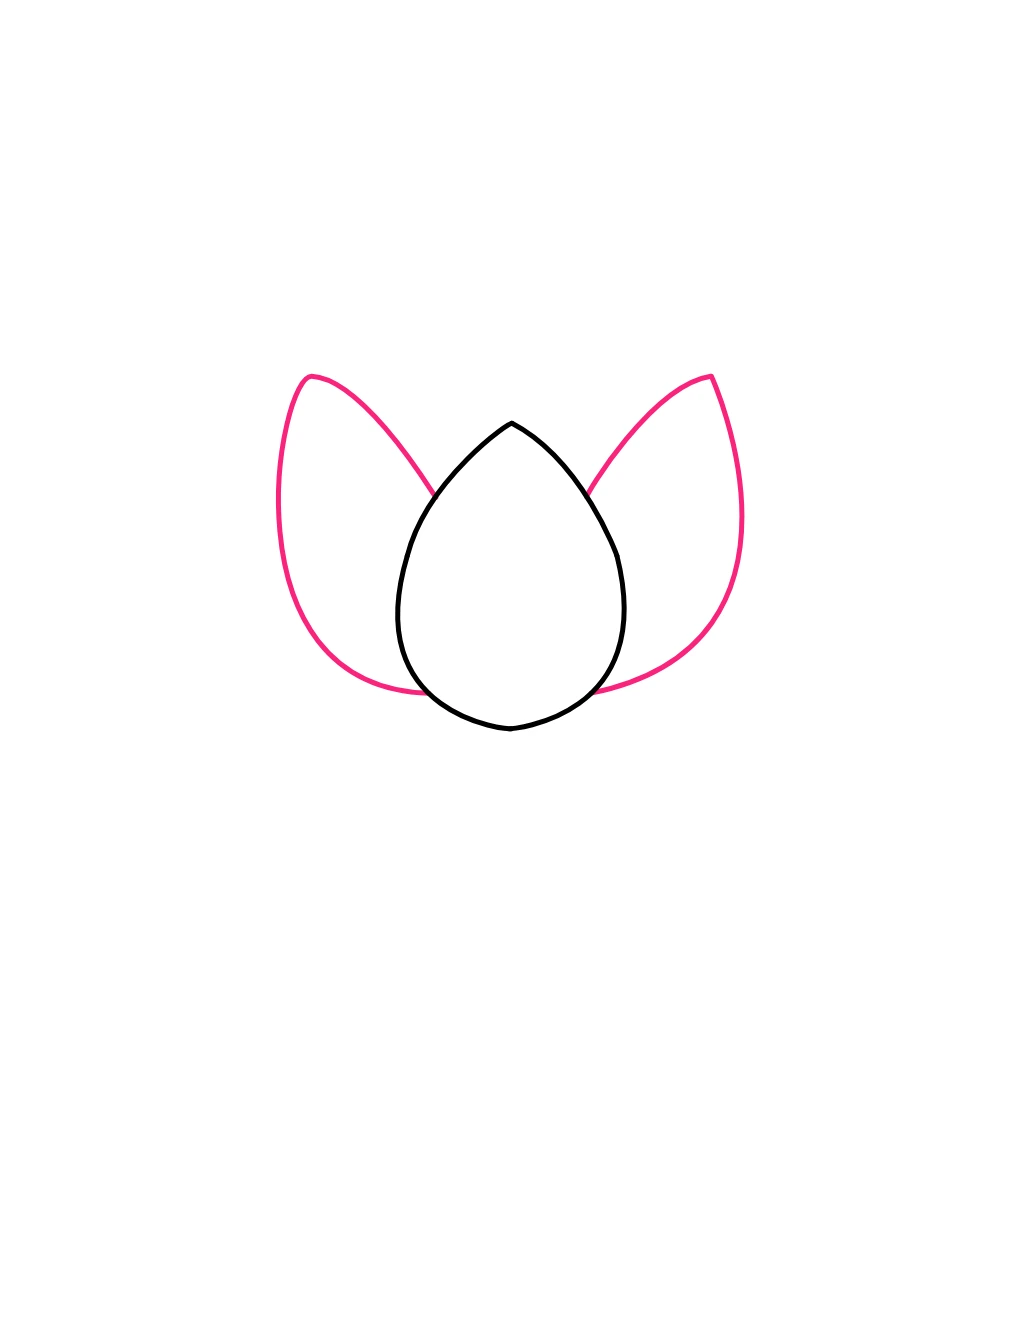
Step 1: Draw the Center Petal

Start in the middle of your paper. Draw one single petal shape — it looks like a rounded teardrop, wider at the bottom and coming to a soft point at the top. This is the very center petal of your lotus and will be the guide for everything else you draw around it.

2

Add the Two Side Petals

Step 2: Add the Two Side Petals

On either side of your center petal, draw one petal each. These two petals are slightly wider and more open than the center one, and they lean outward to the left and right. Their inner edges should touch or slightly overlap the sides of the center petal.

3

Add the Inner Top Petals

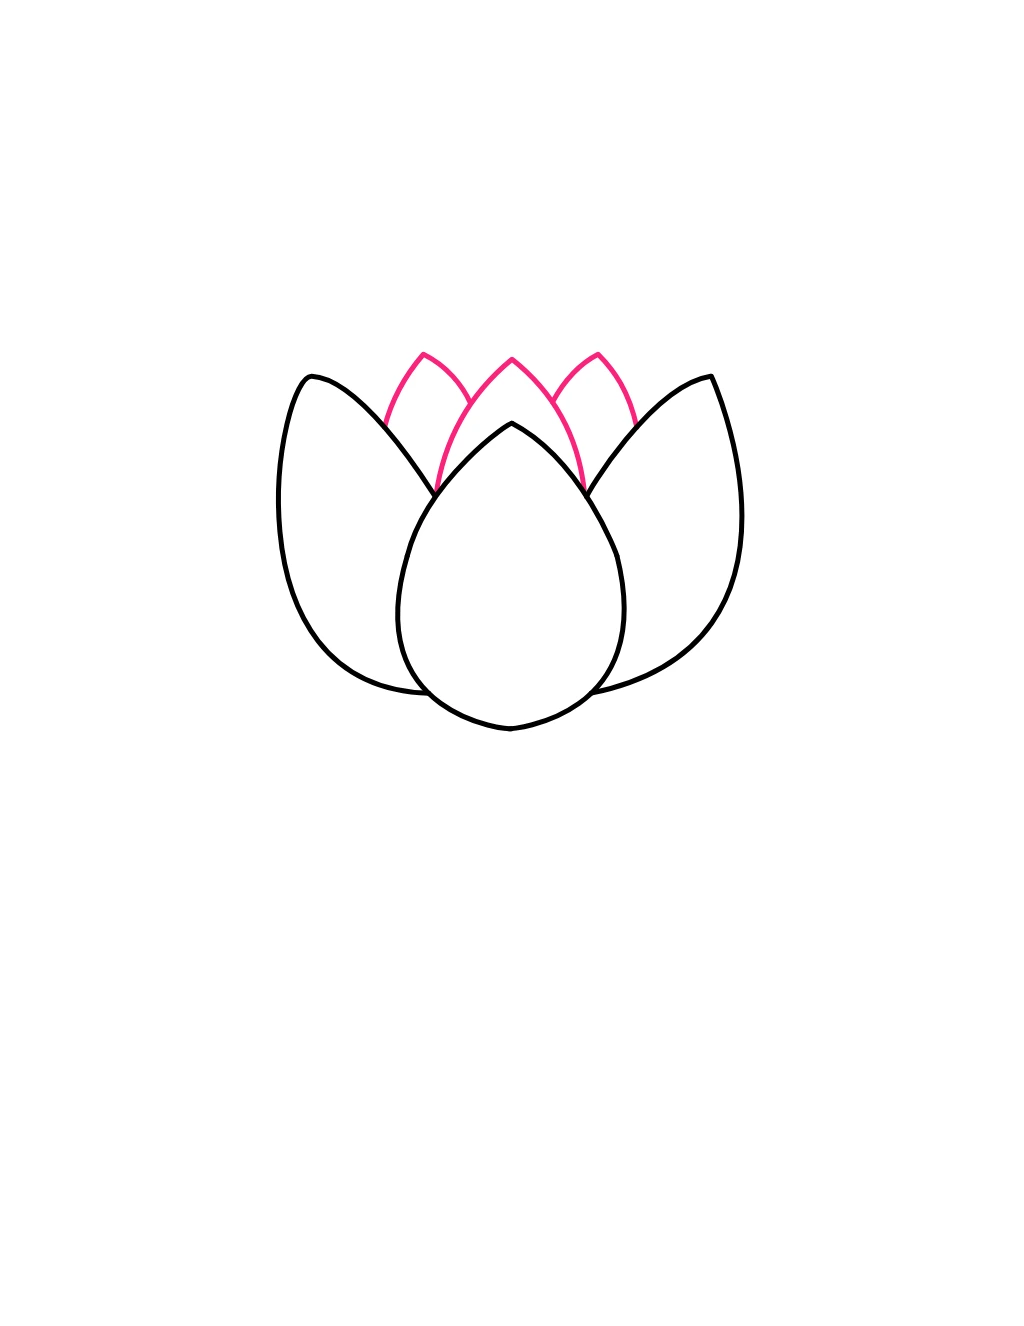
Step 3: Add the Inner Top Petals

Behind and between the three petals you have already drawn, add three more smaller petals peeking out from the top. These petals sit slightly higher and create the second inner layer of the flower. Keep them the same teardrop shape but a little narrower.

4

Add the Outer Petal Layer

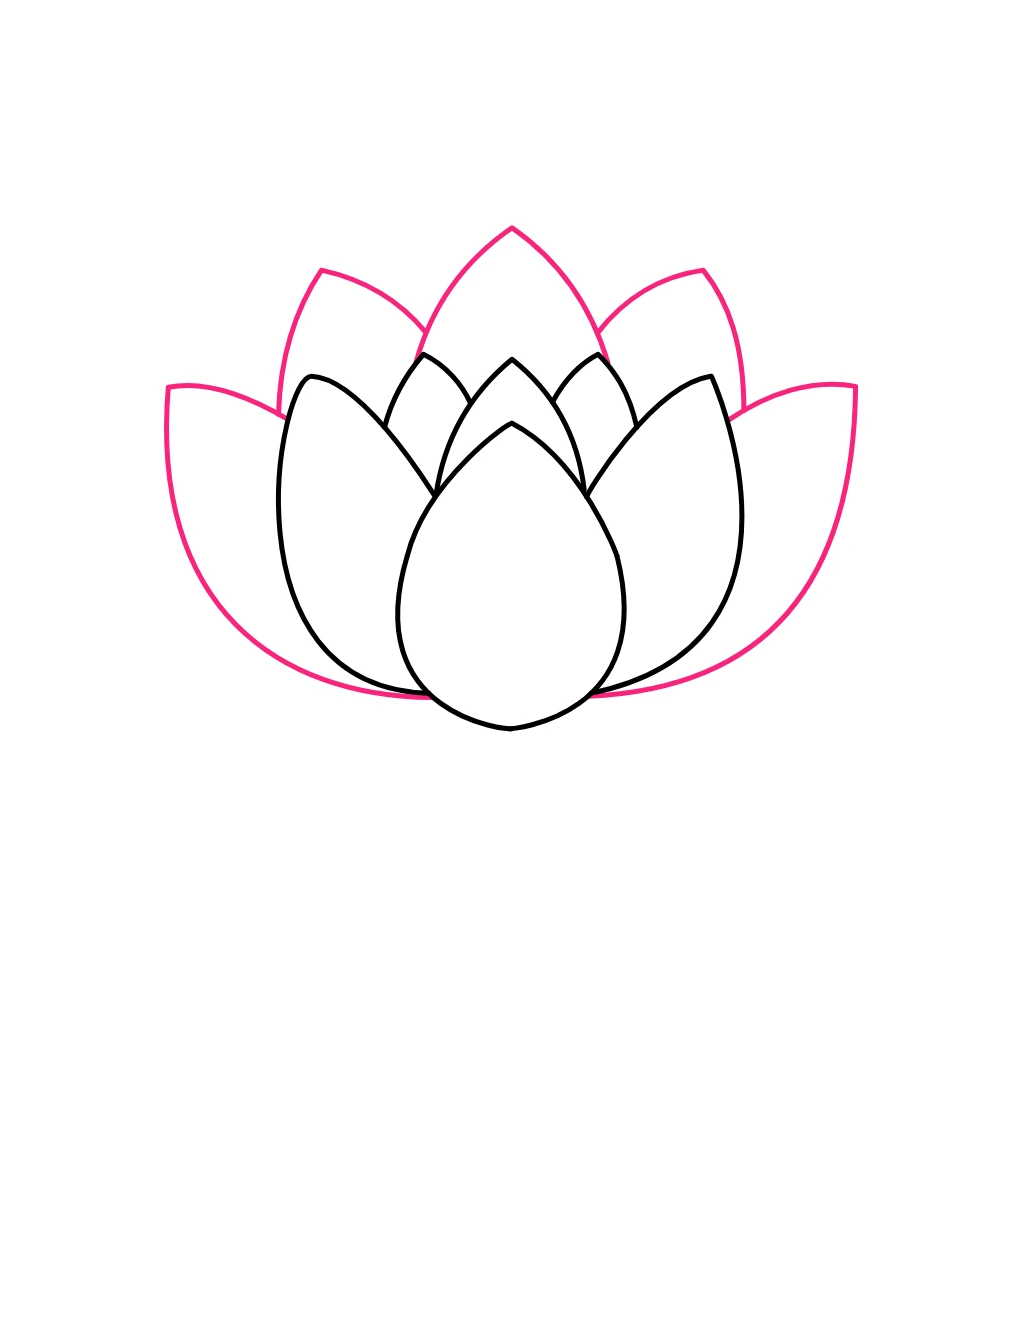
Step 4: Add the Outer Petal Layer

Now draw a larger outer layer of petals spreading out around the ones you have already drawn. Add two big petals on the far left and far right, curving outward. Then fill in the gaps between them with additional petals. This outer ring of petals should look fuller and wider, giving the lotus its signature blooming shape.

5

Add the Bottom Petals

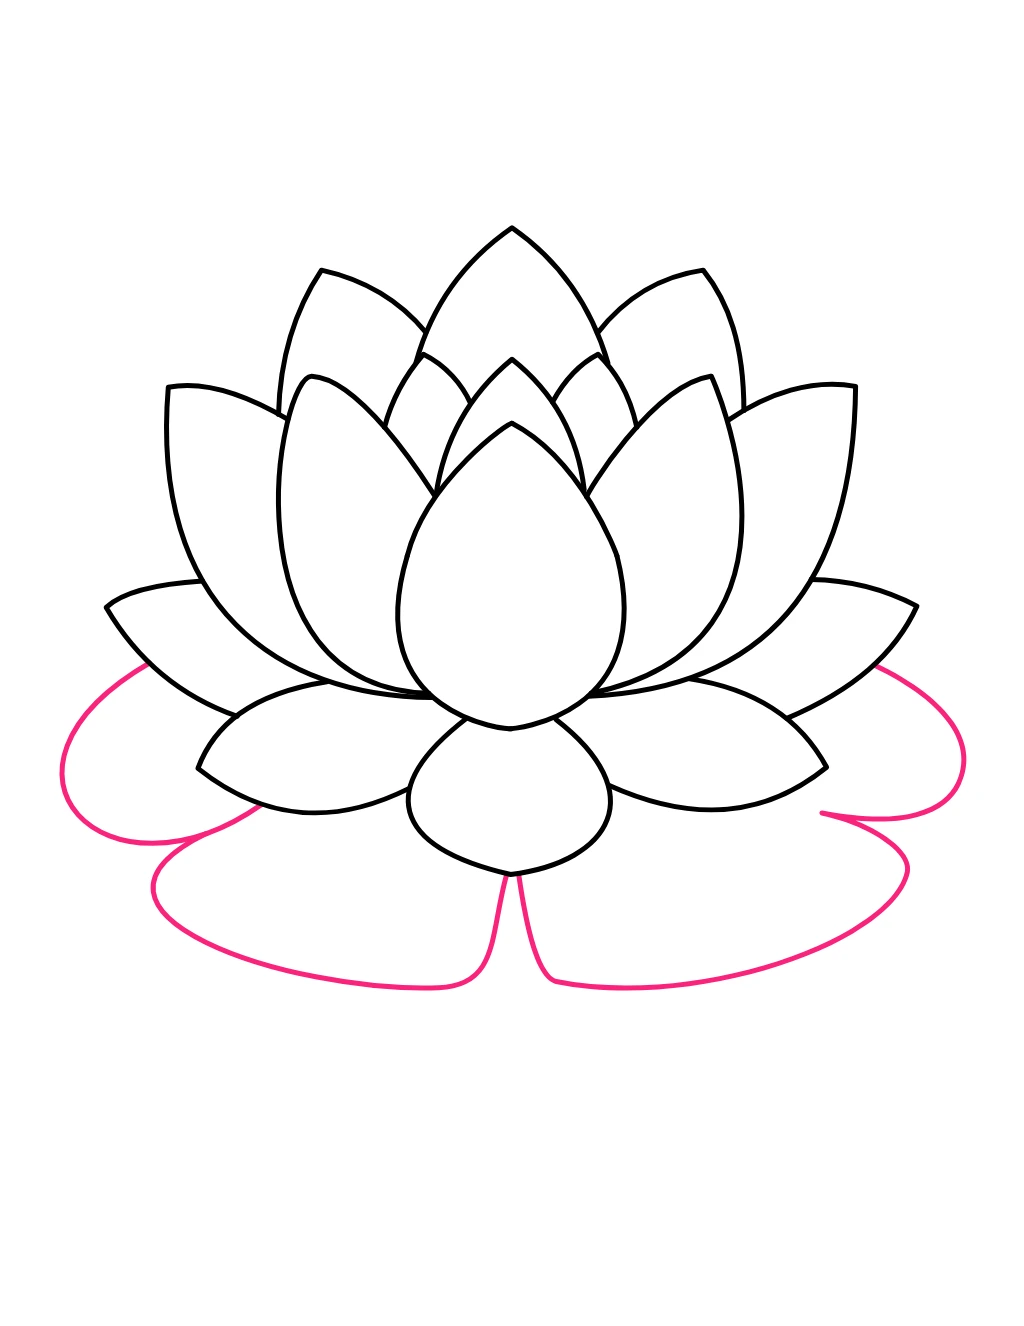
Step 5: Add the Bottom Petals

Below the main flower, draw a row of three to four shorter, rounder petals curving downward. These petals form the very bottom of the flower and help the lotus look full and complete from all angles. They should be slightly flatter and more spread out than the upper petals.

6

Draw the Lily Pad Base

Step 6: Draw the Lily Pad Base

Beneath all the petals, draw a wide, flat lily pad shape. It should look like a large rounded disc with slightly wavy or bumpy edges. The lily pad is what holds the entire lotus flower above the water. Make it wide enough so it extends a little beyond the outermost petals on both sides.

7

Add Petal Detail Lines

Step 7: Add Petal Detail Lines

Go back to your petals and add simple detail lines inside each one. For each petal, draw a single soft curved line that follows the inner edge from bottom to tip. This small detail makes each petal look three-dimensional and adds a realistic, delicate feel to the whole drawing.

8

Add the Water Ripple

Step 8: Add the Water Ripple

Around the base of the lily pad, draw a simple oval or ellipse shape to represent the surface of the water. Add one or two more slightly larger ovals around it for the ripple effect. These curved lines give the impression that your lotus is peacefully floating on still water.

9

Ink and Color Your Lotus Flower

Step 9: Ink and Color Your Lotus Flower

Trace your final outlines with a black marker and erase the pencil underneath once dry. Now bring your lotus to life with color:

  • Petals: Light pink on the outer petals, deeper pink toward the center
  • Petal detail lines: Slightly darker pink or rose
  • Lily pad: Fresh green
  • Water ripples: Light blue or sky blue
  • Center bud: Soft pink or white

Your beautiful lotus flower drawing is complete!

Final Thoughts

Drawing a lotus flower is all about patience and layering. Each step adds one more ring of petals, and slowly the full flower comes together in front of you. Once you have practiced this a few times, you will find that your hand remembers the shapes naturally and the drawing gets faster and more confident every time.

Keep drawing and keep creating — every lotus you draw will look more beautiful than the last! 🌸