
How to Draw a Fish

July 26, 2026
7 Steps
AR Drawing Logo

AR Drawing

Drawing Tutorials

A fish is one of those drawings that feels like it belongs to the ocean the moment you start it, even before a single fin or stripe goes on. That plump, lemon-shaped body, the big round eye, and the fanned-out fins all come together to make one of the friendliest little sea creatures you can put on paper. What makes it such a great pick for beginners is that everything builds from one simple curved shape, and every step after that just adds a little more charm — a fin here, a stripe there — until it looks ready to swim right off the page. Let's get drawing!

How to Draw a Fish
What You Will Need
  • Pencil
  • Eraser
  • White paper
  • Black marker or fine-liner (optional)
  • Colored pencils, crayons, or markers
1

Draw the Body

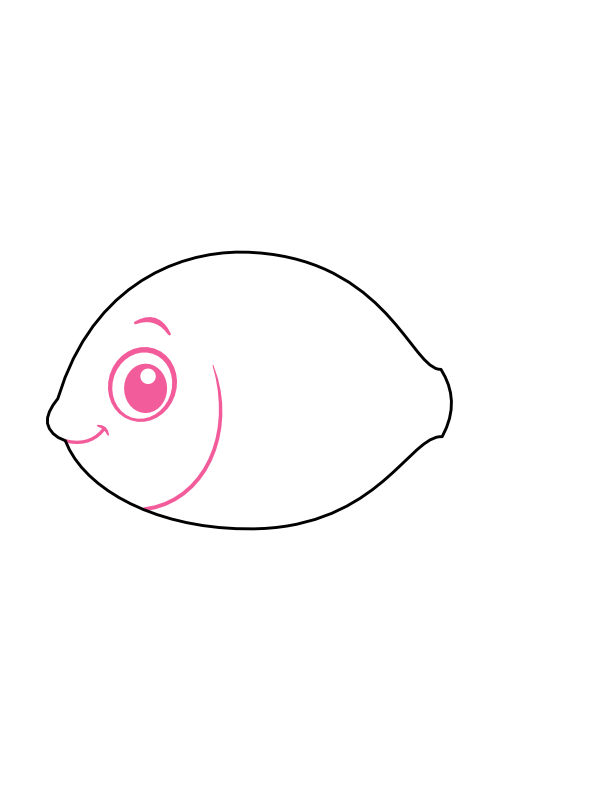
Step 1: Draw the Body

In the center of your paper, draw a large, rounded shape like a fat lemon lying on its side — wide and full in the middle, tapering to a soft point on the right side and curving gently on the left where the face will go. Keep the top and bottom curves smooth and even, so the body looks plump and full rather than flat or angular. This one simple shape holds the whole fish, so take a moment to get it nice and round before moving on.

2

Add the Face

Step 2: Add the Face

On the left side of the body, draw a big round eye with a small white highlight dot left uncolored inside it for that lively, sparkling look. Just above the eye, add a short curved line for the eyebrow, and below it, a small curved smile with a tiny upward flick at the corner. Then draw a long curved line starting near the eye and sweeping down and back toward the body — this is the gill line, and it's what gives the face its shape and separates the head from the rest of the body.

3

Draw the Top Fin

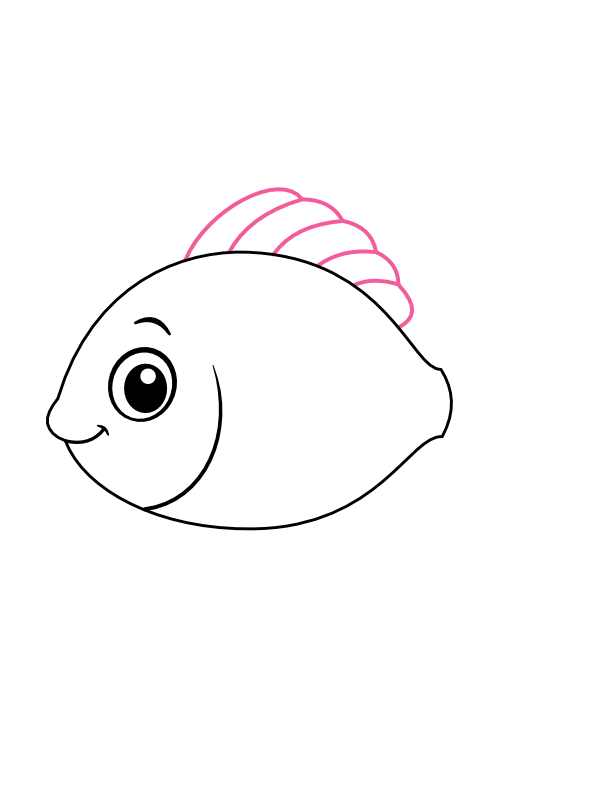
Step 3: Draw the Top Fin

Along the upper edge of the body, draw the dorsal fin — a row of four or five small, rounded scallop shapes overlapping each other, rising up from the back like a little ridge. Keep each scallop a similar size so the fin looks even and neatly layered rather than uneven or spiky. This fin sits right along the topline of the body and gives the fish its recognizable silhouette from above.

4

Add the Side and Bottom Fins

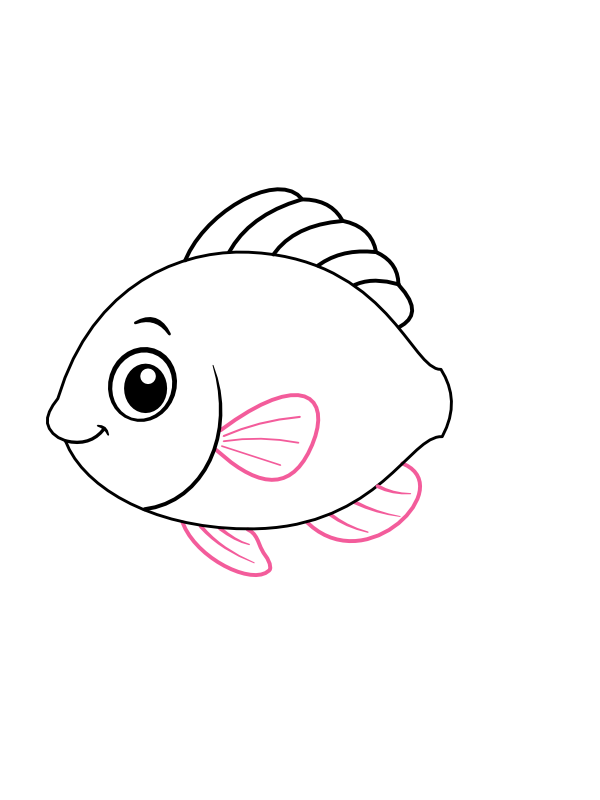
Step 4: Add the Side and Bottom Fins

Just below the eye, on the side of the body, draw a rounded fan-shaped fin with a few thin lines inside it to suggest the fin rays. Then add two more small fins along the bottom edge of the body, one a little further back than the other, using the same rounded fan shape. These fins should look soft and slightly overlapping, like they're gently fanned out rather than stiff and flat.

5

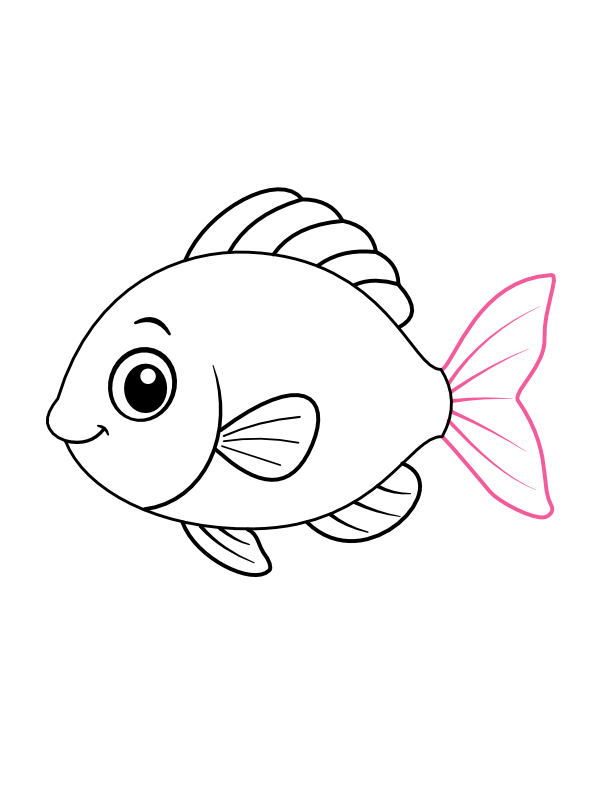
Draw the Tail Fin

Step 5: Draw the Tail Fin

At the tapered right end of the body, draw the tail fin — a wide triangular shape that flares outward and splits into two soft points, like a wide letter V with a gentle curve. Add a few thin lines radiating out from the base of the tail toward the edges to suggest fin rays, just like on the other fins. A tail that flares out nicely gives the whole fish a sense of motion, like it's about to swim off the page.

6

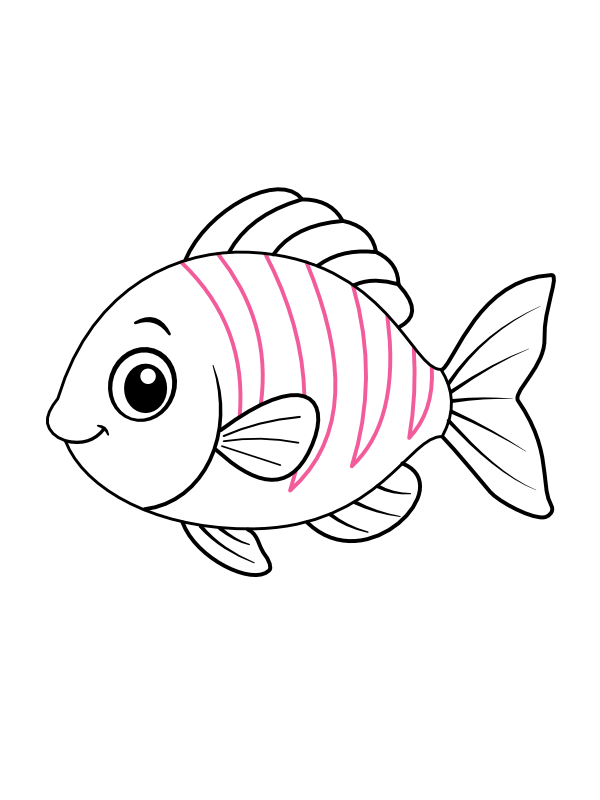
Add the Body Stripes

Step 6: Add the Body Stripes

Across the middle of the body, between the dorsal fin and the belly, draw a series of curved vertical stripes running from top to bottom, following the round shape of the body. Space them evenly across the width of the fish, with each stripe curving slightly to match the body's curve. These stripes are the detail that gives the fish its playful, tropical look, similar to the bold patterns seen on real reef fish.

7

Color Your Fish

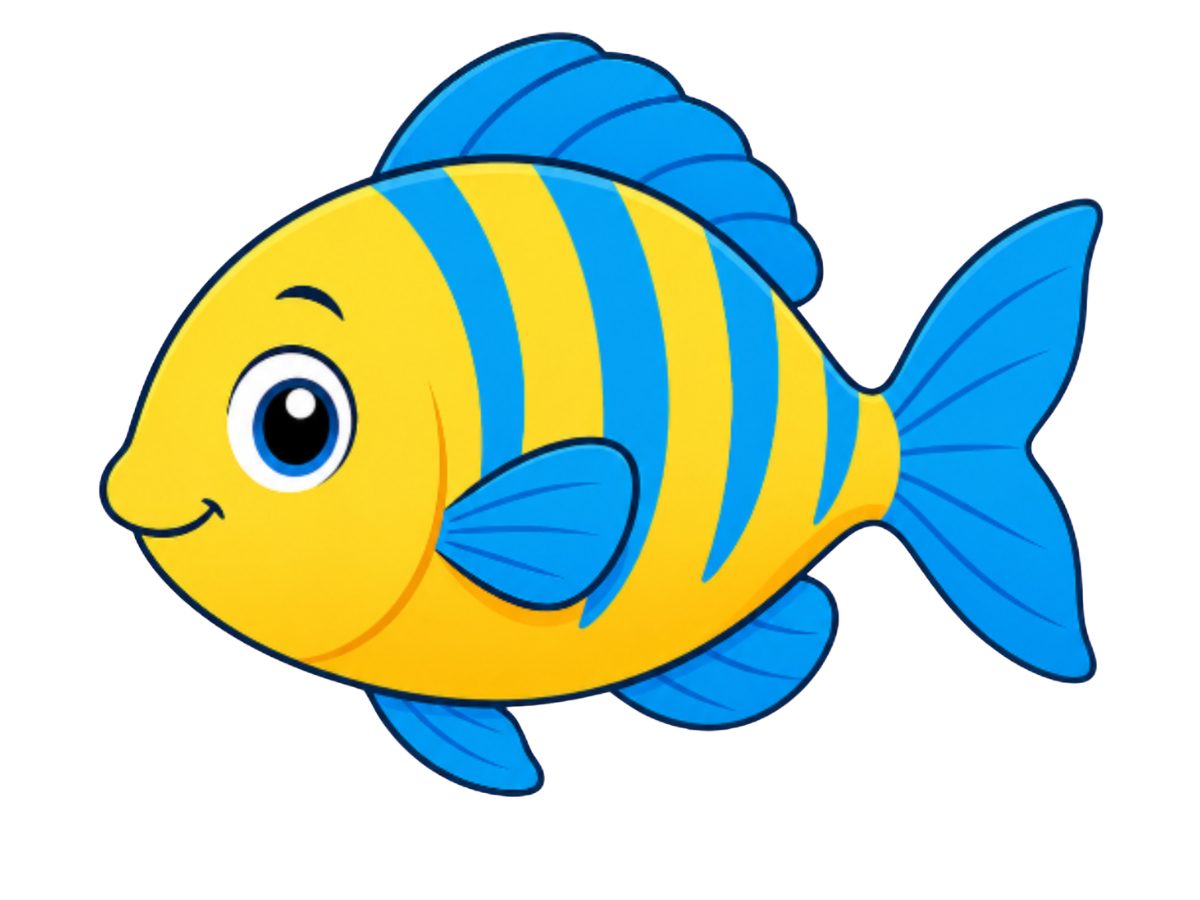
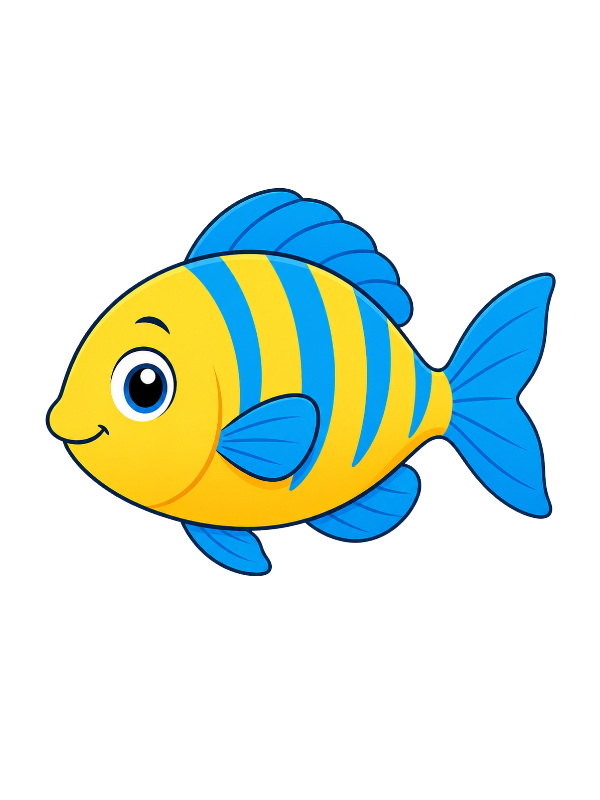
Step 7: Color Your Fish

Now for the most satisfying part!

  • Body: Bright, warm golden yellow, covering the head, back, and belly
  • Stripes: Vivid sky blue, running evenly across the body from top to bottom
  • Fins (dorsal, side, bottom, and tail): The same bright blue as the stripes, with a slightly darker blue line along the outer edges for definition
  • Eye: Solid black pupil with a white highlight dot, set inside a blue and white ring
  • Eyebrow and smile: Simple black lines, thin and clean
  • Belly area: A slightly lighter, warmer yellow near the bottom edge for a soft glow

Once the color goes on, that bright yellow body with bold blue stripes and fins makes this fish look like it swam straight out of a coral reef, full of energy and ready to dart across the page. 🐠

Final Thoughts

The part that brings this whole drawing together is the stripes in Step 6 — they turn a plain rounded body into something bold and full of personality. Don't worry about making every stripe perfectly straight or evenly spaced; a little natural variation actually makes the pattern feel more organic, just like the markings on a real fish.

Once you're comfortable with this side view, try drawing a small school of these fish together at different sizes and angles — it turns one cheerful little fish into a lively underwater scene. 🐠