

How to Draw a Daisy Flower

July 8, 2026
6 Steps
AR Drawing Logo

AR Drawing

Drawing Tutorials

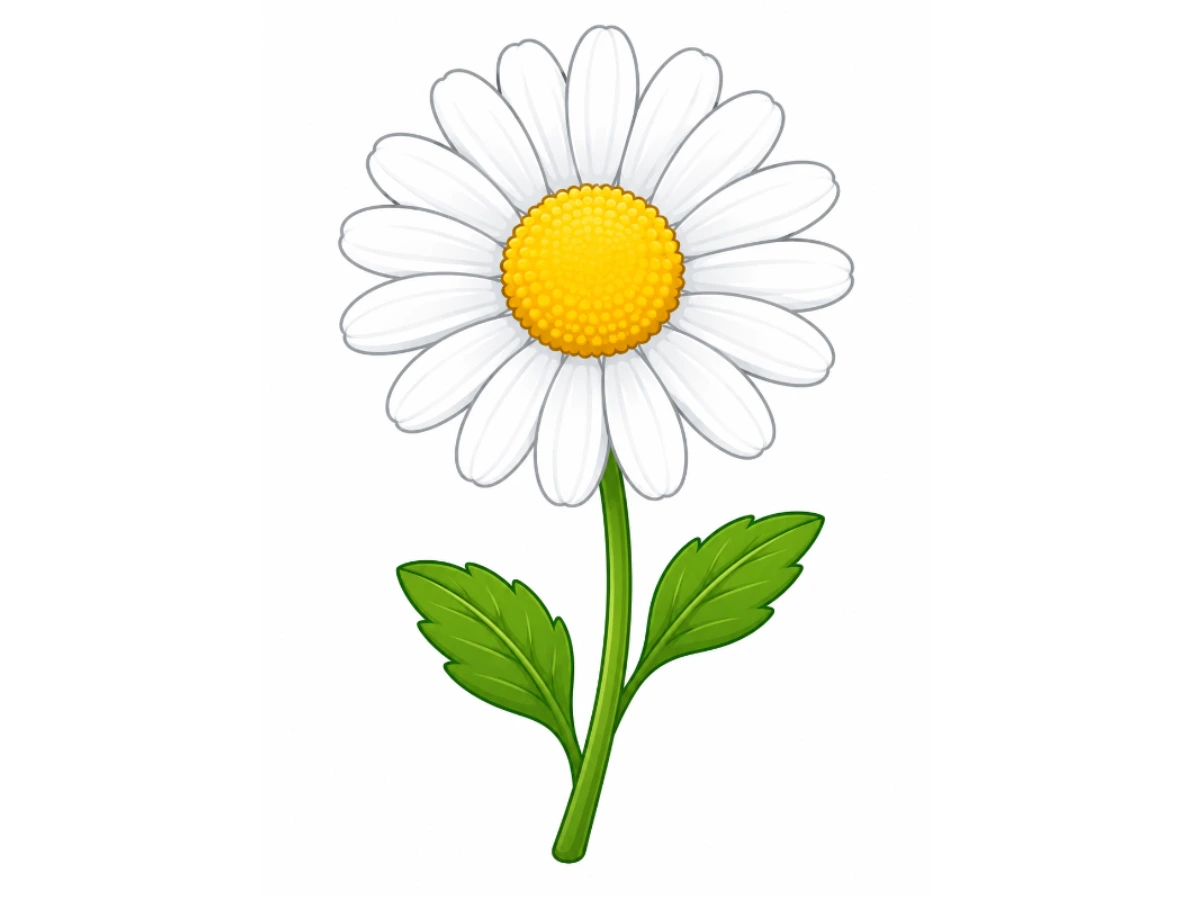
A daisy is one of those flowers that always looks cheerful no matter where it shows up — in a garden, in a bouquet, doodled on the corner of a notebook page. And drawing one is genuinely one of the most satisfying things you can do with a pencil, because it builds from the center outward in a way that feels natural and almost meditative. The whole flower is just one textured circle, a ring of long petals going around it, a gently curving stem, and a couple of leaves. By the time everything is in place, it looks like the kind of drawing you'd frame. Let's get drawing!

How to Draw a Daisy Flower
What You Will Need
  • Pencil
  • Eraser
  • White paper
  • Black marker or fine-liner (optional)
  • Colored pencils, crayons, or markers
1

Draw the Center Disc

Step 1: Draw the Center Disc

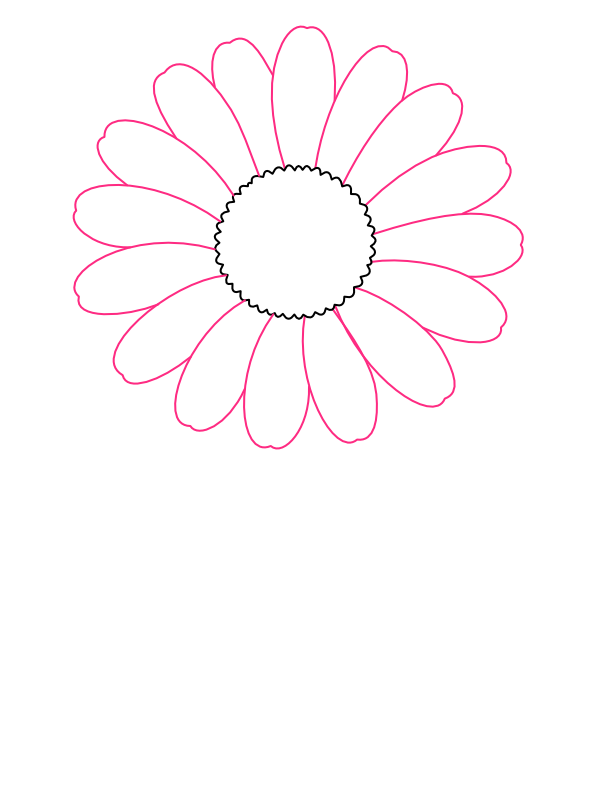
In the upper-center portion of your paper, draw a medium-sized circle — but instead of a smooth edge, give it a wavy, scalloped outline all the way around, like a gear or a flower-shaped cookie cutter. The bumps should be small and fairly even, running continuously around the full circumference of the disc. This textured edge is what will later suggest the tiny individual florets packed into a real daisy's center button, and it takes just a little more patience than a plain circle, but the payoff when the petals go on around it is completely worth it. Leave plenty of space on all sides for the petals that will radiate outward in the next step.

2

Draw the Petals

Step 2: Draw the Petals

Around the outside of the center disc, draw the daisy's petals — long, narrow shapes that radiate outward from the disc in every direction, like rays of light spreading from a small sun. Each petal should have a rounded tip and two gently curving sides that taper back to a narrow base where they meet the center. Fill in the full circle around the disc, spacing the petals as evenly as you can and making sure they all point away from the center rather than crossing over each other. A daisy typically has somewhere between fifteen and twenty petals visible in a front-facing view, so aim for that range — enough to fill the ring completely without the petals feeling cramped or overlapping awkwardly. The whole daisy head should look full and open, like it's facing the sun with its petals spread wide.

3

Draw the Stem

Step 3: Draw the Stem

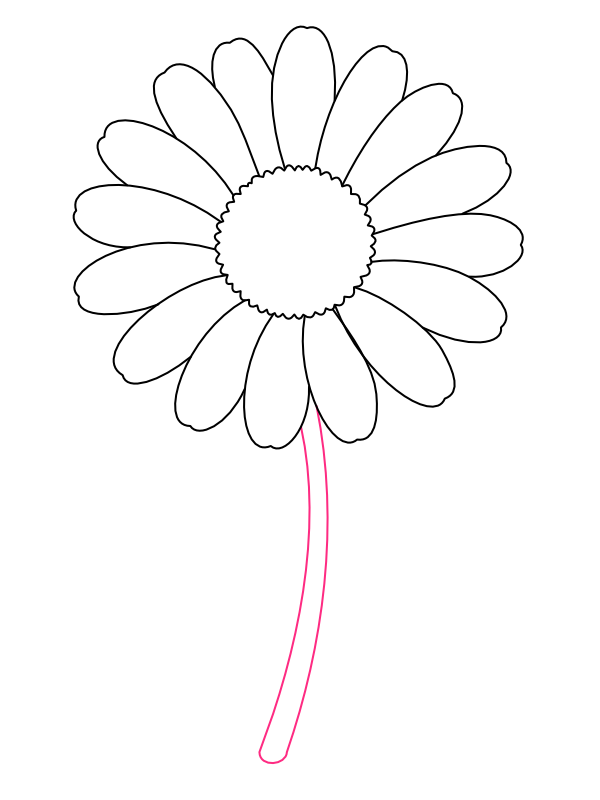
From the very bottom of the daisy head, draw a long stem curving gently downward toward the bottom of the page. Give the stem some thickness by drawing it as two parallel lines rather than a single thin stroke — a stem with visible width looks sturdy and botanical, while a single hairline looks more like a wire than a plant. Let it curve very slightly to one side as it descends rather than running perfectly straight; real flower stems have a gentle lean to them, and even a subtle curve gives the whole drawing a more natural, freshly-cut-from-the-garden quality.

4

Add the First Leaf

Step 4: Add the First Leaf

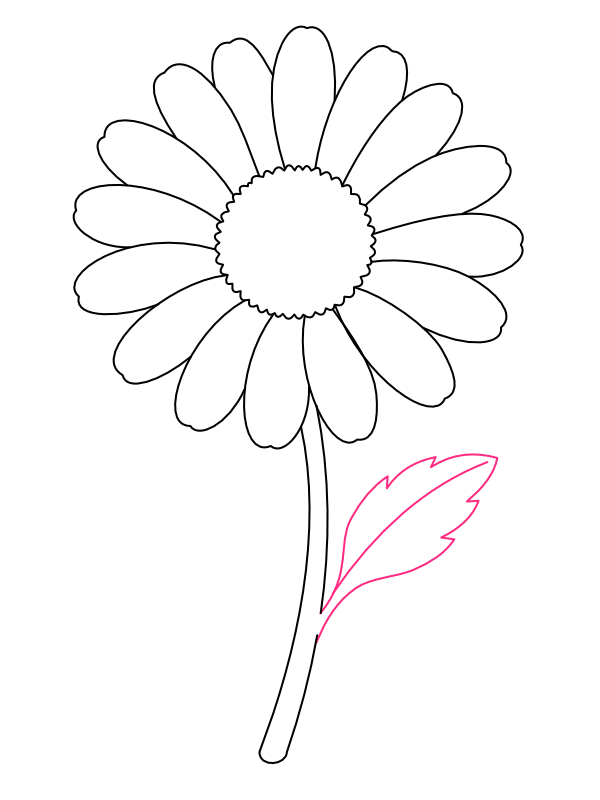
About midway down the stem, on the right side, draw the first leaf — a pointed oval shape that connects to the stem at a narrow base and widens toward the middle before tapering back to a sharp tip. Give the outer edge a series of small, irregular teeth or notches all the way around, like a mildly serrated edge, and draw a single center vein running from the base down through the middle of the leaf to the tip. The serrated edge and the center vein together are the two details that make this read as a real leaf rather than just a plain oval — they're quick to add and the difference is immediately visible.

5

Add the Second Leaf

Step 5: Add the Second Leaf

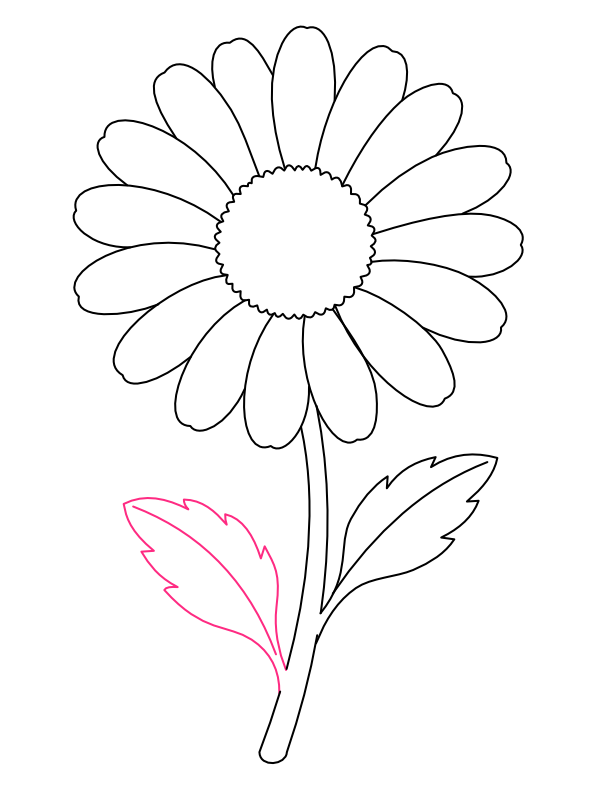
On the left side of the stem, a little lower than the first leaf, draw a second leaf using the same approach — pointed oval shape, serrated edge, center vein running through the middle. Let this one angle slightly differently from the first, either tilting at a different angle or pointing in a slightly different direction, so the two leaves don't look like carbon copies of each other. In real plants, leaves on opposite sides of a stem almost never match exactly, and that small variation between the two leaves is what makes the whole plant feel like it grew rather than was assembled.

6

Color Your Daisy

Step 6: Color Your Daisy

Now for the most satisfying part!

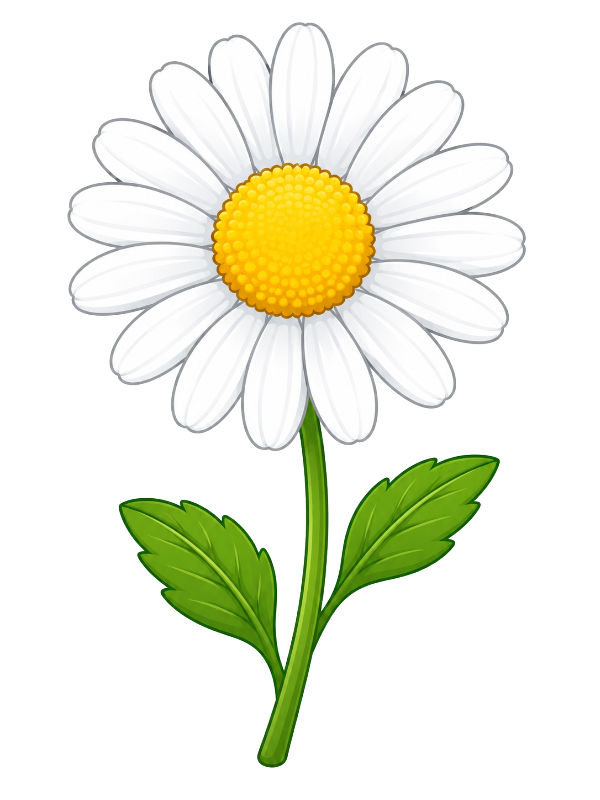
  • Petals: Pure white or very pale off-white — daisies are most classically white, and leaving the petals white against the other colors lets the center really pop. Add a very light grey or pale cool shadow along the base of each petal near the center disc and a subtle shadow line down one edge of each petal to give them gentle dimension
  • Center disc: Bright, warm golden yellow — vivid and saturated, since the bold yellow center is the visual anchor the whole flower is built around. Add a slightly deeper orange-yellow toward the outer edge of the disc and keep the very center of the button a bright, light yellow
  • Stem: Fresh medium green, with a slightly darker green along one edge to suggest the rounded, cylindrical shape of the stem in light
  • Leaves: Medium to bright green matching the stem, with slightly darker shading in the recessed areas between the leaf teeth and along the center vein, and a lighter highlight stripe running down the center of each leaf toward the tip

Once the color fills in, that clean white-and-yellow combination is exactly what makes a daisy so immediately recognizable and so endlessly appealing — your flower looks ready to be picked and tucked behind an ear. 🌼

Final Thoughts

The part of this drawing that most people underestimate is Step 2 — the petals. There are quite a few of them, and it can feel repetitive to draw each one individually all the way around the disc. But the trick is not to aim for perfect uniformity. Real daisy petals vary slightly in width and length, and a ring of petals where each one is slightly different from its neighbors looks far more natural and convincing than a ring of identical ones. Draw them one at a time, check the spacing after every few, and by the time you've gone all the way around, you'll have built a flower that looks genuinely full and alive.

Once you're comfortable with this straight-on view, try drawing the daisy from a slight side angle so the center disc becomes an oval and the petals on one side are partially hidden — it gives the flower a more dynamic, three-dimensional quality that's worth trying once the basic structure feels natural.