How to Draw a Crown for Beginners

June 28, 2026
8 Steps
AR Drawing Logo

AR Drawing

Drawing Tutorials

A crown is one of those drawings that looks like it belongs in a museum case, all gold and gemstones and fancy curls, but it's really just a band with a few decorative shapes layered on top. Once you see the scalloped arches and the central spike as separate, simple pieces instead of one complicated mess, the whole thing becomes a lot less daunting — and a lot more fun to draw. Let's get drawing!

How to Draw a Crown for Beginners
What You Will Need
  • Pencil
  • Eraser
  • White paper
  • Black marker or fine-liner (optional)
  • Colored pencils, crayons, or markers
1

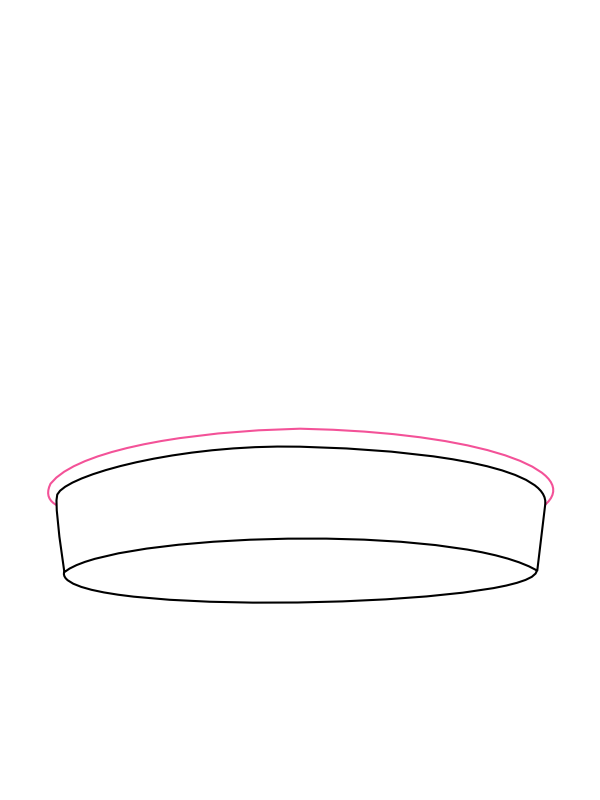
Draw the Base Band

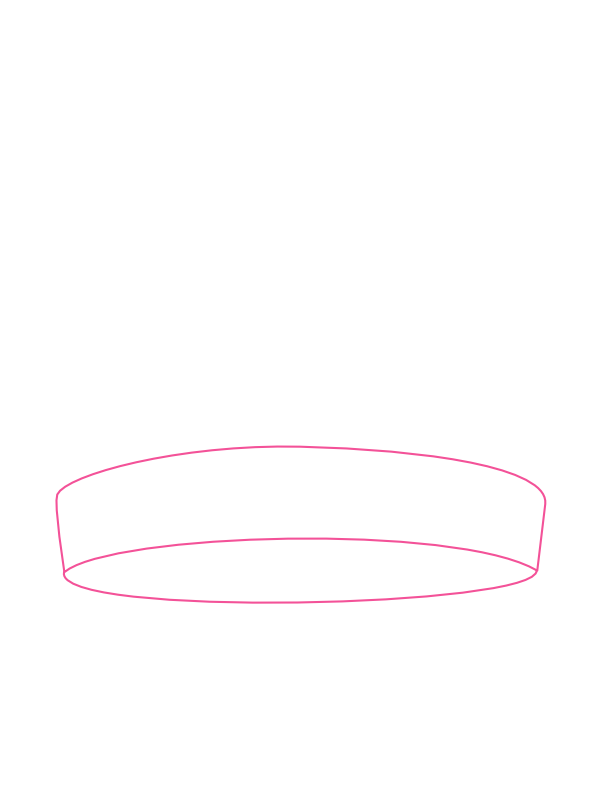
Step 1: Draw the Base Band

In the lower-middle of your paper, draw a wide, flattened cylinder shape: a long oval for the top edge and a matching oval beneath it for the bottom edge, connected by two short curved lines on the left and right sides. This band is the part that wraps around the head, so give it plenty of width — everything else in this tutorial gets built on top of it.

2

Add the Rolled Top Edge

Step 2: Add the Rolled Top Edge

Just above the top edge of the band, draw a second curved line tracing closely alongside the first one from one side to the other. This creates a slightly raised lip along the top, giving the band a finished, rolled edge instead of a flat cut-off line.

3

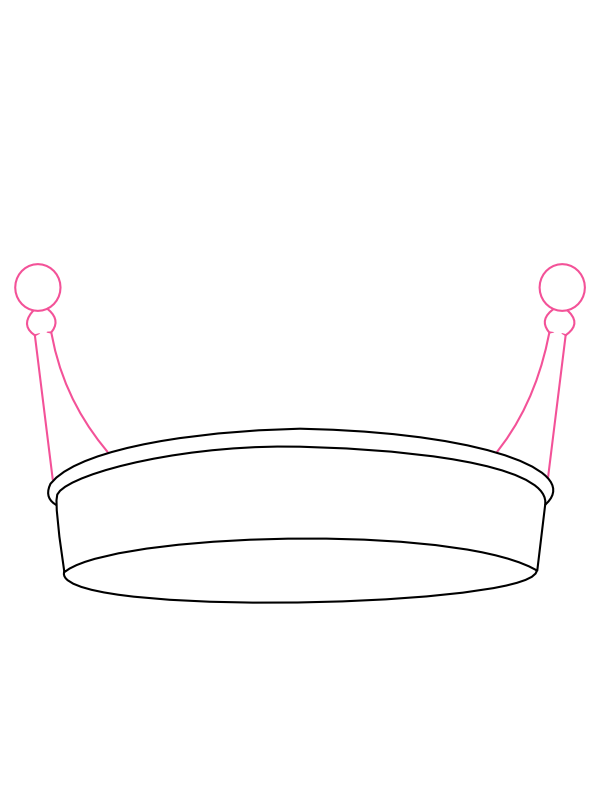
Add the Outer Finials

Step 3: Add the Outer Finials

At the far left and far right ends of the band, draw a thin stem rising upward, with a small circle sitting on top of each one. These little ball-tipped spikes are called finials, and placing them first at the outer corners gives you a clear frame to build the rest of the crown's silhouette within.

4

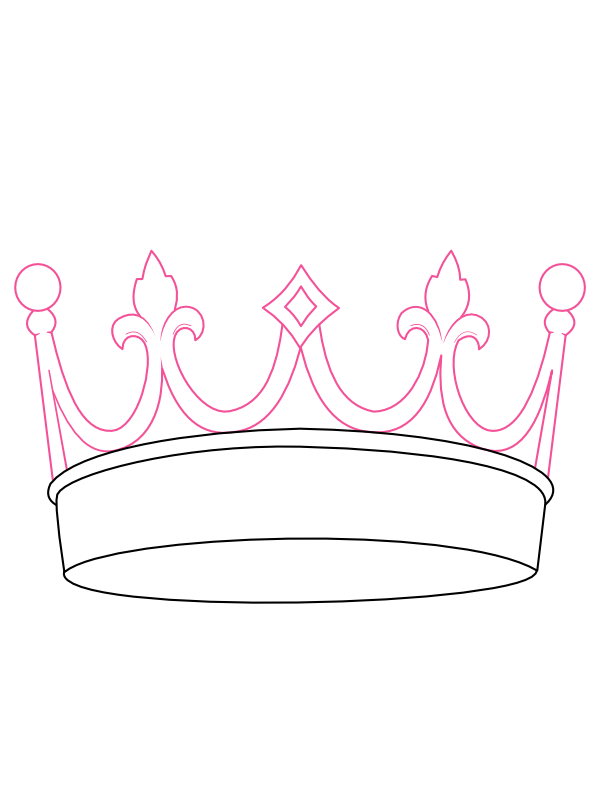
Draw the Scalloped Arches and Side Points

Step 4: Draw the Scalloped Arches and Side Points

Between the two finials, draw a series of dipping, scalloped curves that rise and fall across the top of the band like little waves. Add two smaller pointed leaf-like shapes partway between the center and each outer finial, and place a diamond shape right in the middle of the band's top edge. This crisscrossing arch pattern is what gives a crown its instantly recognizable outline.

5

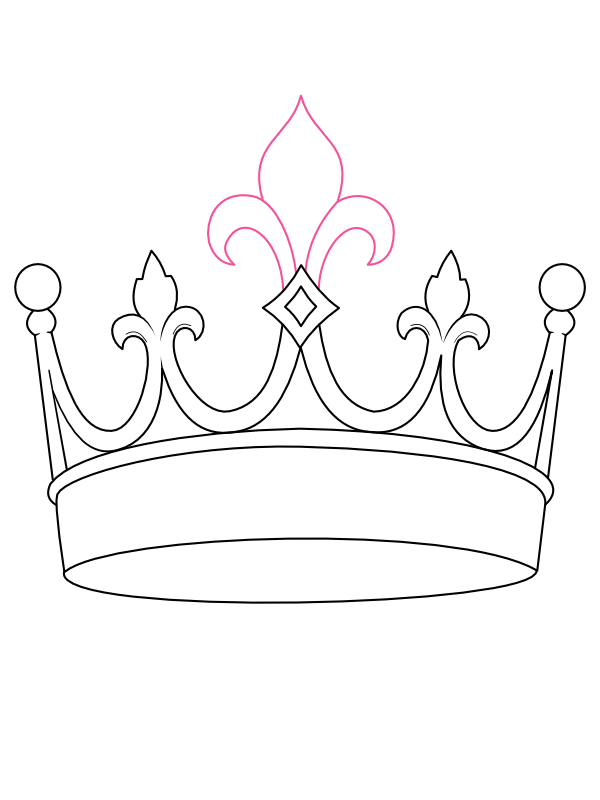
Add the Central Fleur-de-Lis

Step 5: Add the Central Fleur-de-Lis

Rising up from the diamond shape in the center, draw a tall, flame-like spike that flares out into two curling petals near its base. This classic fleur-de-lis shape is the centerpiece of the whole design, so let it stand noticeably taller than every other point around it.

6

Define the Bottom Edge

Step 6: Define the Bottom Edge

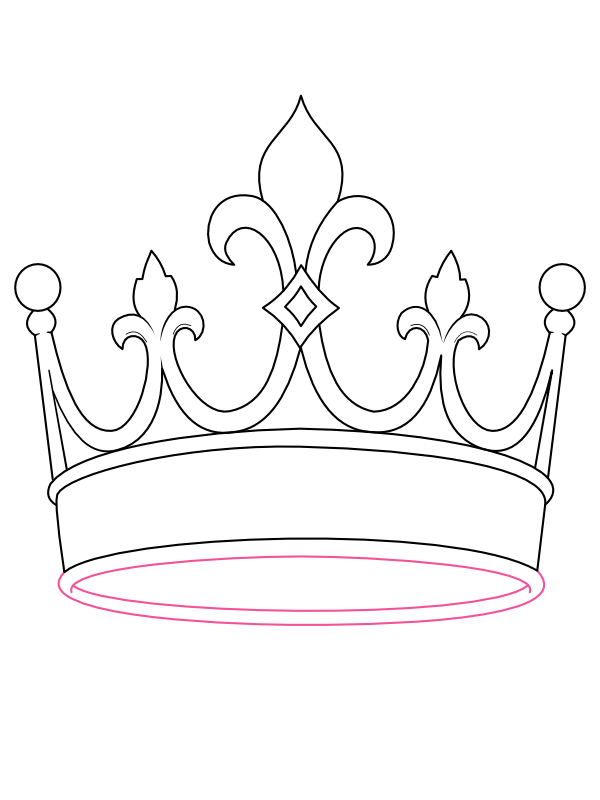
Just below the bottom edge of the band, draw one more thin curved line running alongside it, the same way you did for the top edge back in Step 2. This second line gives the base of the crown some visual weight and thickness, so it doesn't look like a flat ribbon.

7

Add the Gemstones

Step 7: Add the Gemstones

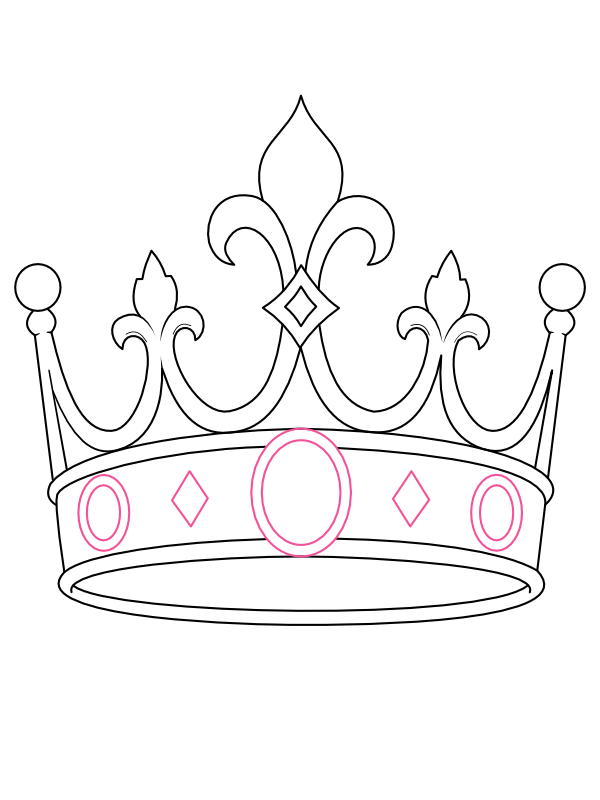
Along the front of the band, draw one larger oval gem in the very center, then add two smaller diamond shapes spaced evenly on either side of it, and finish with two more small oval gems placed further out toward each end. These five jewels running across the band are what really push the design from "metal headband" to "treasure."

8

Color Your Crown

Step 8: Color Your Crown

Now for the part that makes it shine!

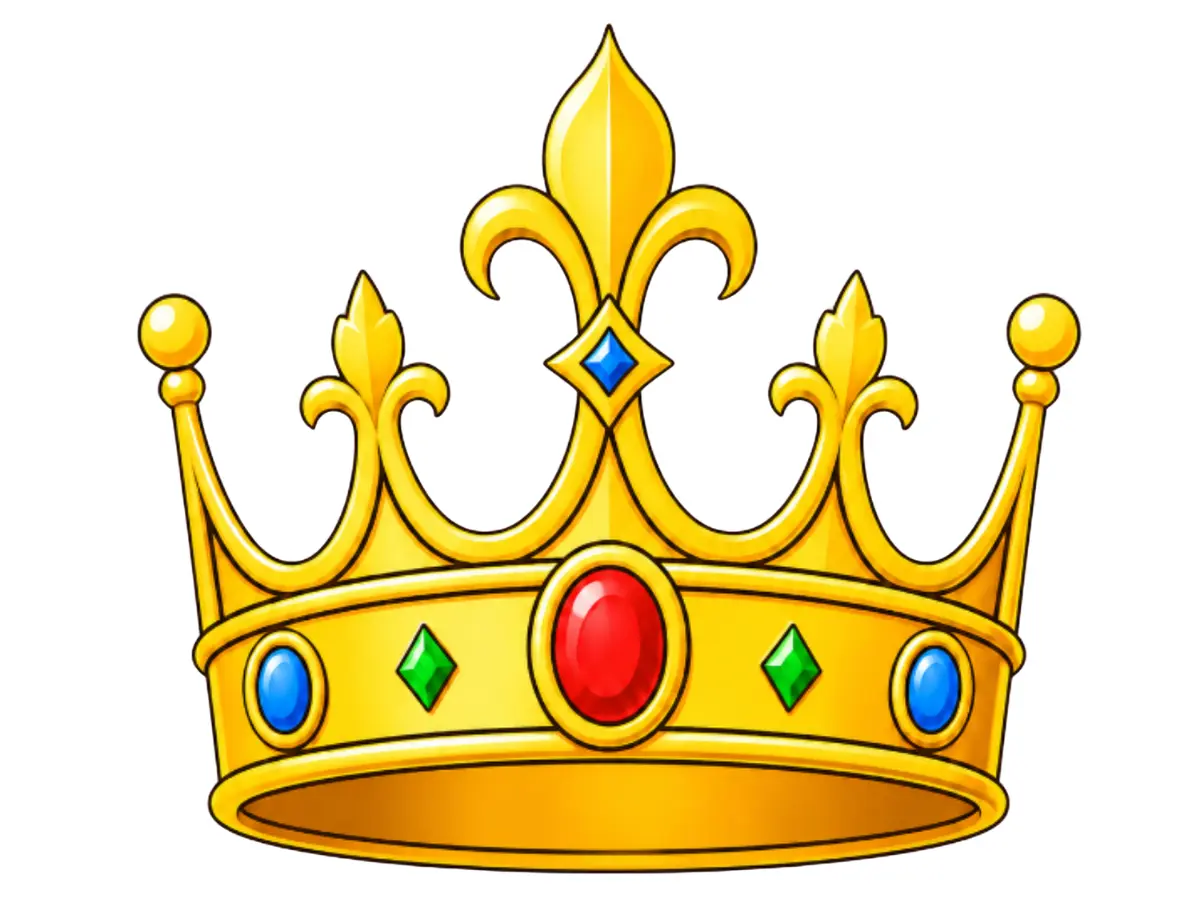
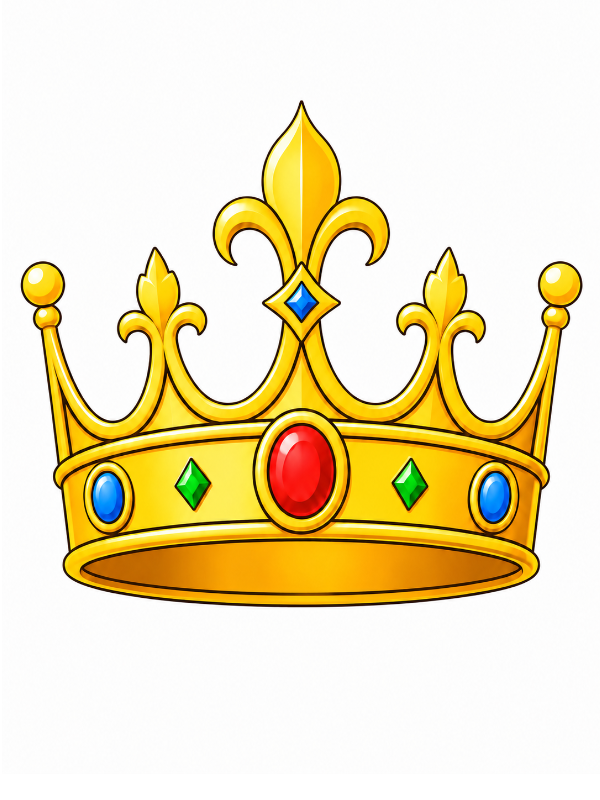
  • Metal (band, rim, finials, fleur-de-lis, arches): Bright gold, with a deeper golden shade along the lower edges for dimension
  • Center oval gem: Deep red
  • Top diamond, beneath the fleur-de-lis: Rich blue
  • Side diamond gems: Emerald green
  • Outer oval gems: Rich blue
  • Highlights: A few light yellow streaks on the gold for that polished, gleaming look

Once the gold and gemstone colors go on, the whole crown suddenly looks like it's worth a king's ransom. 👑

Final Thoughts

What's nice about a crown is that nearly every "fancy" detail is just a simple shape repeated or layered with the next one — finials, scallops, a fleur-de-lis, and a row of gems, each easy enough on its own. Once the structure feels familiar, you can change the number of points, swap the central spike for a cross or a single tall gem, or rearrange the jewel colors entirely.

Try making a second version with cooler tones — silver metal with sapphire and amethyst gems gives a completely different, almost icy feel compared to the warm gold-and-ruby look here, even though the underlying shapes stay exactly the same.

More Drawing Tutorials

How to Draw a Whale for Beginners

How to Draw a Whale for Beginners

A whale is one of the most joyful animals you can draw — that big, round, generous body, the happy little smile that seems to stretch almost half the length of the face, and that iconic water spout shooting up from the blowhole like the whale is celebrating simply by existing.

9 Steps
Read
How to Draw a Yacht for Beginner

How to Draw a Yacht for Beginner

A yacht looks like one of those drawings that requires a ruler, a steady hand, and maybe a degree in naval architecture. But the whole thing is really just a long, flat hull shape that you stack level after level on top of — cabin, then flybridge, then upper deck, each one smaller than the last. Once that foundation hull is in place, the rest of the yacht practically builds itself upward like a little floating building.

11 Steps
Read
How to Draw a Burger

How to Draw a Burger

A burger is basically a stack of the most satisfying shapes you can possibly draw — a big fluffy dome on top, a few layers of ingredients peeking out in the middle, and a wide sturdy bun holding everything together at the bottom. Every layer is a different texture and a different silhouette, which means that even before the color goes on, the finished drawing already looks mouthwatering just from the outlines alone.

8 Steps
Read
How to Draw a Cupcake

How to Draw a Cupcake

A cupcake topped with swirly frosting and colorful sprinkles is one of the most delightful things you can draw. It is sweet, cheerful, and surprisingly simple once you break it down into a few basic shapes. Learn how to draw it step-by-step!

9 Steps
Read