How to Draw a Cute Puppy

June 24, 2026
10 Steps
AR Drawing Logo

AR Drawing

Drawing Tutorials

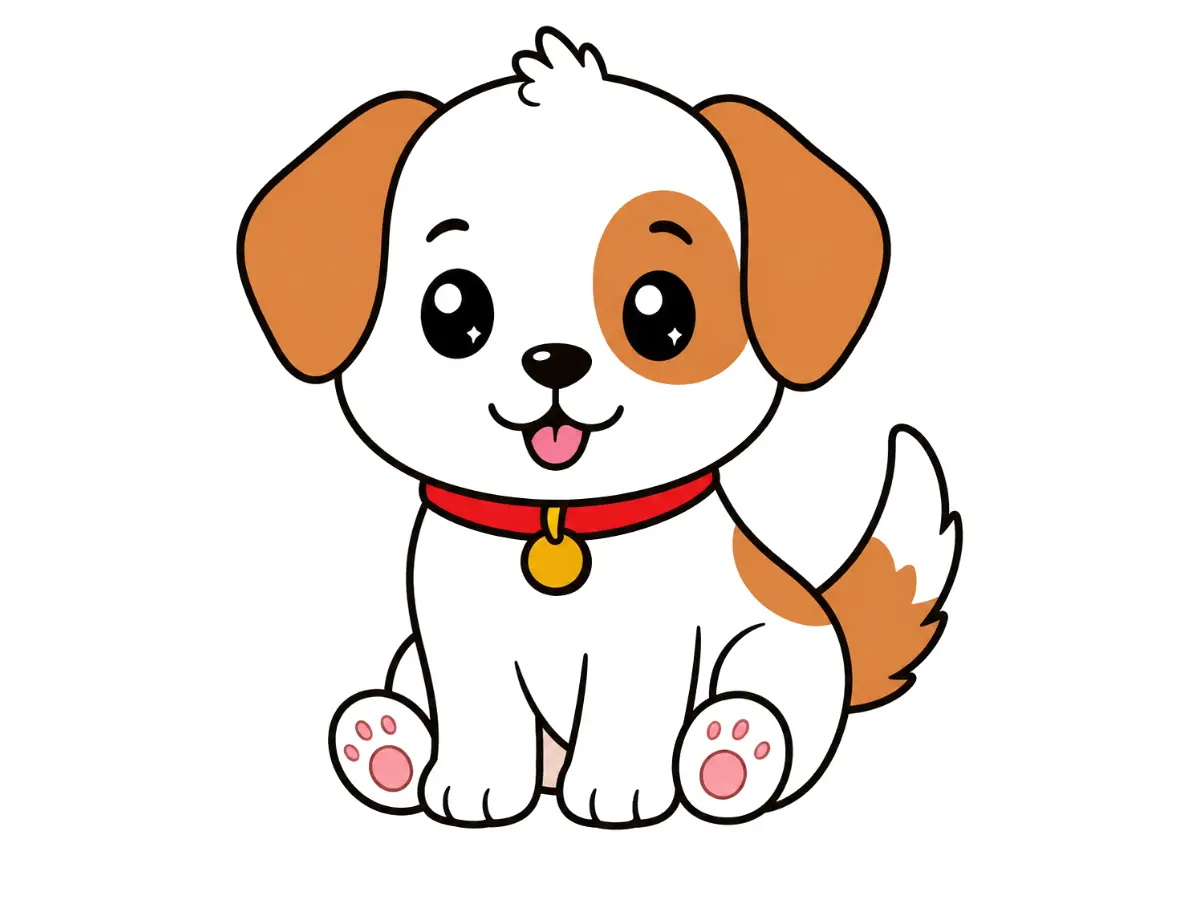
There's a reason puppy drawings show up everywhere from greeting cards to phone cases — those big glassy eyes, floppy ears, and a tiny wagging tail just make people smile. The good news is you don't need fancy art skills to capture that charm on paper. This little pup is built entirely from soft, rounded shapes, so even if you've never drawn an animal before, you'll end up with something genuinely cute by the time you're done. Let's get started!

How to Draw a Cute Puppy
What You Will Need
  • Pencil
  • Eraser
  • White paper
  • Black marker or fine-liner (optional)
  • Colored pencils, crayons, or markers
1

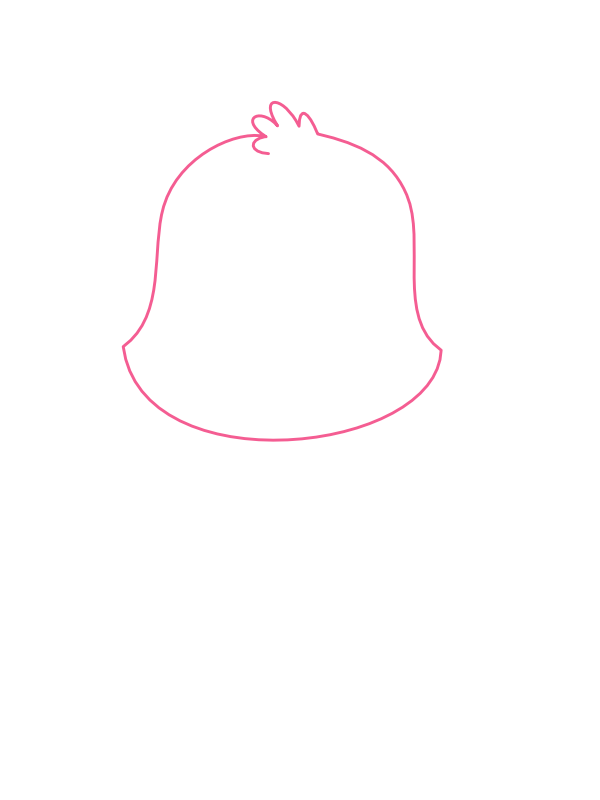
Draw the Head Shape

Step 1: Draw the Head Shape

In the upper half of your paper, draw a rounded shape that's wider at the bottom and curves in slightly near the top — think of an acorn turned upside down, or a soft bell shape. At the very top of this shape, add three small pointed zigzag lines close together to form a tiny tuft of fur. This one small detail instantly gives your puppy a playful, just-woke-up kind of charm.

2

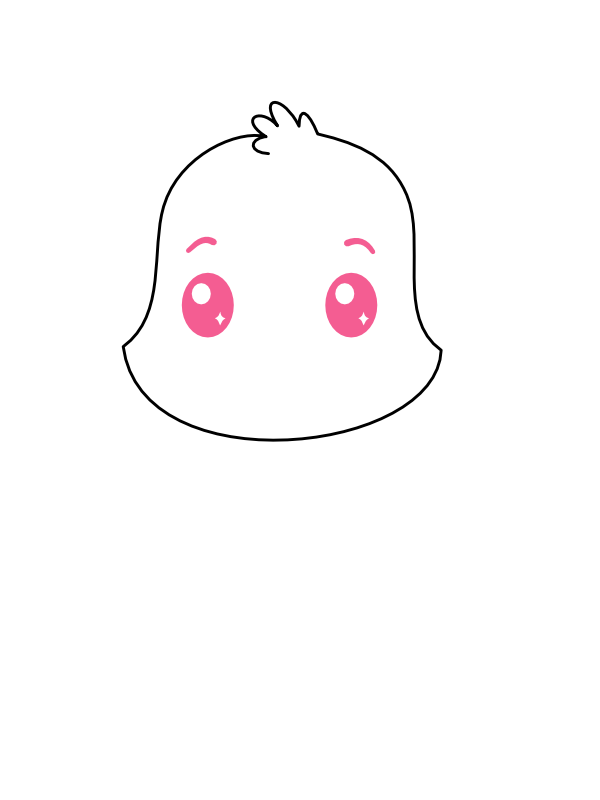
Add the Eyebrows and Eyes

Step 2: Add the Eyebrows and Eyes

A little above the center of the face, draw two short curved lines for the eyebrows, leaving some space between them. Just below each one, draw a rounded oval and fill it in completely, leaving a small white oval near the top for a glossy highlight, plus a tiny sparkle beside it. These big, shiny eyes do most of the work when it comes to making your puppy look adorable, so take your time getting them nice and round.

3

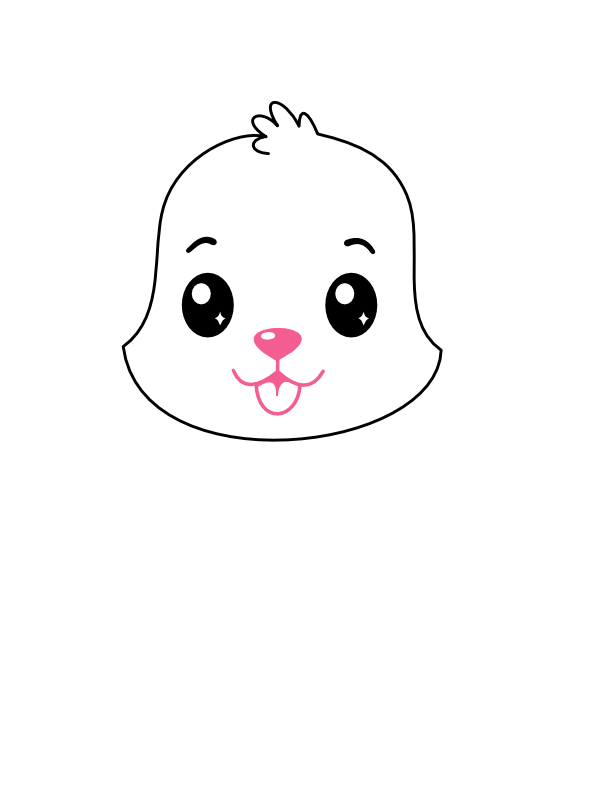
Draw the Nose and Smiling Mouth

Step 3: Draw the Nose and Smiling Mouth

Between the eyes and slightly below them, draw a small rounded nose — a little heart-shaped or teardrop shape works nicely. Right underneath it, draw a wide curving smile made of two soft lines that meet near the nose, then tuck a small rounded tongue into the center of the mouth, poking out just slightly. This open, happy mouth is what really brings the face together.

4

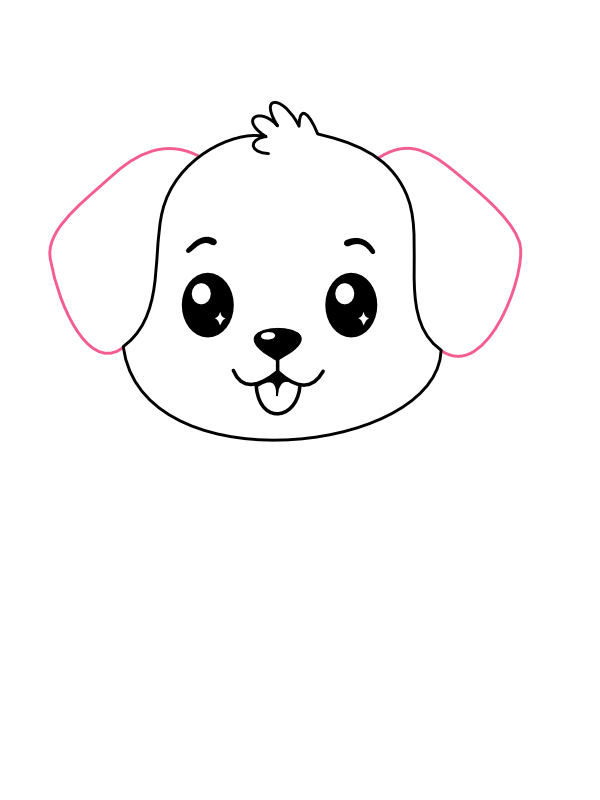
Add the Floppy Ears

Step 4: Add the Floppy Ears

On either side of the head, draw two large rounded ears that hang down past the bottom of the face. Keep the shapes soft and droopy rather than pointed — pointed ears would make this look more like a little fox, and we want that classic, huggable puppy look instead.

5

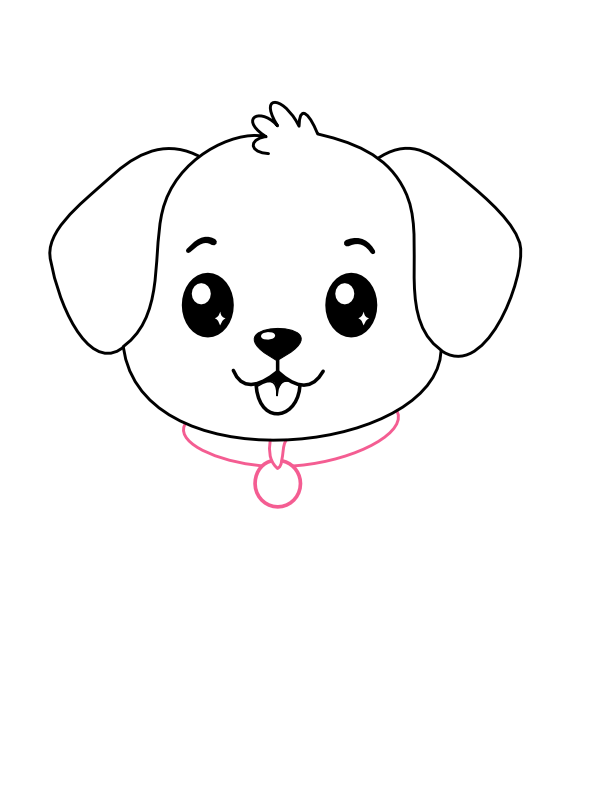
Draw the Collar and Tag

Step 5: Draw the Collar and Tag

Along the bottom edge of the head, draw a curved band stretching from one side to the other to form a collar sitting around the neck. From the middle of that band, hang a small circle using a short connecting line, just like the little ID tags real dogs wear.

6

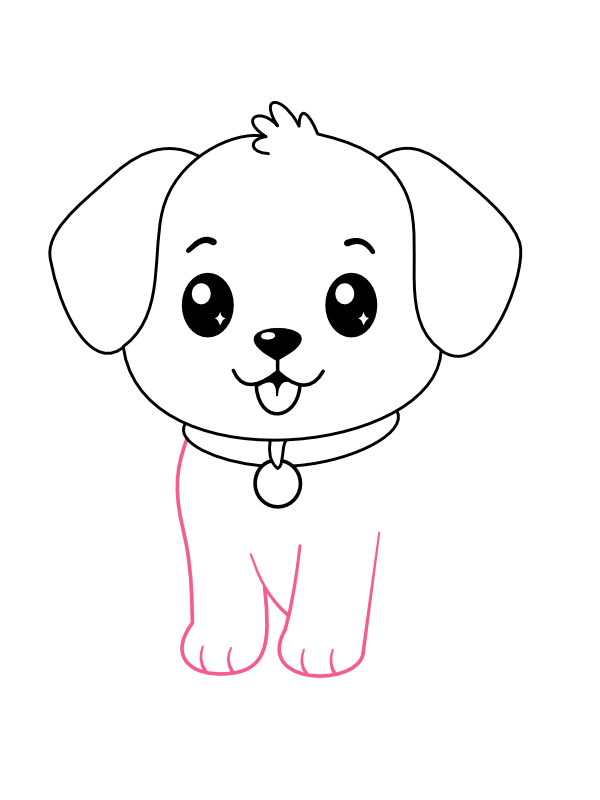
Draw the Front Legs and Paws

Step 6: Draw the Front Legs and Paws

Beneath the collar, draw two short, rounded legs standing close together, with a paw at the bottom of each one. Add a few small curved lines at the base of each paw to suggest little toes. This gives your puppy a body to sit on and starts turning it from a floating head into a full little character.

7

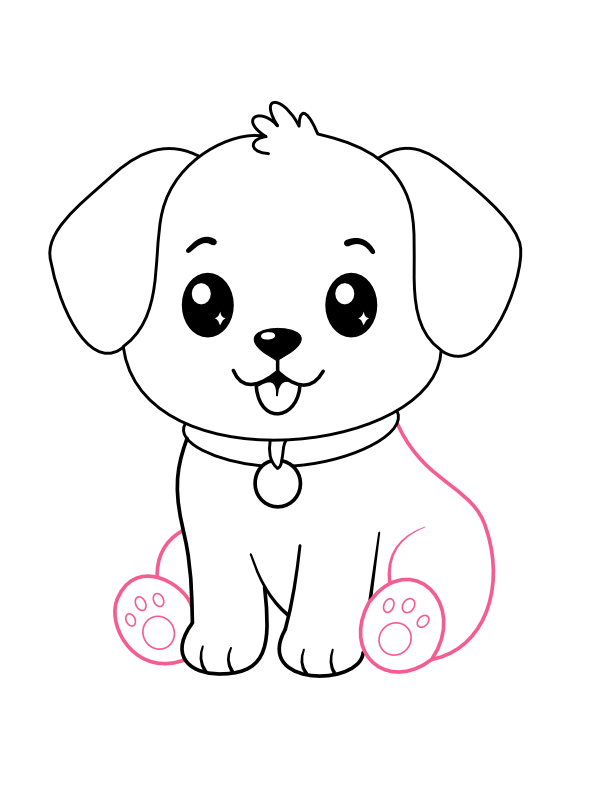
Detail the Paw Pads and Back Curve

Step 7: Detail the Paw Pads and Back Curve

Inside each paw, draw one larger oval pad shape with three or four tiny circles inside it for the toe pads — this small paw-print detail makes a surprisingly big difference. While you're working down there, sketch a curved line along the right side of the body, flowing upward from the back leg toward where the tail is about to go.

8

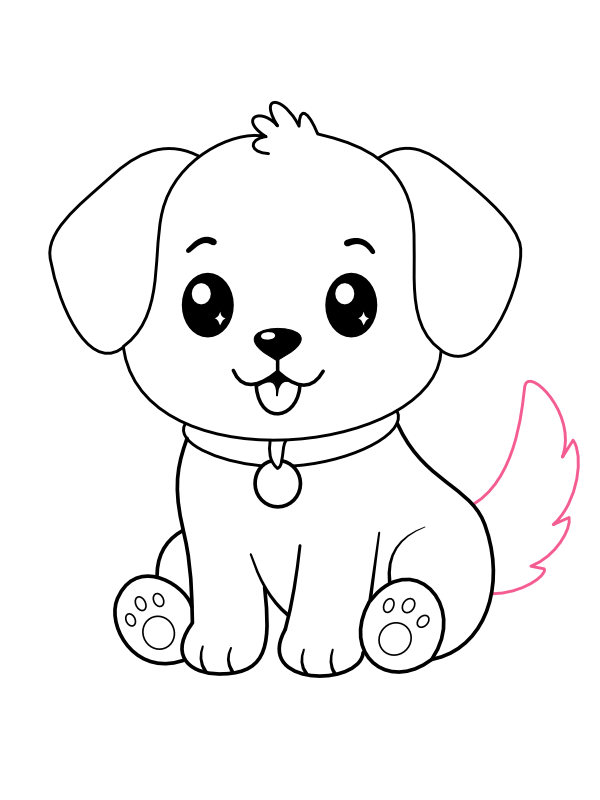
Draw the Fluffy Tail

Step 8: Draw the Fluffy Tail

Following the curve you just sketched, draw a tail that sweeps upward and curls over at the top. Build it out of two or three overlapping scalloped layers, almost like stacked waves or feathers, instead of one flat shape — this is what gives the tail its fluffy, wagging look.

9

Mark the Eye Patch and Body Patch

Step 9: Mark the Eye Patch and Body Patch

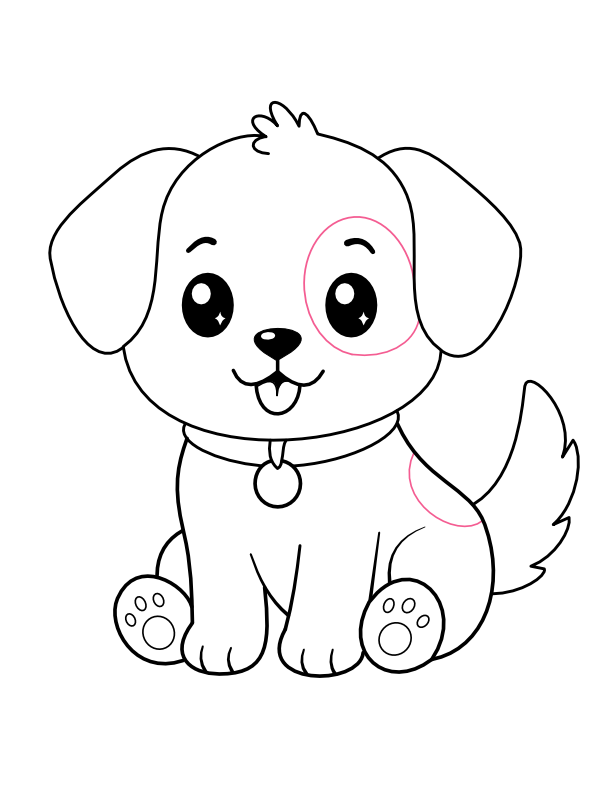
Lightly sketch a circle around one of the eyes, and a small curved patch shape near the hip where the back leg meets the body. These are just guide marks for now, but they'll tell you exactly where to add color in the next step, so it's worth placing them evenly before moving on.

10

Color Your Puppy

Step 10: Color Your Puppy

Time for the fun part!

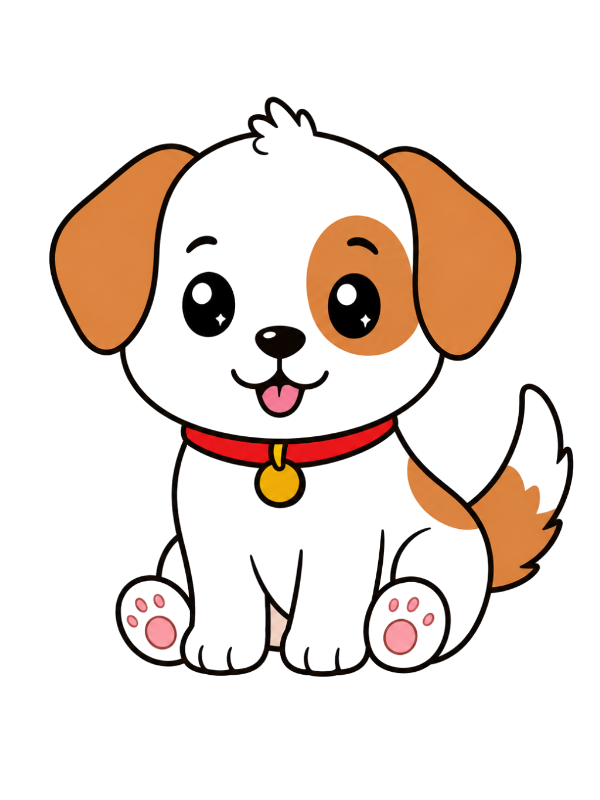
  • Fur base: White or warm cream
  • Ears: Tan or orange-brown
  • Eye patch: Matching tan or orange-brown
  • Hip patch: Matching tan or orange-brown
  • Tail: White with tan or orange-brown tips along the curled layers
  • Nose: Black
  • Tongue: Soft pink
  • Collar: Red
  • Tag: Gold or yellow
  • Paw pads: Light pink inside white paws

Once the color goes on, those patch outlines from Step 9 suddenly make sense, and your puppy goes from a simple sketch to a proper little character. 🐶

Final Thoughts

What makes this puppy fun to draw is how much personality comes from just a handful of curves and ovals — there's no shading trick or tricky perspective involved, just shapes layered in the right order. Once the head-and-ear combination feels comfortable, you can change the pose, move the patch placement, or try a different ear shape and end up with a whole litter of different-looking pups.

Don't feel locked into the tan-and-white color scheme either. A black-and-white version, an all-golden retriever-style pup, or even a dalmatian-inspired spotted coat would all work beautifully with this same set of shapes.