
How to Draw a Bonsai Tree

July 18, 2026
11 Steps
AR Drawing Logo

AR Drawing

Drawing Tutorials

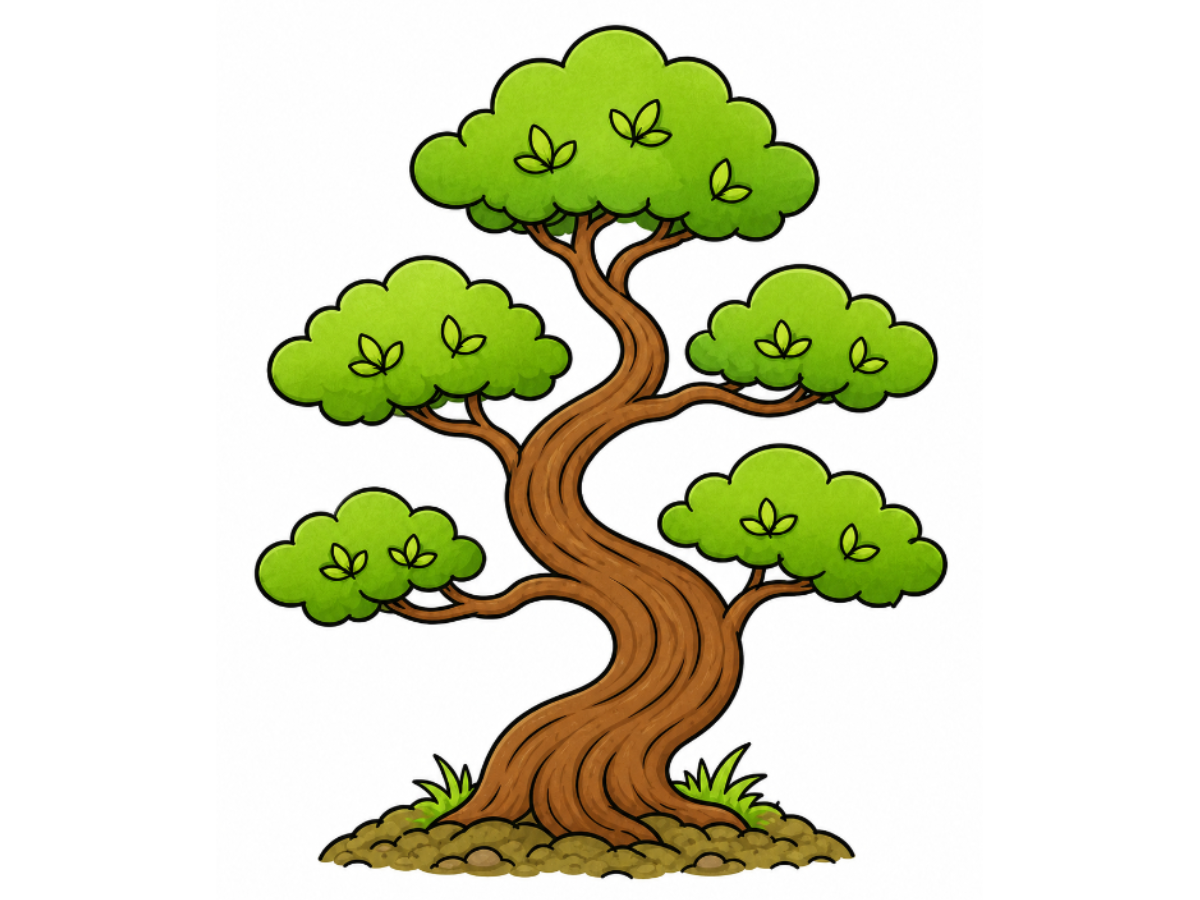
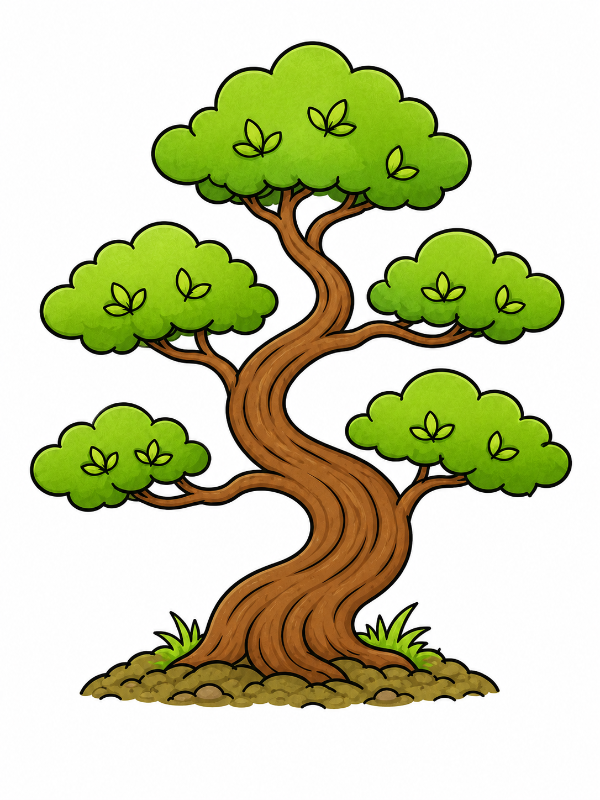
A bonsai tree has a quiet kind of drama to it — that gnarled, winding trunk that bends and curves like it's telling a story, topped with soft clusters of foliage spreading out at different heights. It looks like the kind of drawing that takes serious skill, but the secret is that the whole thing comes together from one flowing double-line trunk and a handful of cloud-shaped canopies repeated at different sizes. Once you see how the shapes repeat, the whole tree stops feeling intimidating and starts feeling like a rhythm you can settle into. Let's get drawing!

How to Draw a Bonsai Tree
What You Will Need
  • Pencil
  • Eraser
  • White paper
  • Black marker or fine-liner (optional)
  • Colored pencils, crayons, or markers
1

Draw the Base of the Trunk

Step 1: Draw the Base of the Trunk

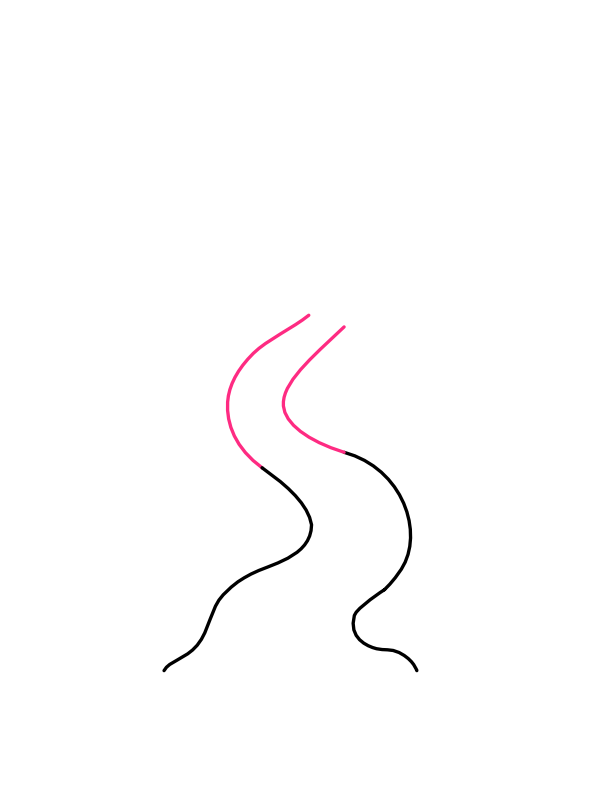
Near the bottom of your page, draw two separate wavy lines rising upward side by side, each one bending gently left and right rather than running straight. These two lines are the beginning of the trunk, and keeping them as two distinct paths rather than a single thick line is what will eventually let the trunk look twisted and sculptural instead of flat. Let the curves feel a little unpredictable here — bonsai trunks are prized precisely for their irregular, weathered shapes.

2

Continue the Trunk Upward

Step 2: Continue the Trunk Upward

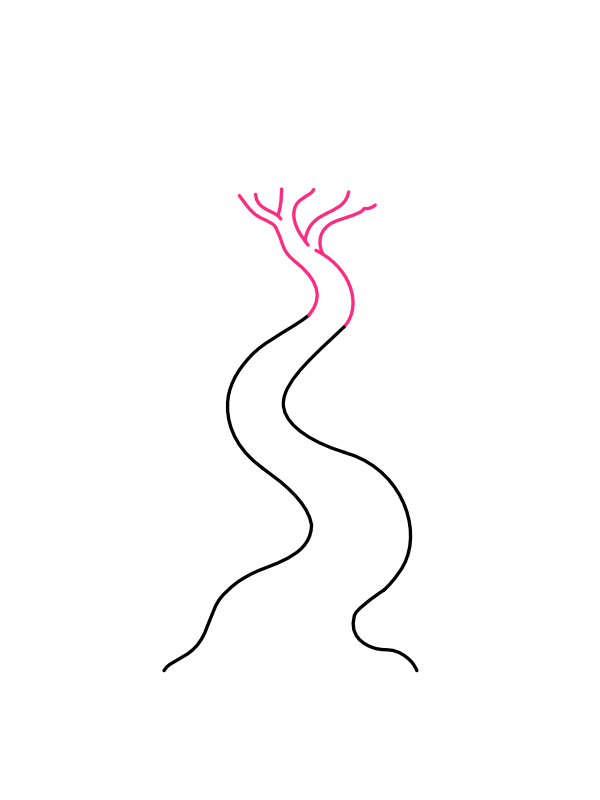
Extend both trunk lines further up the page, letting them continue their gentle back-and-forth sway. The two lines should stay roughly parallel to each other throughout, tracing the same winding path a little distance apart, like a wide ribbon twisting as it rises rather than two unrelated strokes. This continued curve is what gives a bonsai its signature aged, weathered character, so don't be afraid to let the trunk lean and bend more than feels natural for an ordinary tree.

3

Split the Top into Branches

Step 3: Split the Top into Branches

At the top of the trunk, let the two lines separate outward into three or four thinner branch lines, each one forking off at a slightly different angle and height. Add a couple of very short twig marks branching off these main limbs near their tips. This is the point where the trunk stops being a single winding column and starts spreading out into the structure that will support all the leafy canopies in the steps ahead.

4

Draw the First Canopy

Step 4: Draw the First Canopy

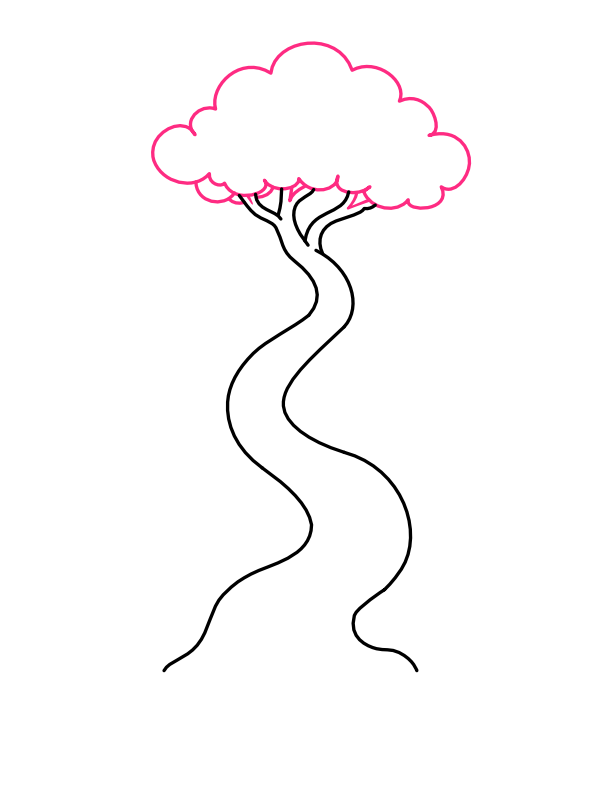
At the very top of the tree, around the highest branch tips, draw a cloud-like cluster of soft, rounded bumps — several overlapping curves forming one puffy, uneven mass rather than a single smooth circle. This bumpy, cloud-shaped canopy is the classic bonsai silhouette, and getting comfortable with this one repeating shape now will make the remaining canopies much quicker to draw.

5

Draw the Second Canopy

Step 5: Draw the Second Canopy

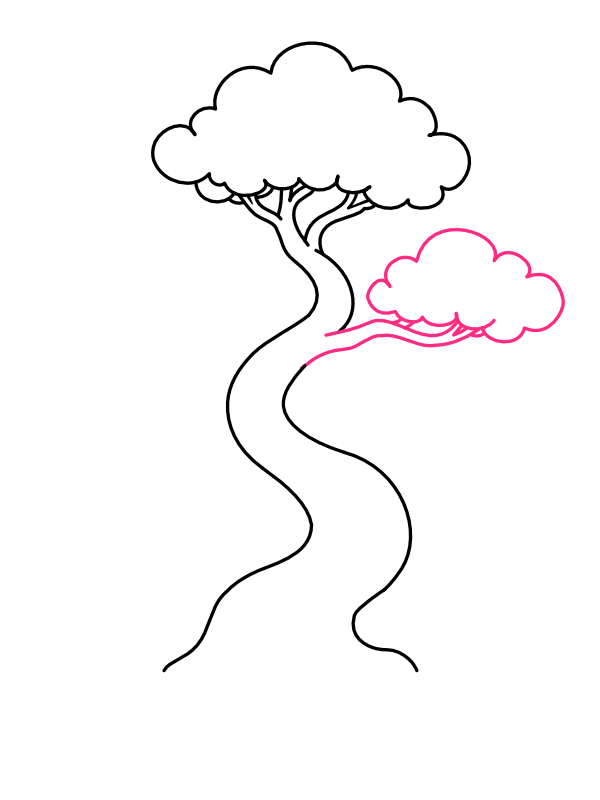
Partway down the trunk, where one of the mid-level branches reaches outward, draw a second cloud-shaped canopy using the same bumpy, overlapping technique as the first one, but noticeably smaller in size. Let this canopy sit at a different height and angle than the top one, extending out to the side rather than stacking directly beneath it, since bonsai trees are prized for the way their foliage spreads outward in layers rather than piling straight up.

6

Draw the Third Canopy

Step 6: Draw the Third Canopy

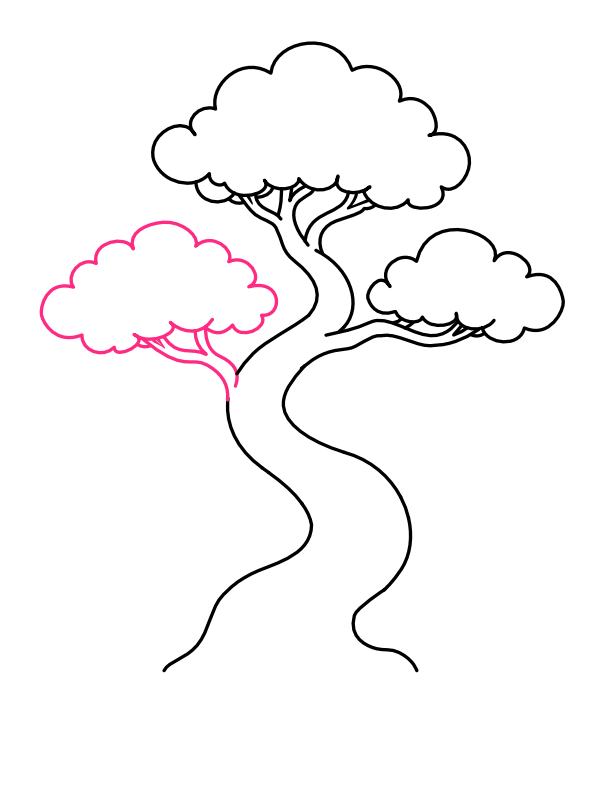
On the opposite side of the trunk, add another cloud-shaped canopy at a similar or slightly different height to the second one, again keeping it smaller than the top canopy from Step 4. With three canopies now in place, the tree should already be showing that classic asymmetrical, wind-swept silhouette that makes bonsai so visually distinct from an ordinary tree shape.

7

Draw the Fourth Canopy

Step 7: Draw the Fourth Canopy

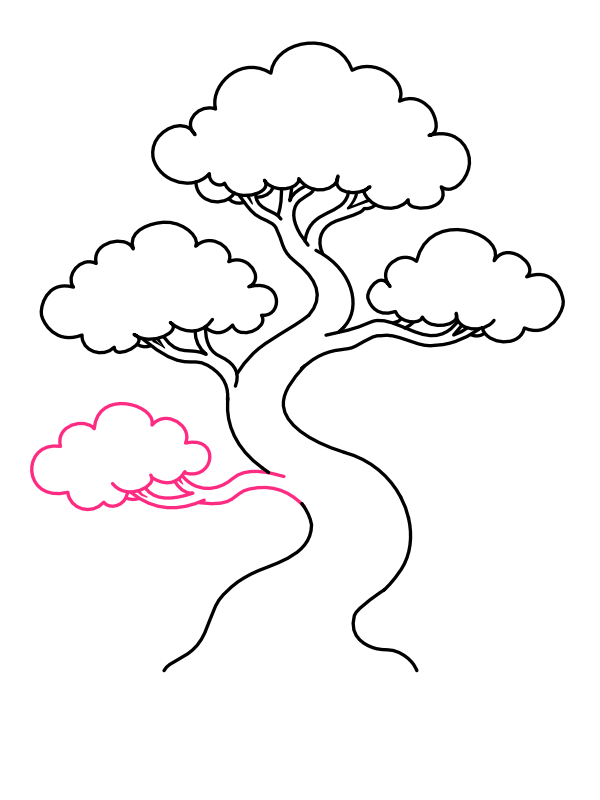
Lower down the trunk, add a fourth cloud-shaped canopy branching off toward one side, keeping it roughly similar in size to the previous two smaller canopies. By this point you'll notice the same bumpy cluster shape getting faster and more comfortable to draw each time, since it's really just the same technique from Step 4 repeated at a new position.

8

Draw the Fifth Canopy

Step 8: Draw the Fifth Canopy

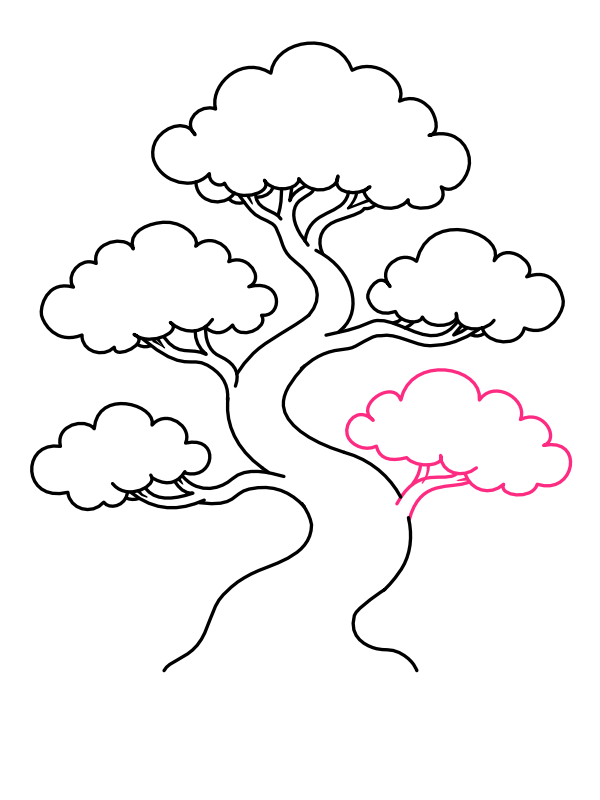
Near the base of the branching structure, add one final cloud-shaped canopy on the remaining open side of the trunk. With five canopies now spread across different heights and angles, the tree should feel fully balanced, with foliage radiating outward in a way that looks natural rather than symmetrical or evenly spaced.

9

Add the Ground and Grass

Step 9: Add the Ground and Grass

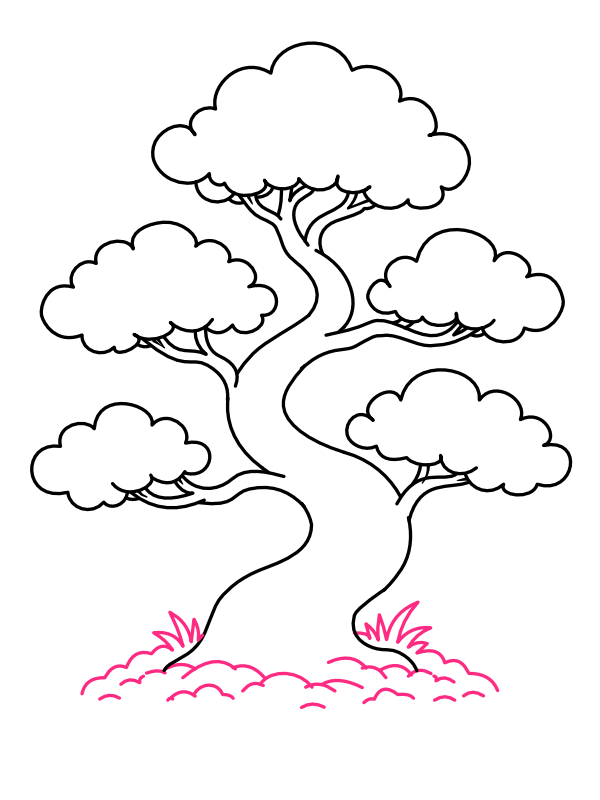
At the very bottom of the trunk, draw a low, uneven mound shape to represent the base of soil or a shallow bonsai pot the tree is rooted in, with a scattering of small bumps along its top edge for texture. On either side of the trunk base, add a few simple blades of grass poking up — short, pointed strokes gathered in small clusters. This grounds the whole tree, giving it a sense of place rather than leaving it floating on an empty page.

10

Add Bark Texture and Leaf Details

Step 10: Add Bark Texture and Leaf Details

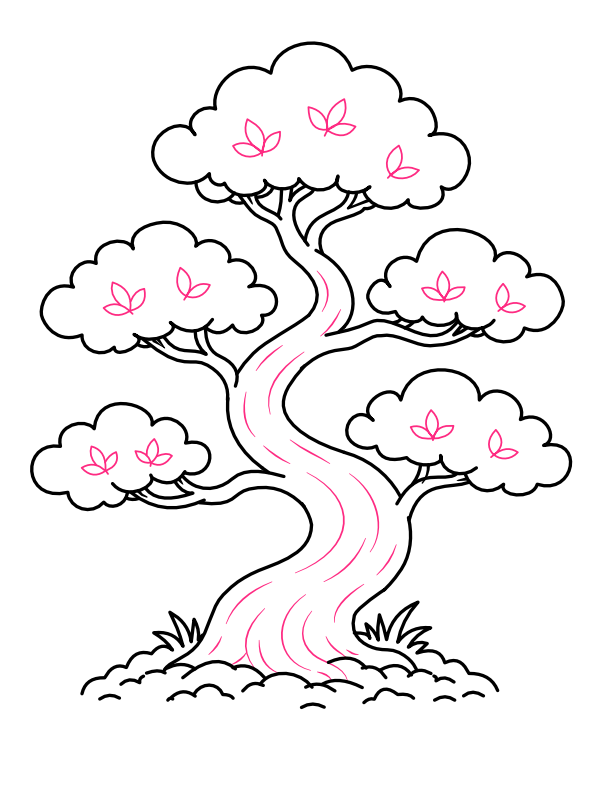
Along the length of the trunk, add a few thin curved lines following the direction of its twist, to suggest the ridged, textured bark real bonsai trunks develop over years of careful shaping. Inside each of the five canopies, add a small scattering of simple three-pointed leaf shapes, just a few per cluster rather than filling the whole area, to hint at individual leaves without overcomplicating the soft, cloud-like silhouette you already built.

11

Color Your Bonsai Tree

Step 11: Color Your Bonsai Tree

Now for the most satisfying part!

  • Trunk: Warm medium brown, with the two original winding lines shaded slightly darker to emphasize the twisted, sculptural shape
  • Trunk highlight: A lighter tan or golden brown running along the outer curve of the twist, to suggest smooth, sunlit bark
  • Canopies: Fresh, vivid green, filling each of the five cloud-shaped clusters
  • Canopy shading: A deeper green tucked into the undersides and overlapping bumps of each canopy, to give the foliage some rounded depth
  • Leaf details: A slightly lighter green or pale yellow-green for the small individual leaf shapes scattered through the canopies, so they stand out just enough against the base green
  • Ground and pot base: Warm earthy brown, with a few small grey pebble shapes tucked in for texture
  • Grass blades: Bright green, matching the canopy tone

Once the color goes on, that rich brown twisting trunk beneath five rounded pockets of green gives the whole drawing the calm, deliberate elegance real bonsai trees are known for — like a tiny ancient forest shaped by patient hands. 🌳

Final Thoughts

The step that tends to take the most getting used to is Steps 1 and 2, where the trunk's double-line twist has to feel deliberate and sculptural rather than shaky or random. It helps to think of the trunk as one continuous ribbon rather than two separate lines — sketch the overall path lightly first, then trace both edges of that path rather than drawing each line independently, since that keeps the width consistent as the trunk winds up the page. The five canopies that follow are much more repetitive and forgiving, and once you've drawn the first one confidently in Step 4, the rest come together quickly using the exact same bumpy cloud technique.

Once this version feels comfortable, try shaping the trunk with an even more dramatic lean or a partial loop, the way some real bonsai styles train the trunk to curve almost horizontally — it's a fun way to push the same basic technique into a bolder, more sculptural silhouette. 🌳

More Drawing Tutorials

How to Draw a Cute Duck for Beginners

How to Draw a Cute Duck for Beginners

There is something endlessly likable about a little duck — that round body, the curved neck, and a bill that always looks like it is mid-quack. It is also one of the friendliest animals to draw, since the whole shape comes together from one flowing neck line and a couple of soft, rounded blobs. Perfect for anyone who wants a satisfying result without needing to fuss over tricky proportions.

7 Steps
Read
How to Draw a Cute Owl

How to Draw a Cute Owl

Owls are one of those animals that look incredibly detailed and complex, but are actually a lot of fun to draw once you break them down into simple shapes. With their big round eyes, fluffy feathers, and wise expressions, cartoon owls always turn out charming and full of character.

8 Steps
Read
How to Draw a Cute Parrot

How to Draw a Cute Parrot

A parrot is one of those animals that people tend to assume is too complicated to draw — all those overlapping feathers, the hooked beak, the layered wing, the long sweeping tail. But once you break it down, the whole bird is really just a rounded head, a teardrop-shaped body, and a handful of feather layers stacked on top of each other in a very predictable order. The beak is the one part that takes a little practice to get right, but once it clicks, you'll find yourself wanting to draw parrots in every color imaginable.

9 Steps
Read
How to Draw a Cute Puppy

How to Draw a Cute Puppy

There's a reason puppy drawings show up everywhere — those big glassy eyes, floppy ears, and a tiny wagging tail just make people smile. Learn how to draw a cute puppy step-by-step!

10 Steps
Read