How to Draw a Cute Owl

June 18, 2026
8 Steps
AR Drawing Logo

AR Drawing

Drawing Tutorials

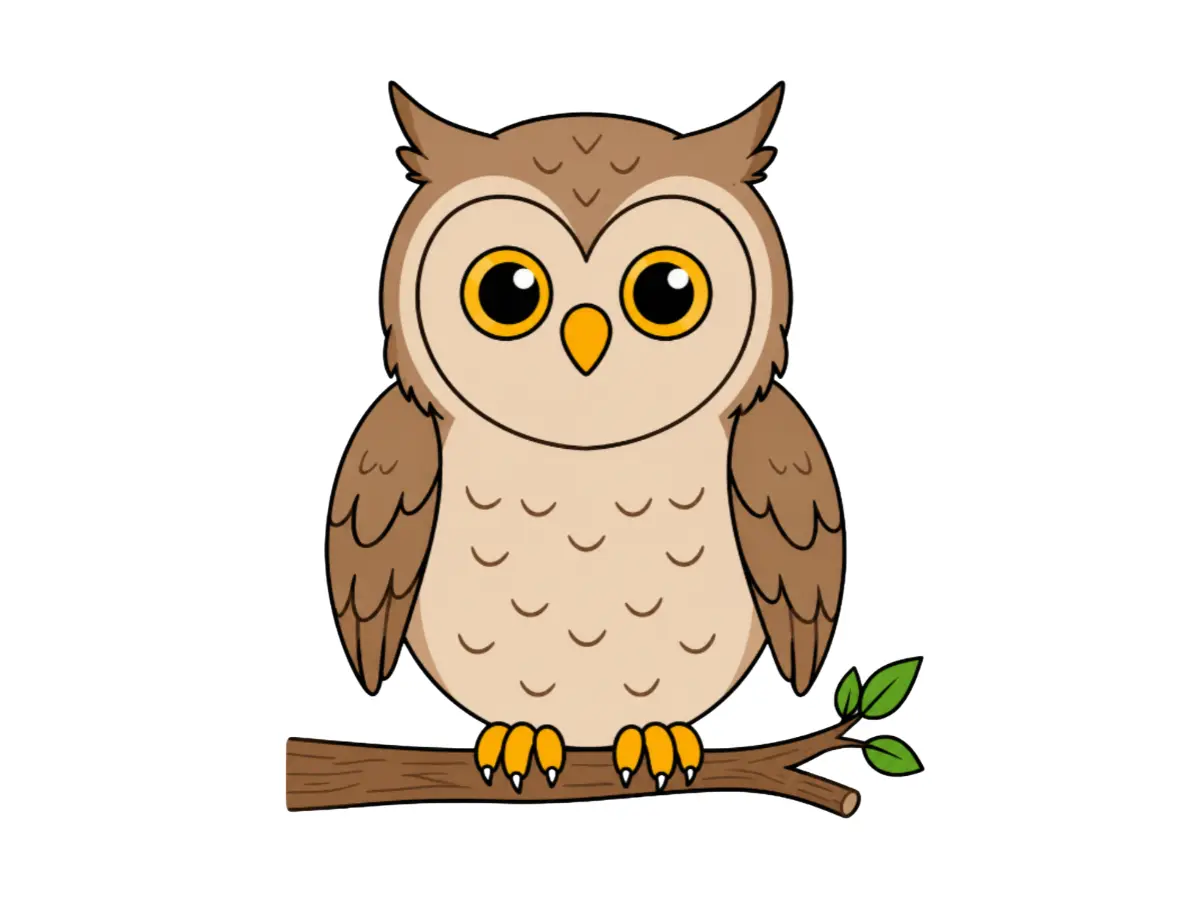
Owls are one of those animals that look incredibly detailed and complex, but are actually a lot of fun to draw once you break them down into simple shapes. With their big round eyes, fluffy feathers, and wise expressions, cartoon owls always turn out charming and full of character. In this tutorial, we will draw a cute owl sitting comfortably on a tree branch — a classic and beautiful pose that every beginner can achieve. Grab your pencil and let us get started!

How to Draw a Cute Owl
What You Will Need
  • Pencil
  • Eraser
  • White paper
  • Black marker or fine-liner (optional)
  • Colored pencils, crayons, or markers
1

Draw the Head and Ear Tufts

Step 1: Draw the Head and Ear Tufts

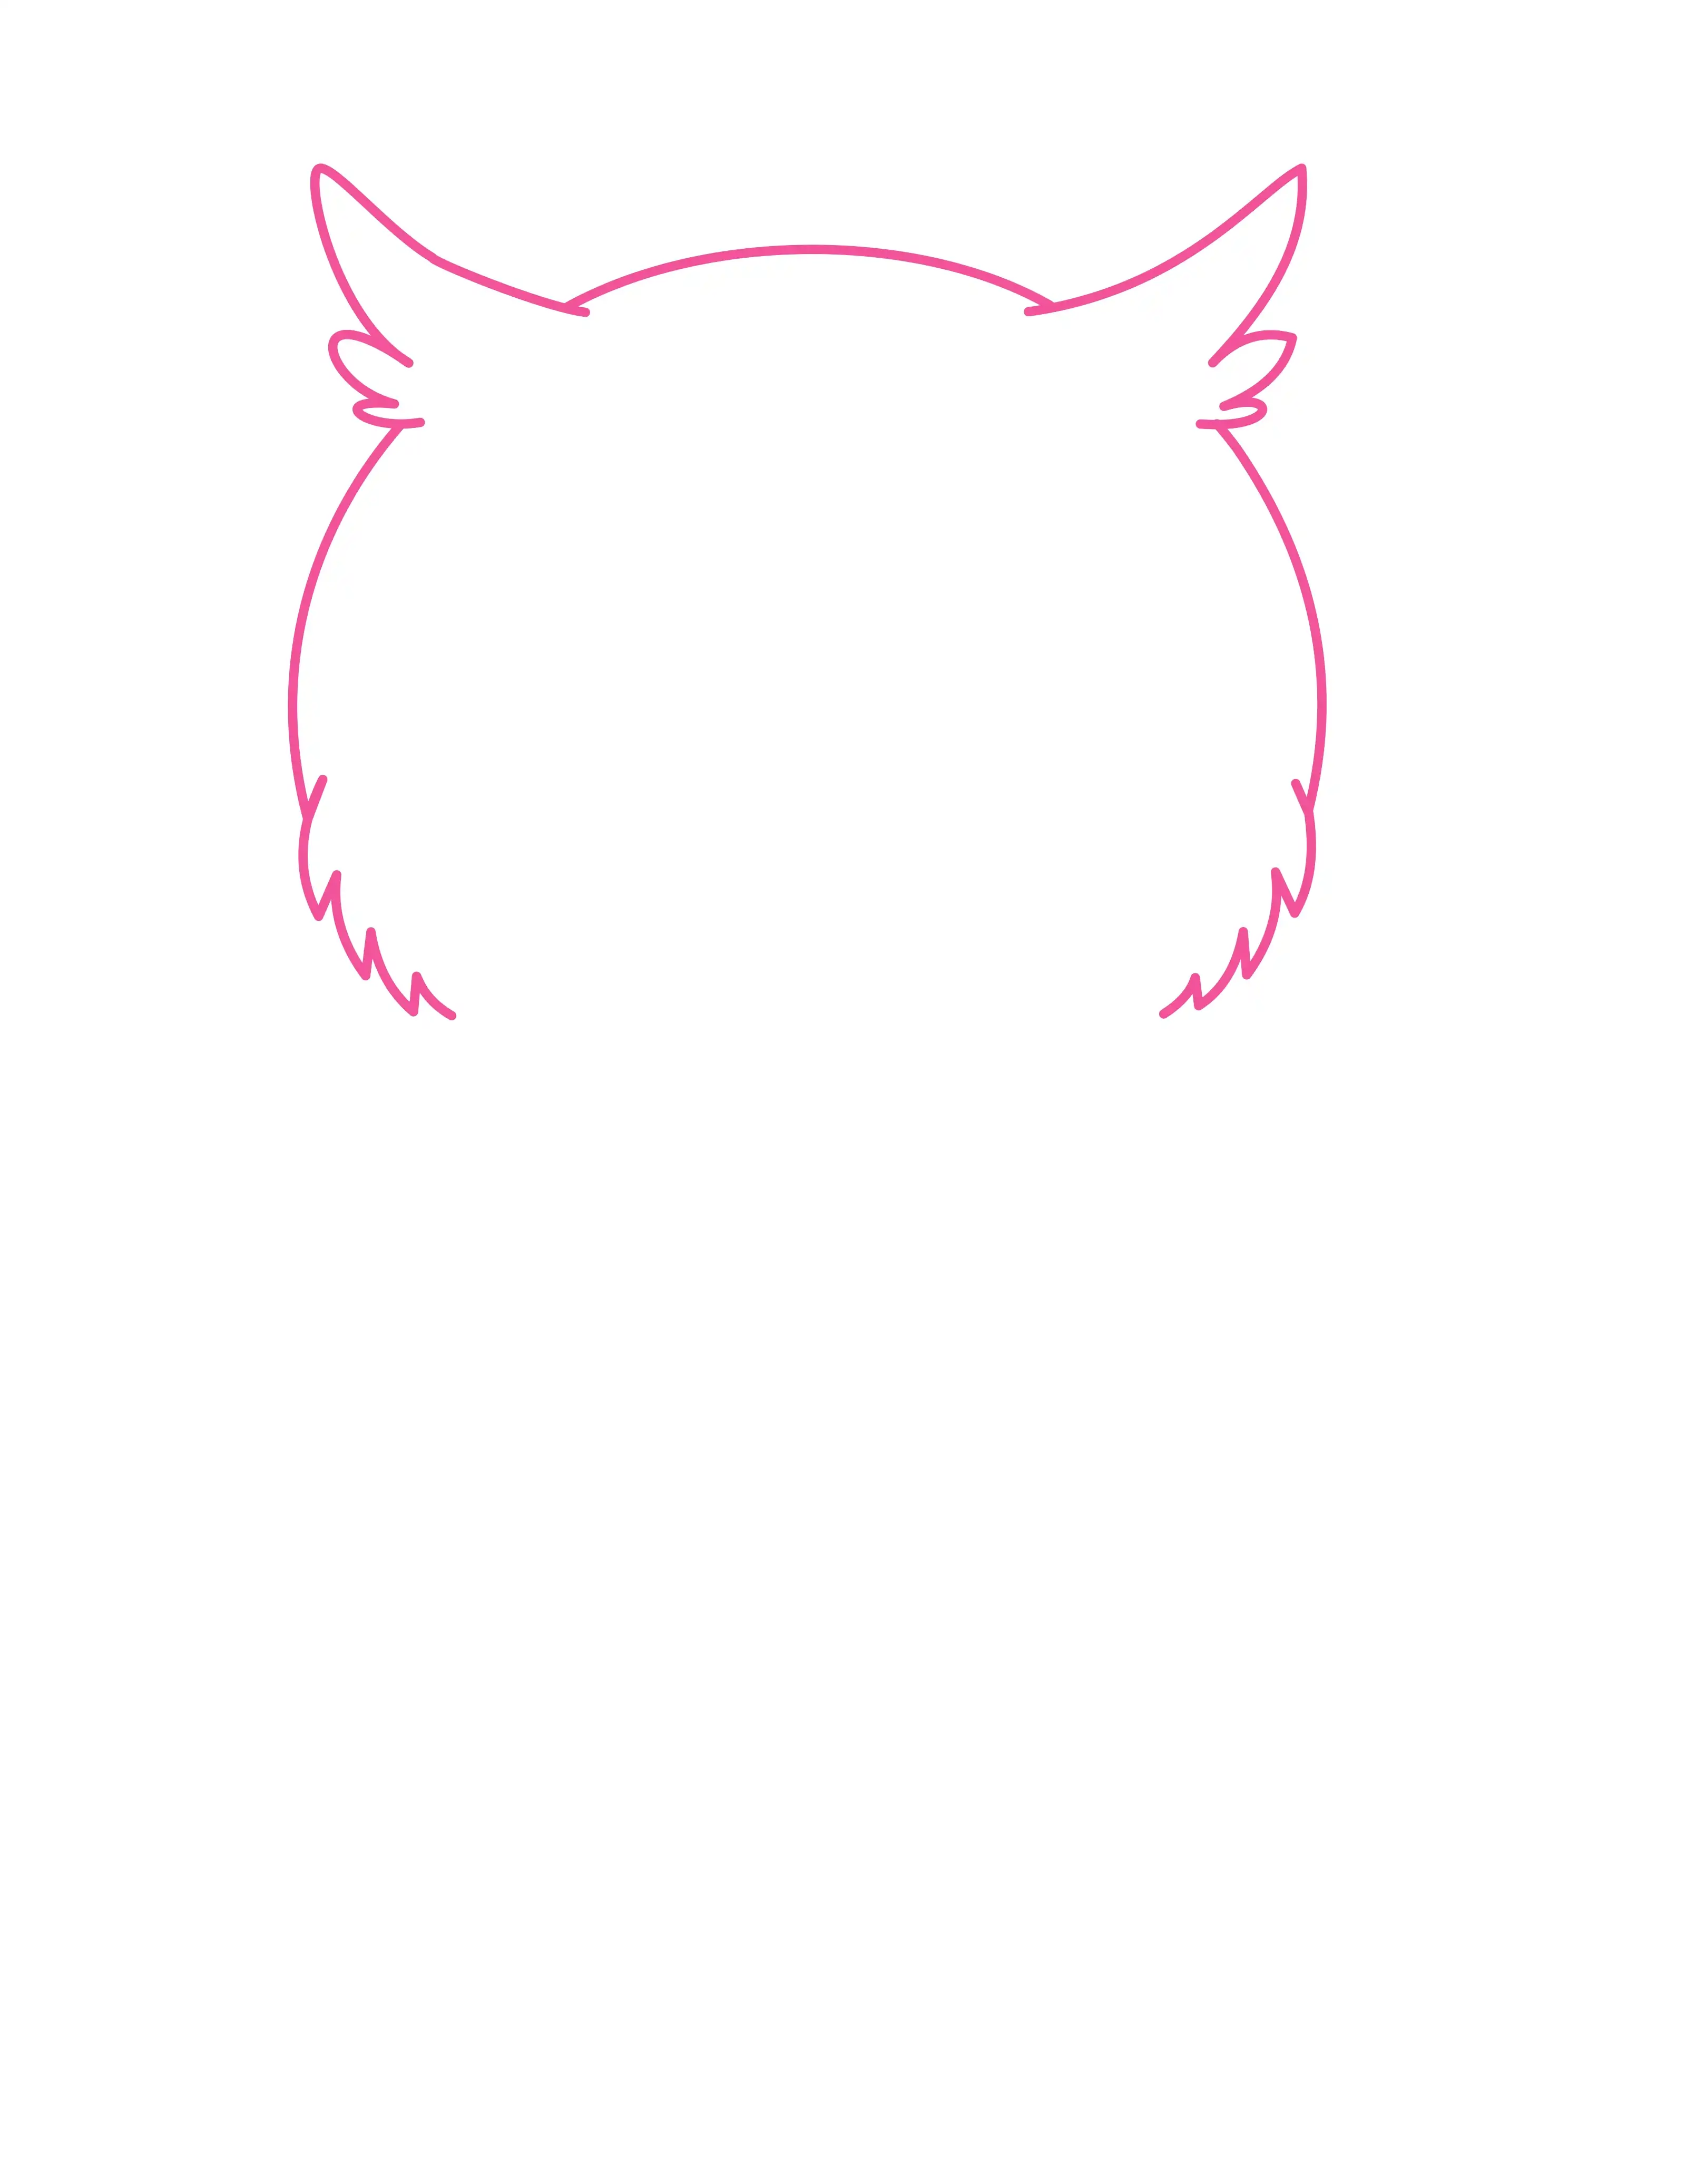
Start by drawing a large, round shape for the owl's head. The outline should not be a smooth circle — add small jagged or spiky bumps along the lower sides to show the fluffy feathered texture. At the top of the head, draw two pointed ear tufts, one on each side, curving slightly outward. These tufts immediately give your owl its classic look.

2

Add the Facial Disc, Eyes and Beak

Step 2: Add the Facial Disc, Eyes and Beak

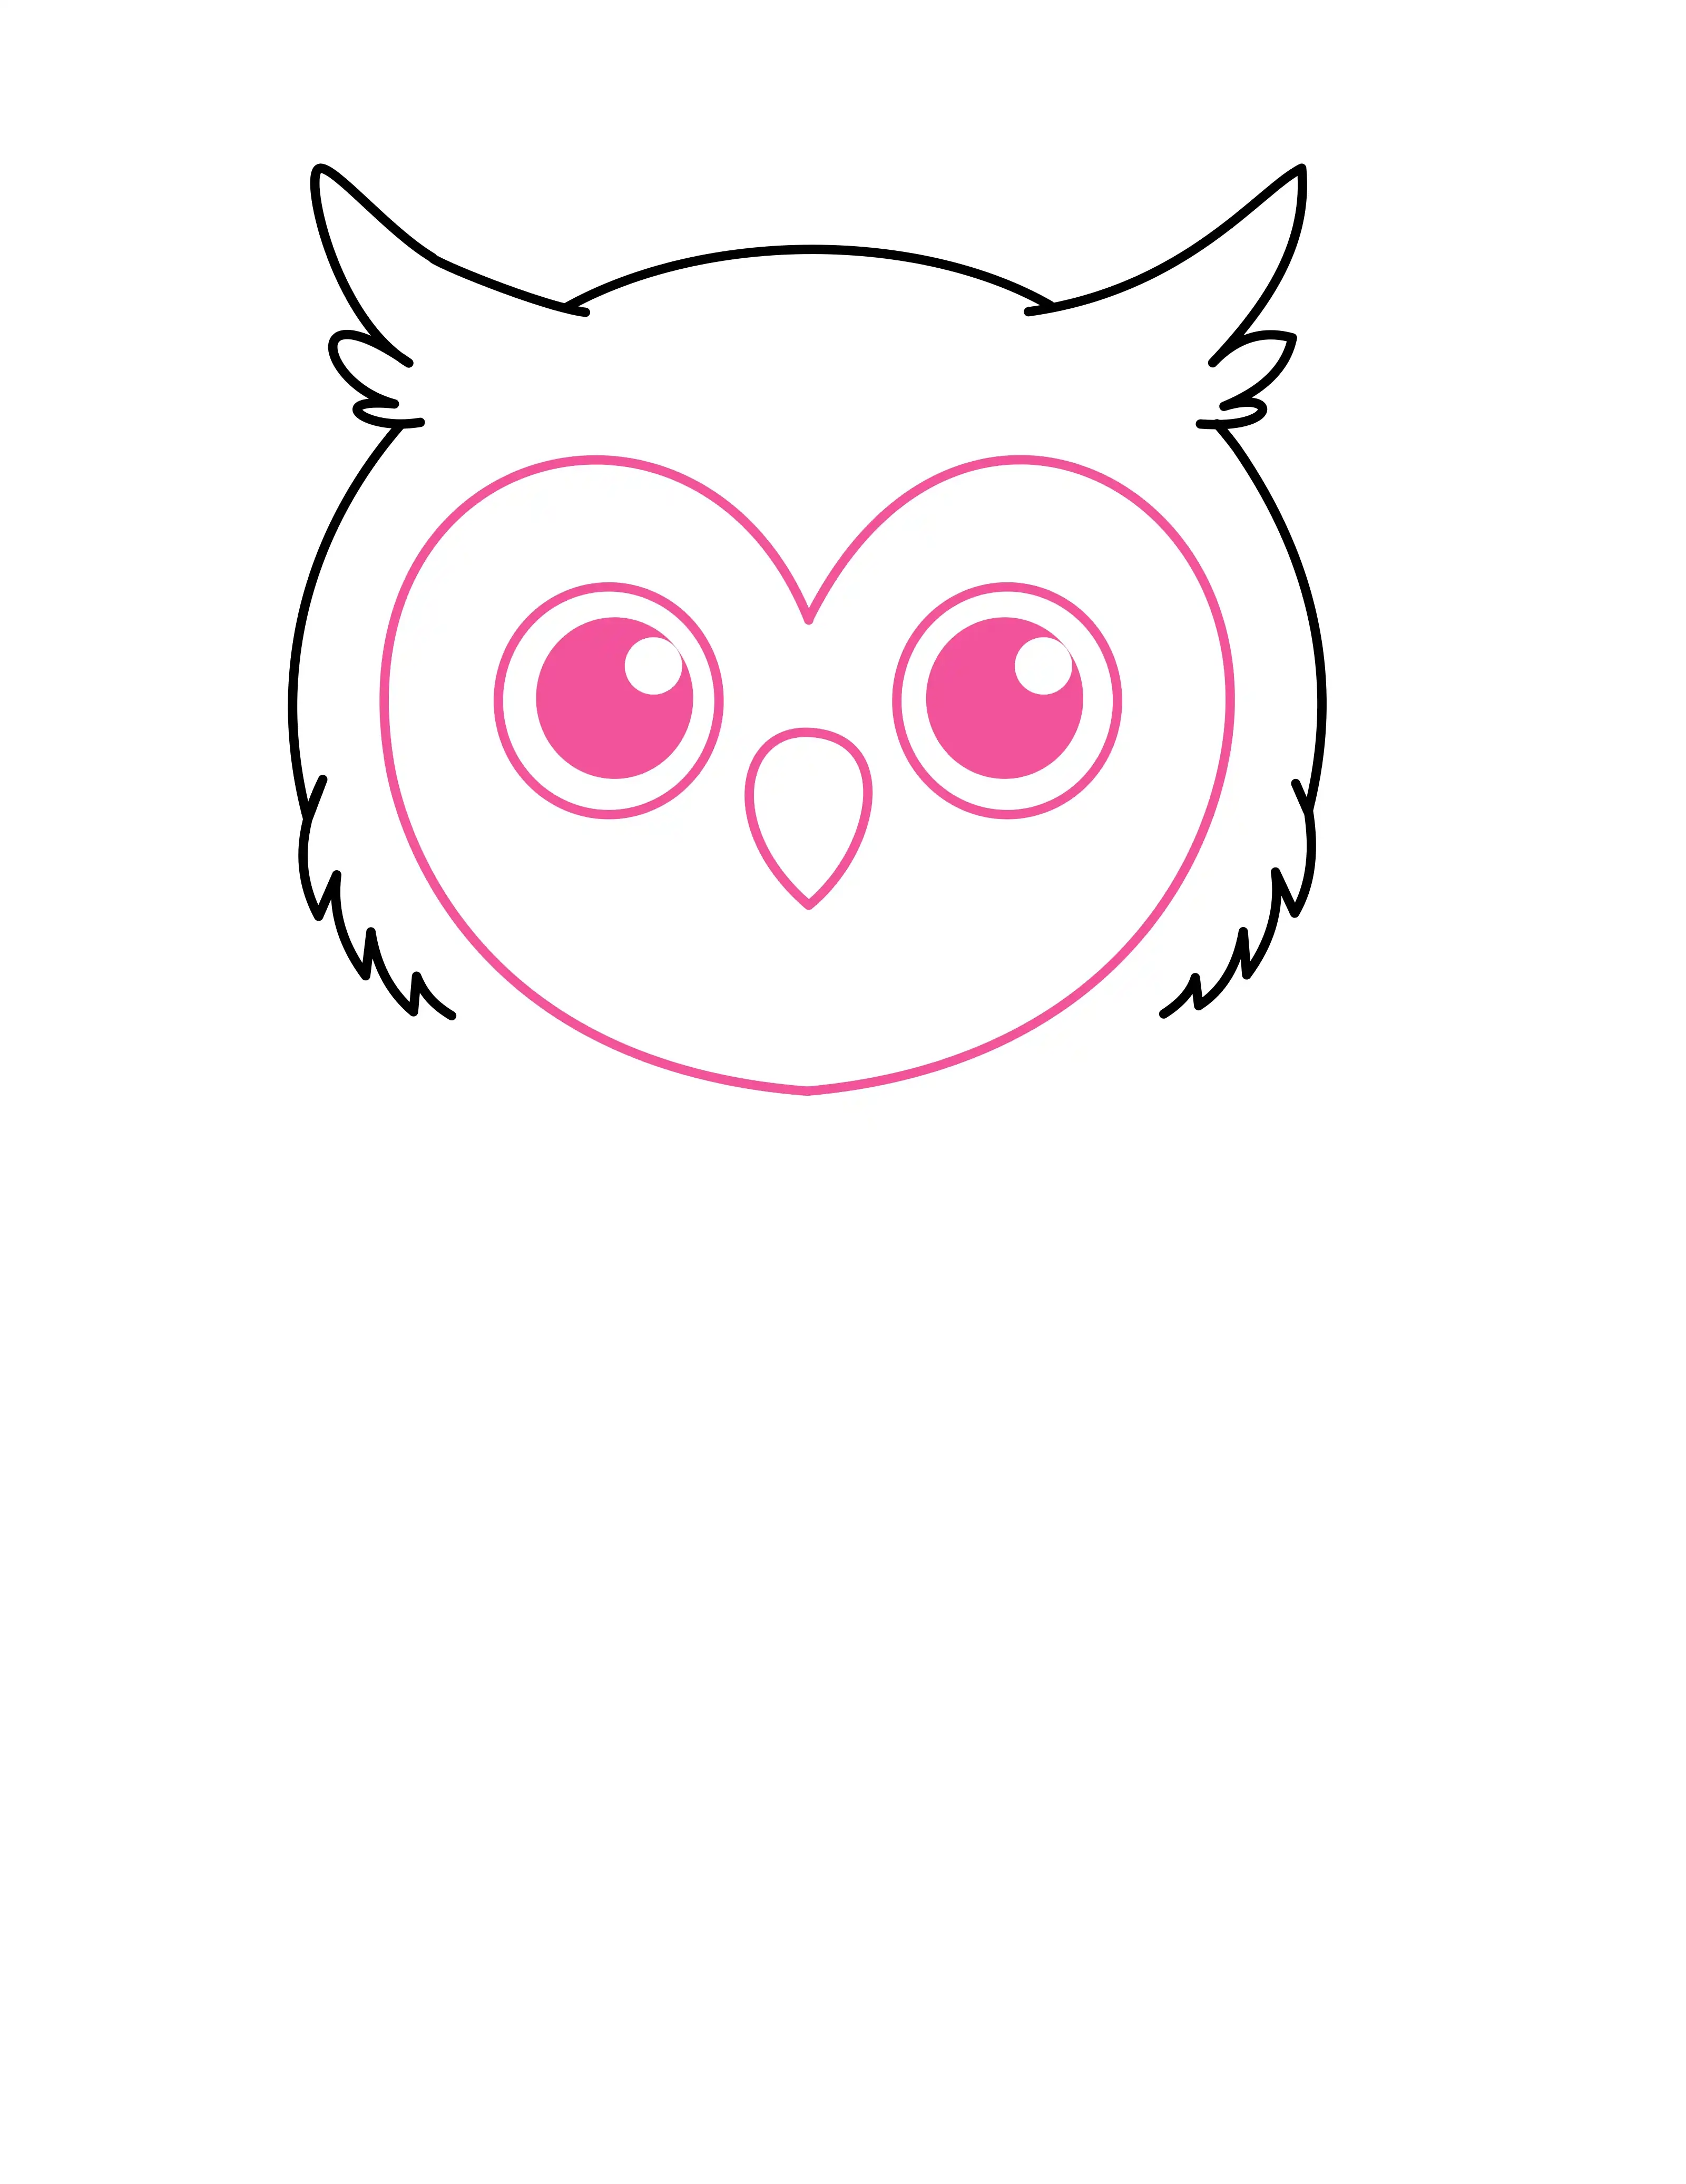
Inside the head, draw a heart shape — wider at the top and coming to a soft point at the bottom. This is the owl's facial disc, the distinctive light-colored area around an owl's face. Inside the disc, draw two large round eyes, filling them in with black but leaving a small white dot in each for the sparkle effect. Between the eyes, draw a small downward-pointing teardrop shape for the beak.

3

Draw the Body Shape

Step 3: Draw the Body Shape

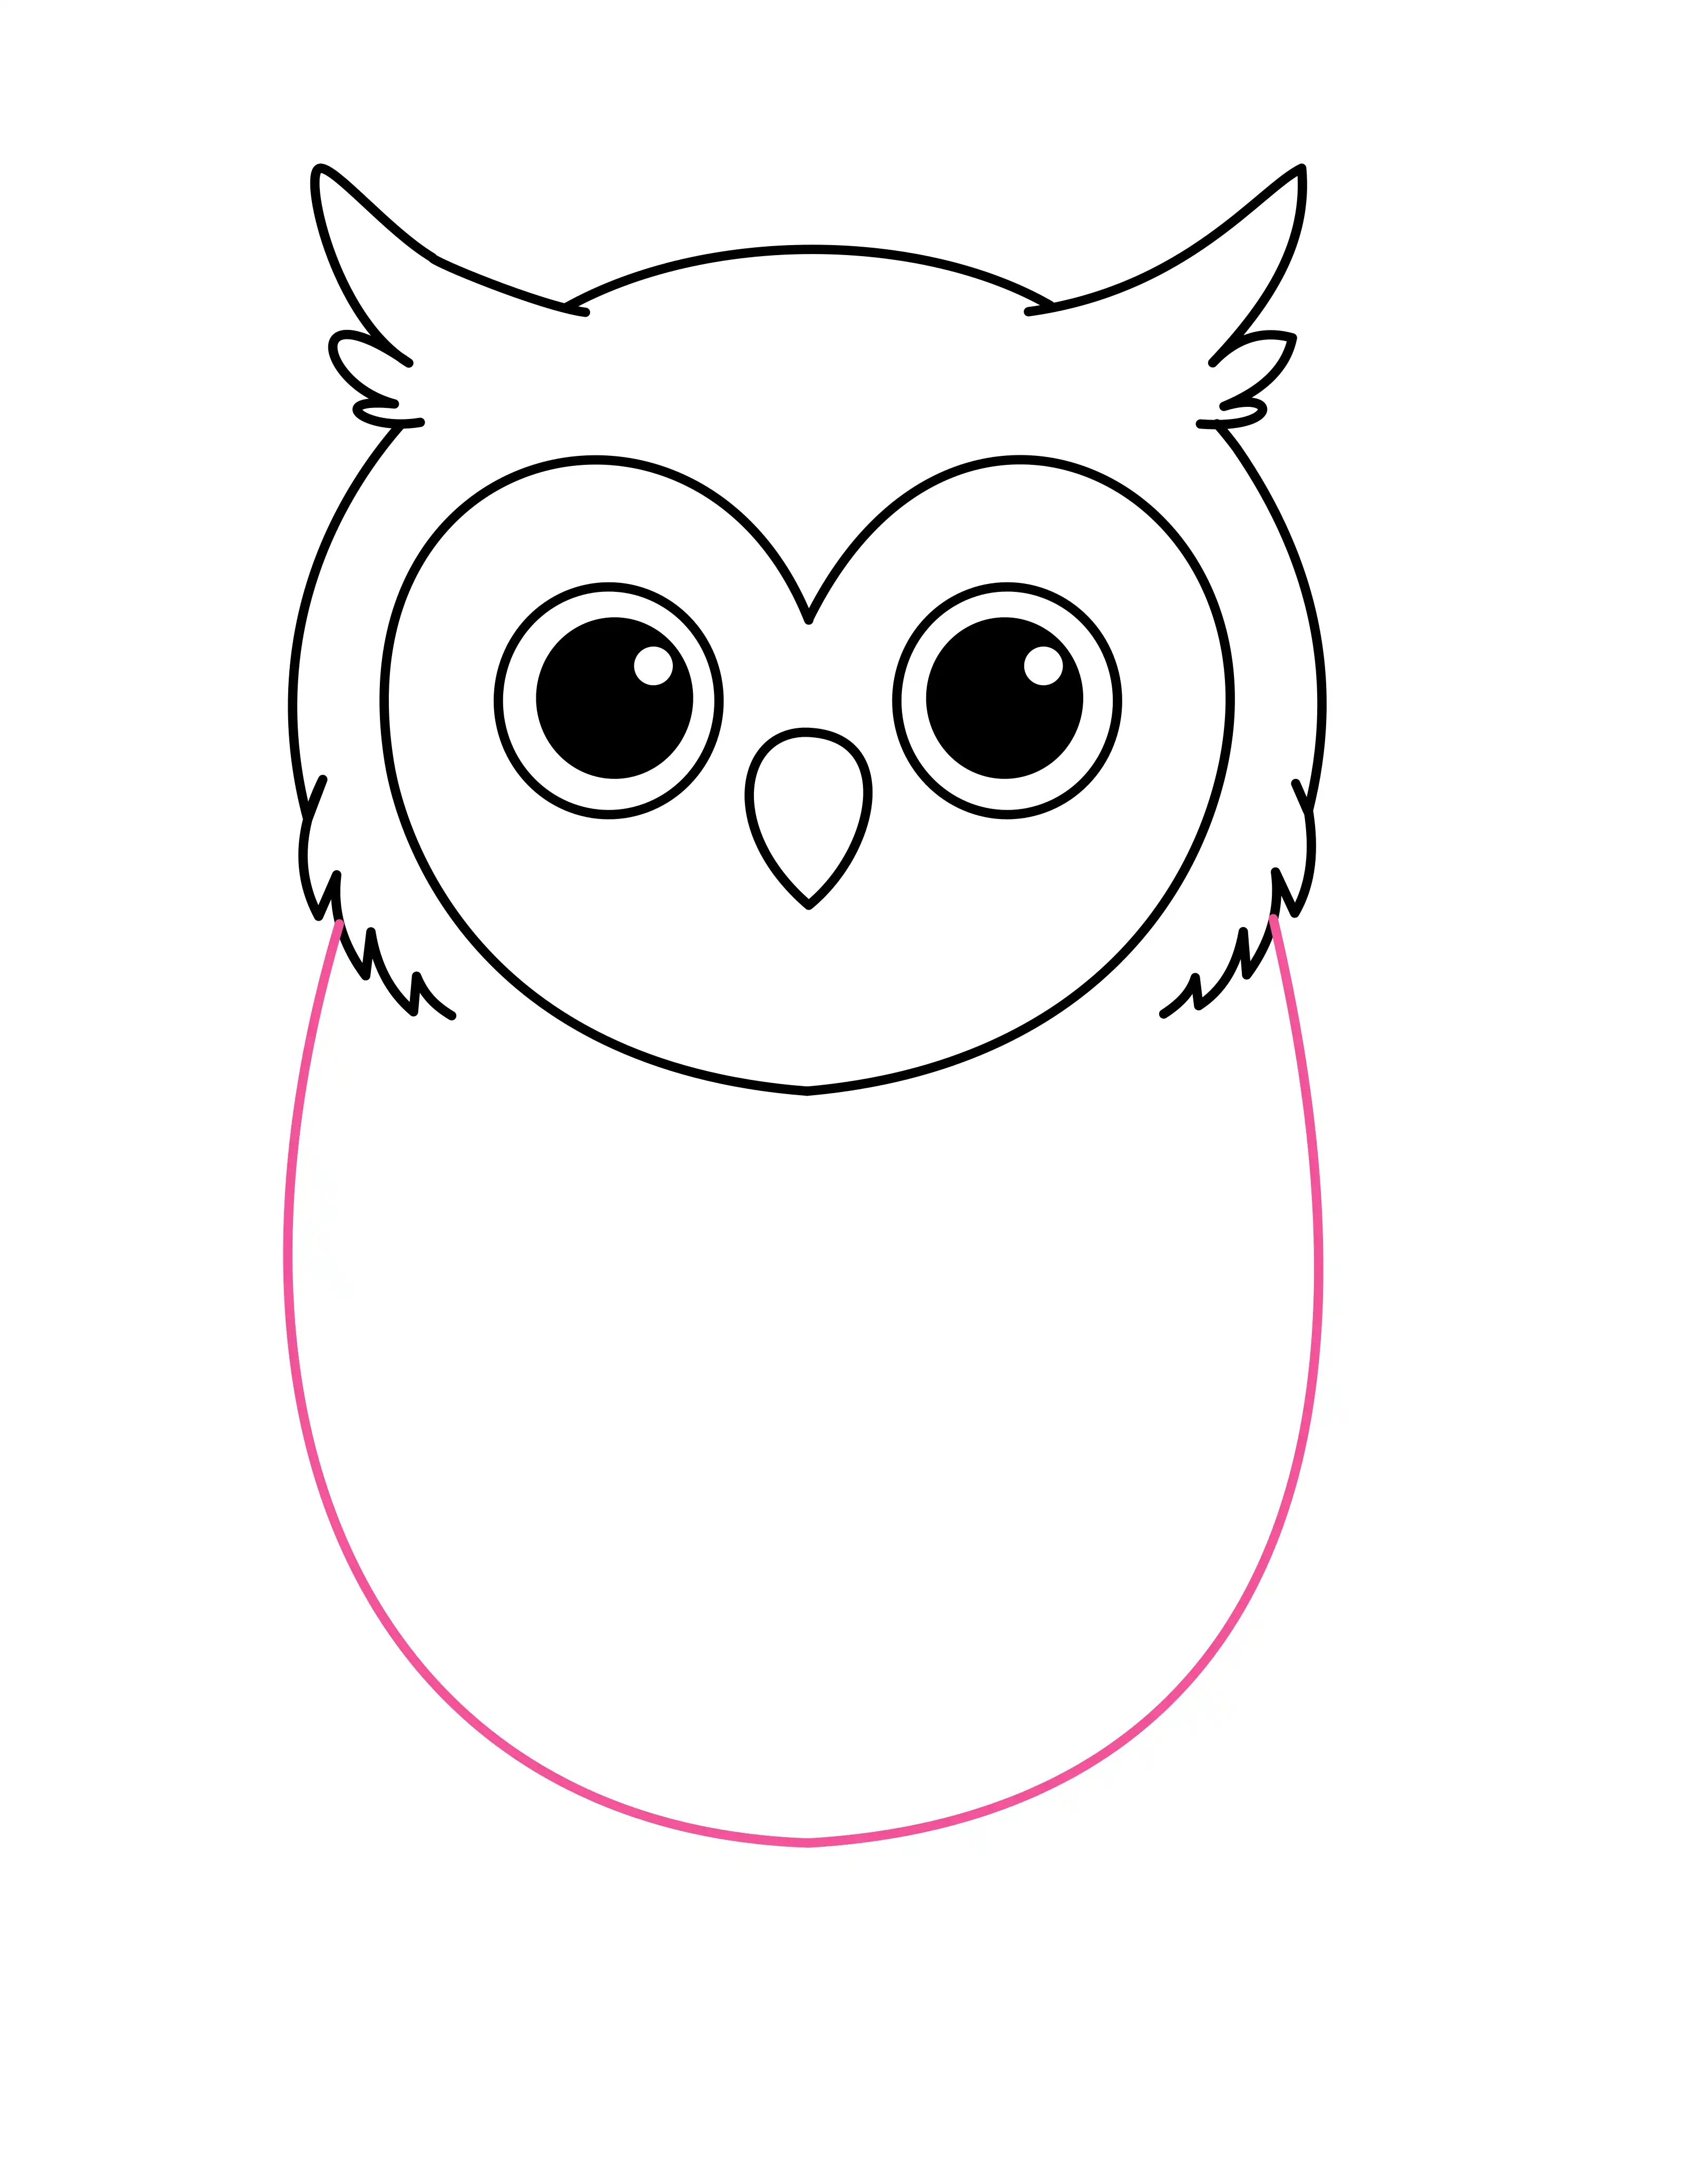
From the lower sides of the head, draw a large rounded body shape — like a big oval or egg that is slightly wider than the head. The body should be full and plump, giving your owl a soft and cuddly cartoon appearance. Close the bottom of the body with a smooth curved line.

4

Add the Wings

Step 4: Add the Wings

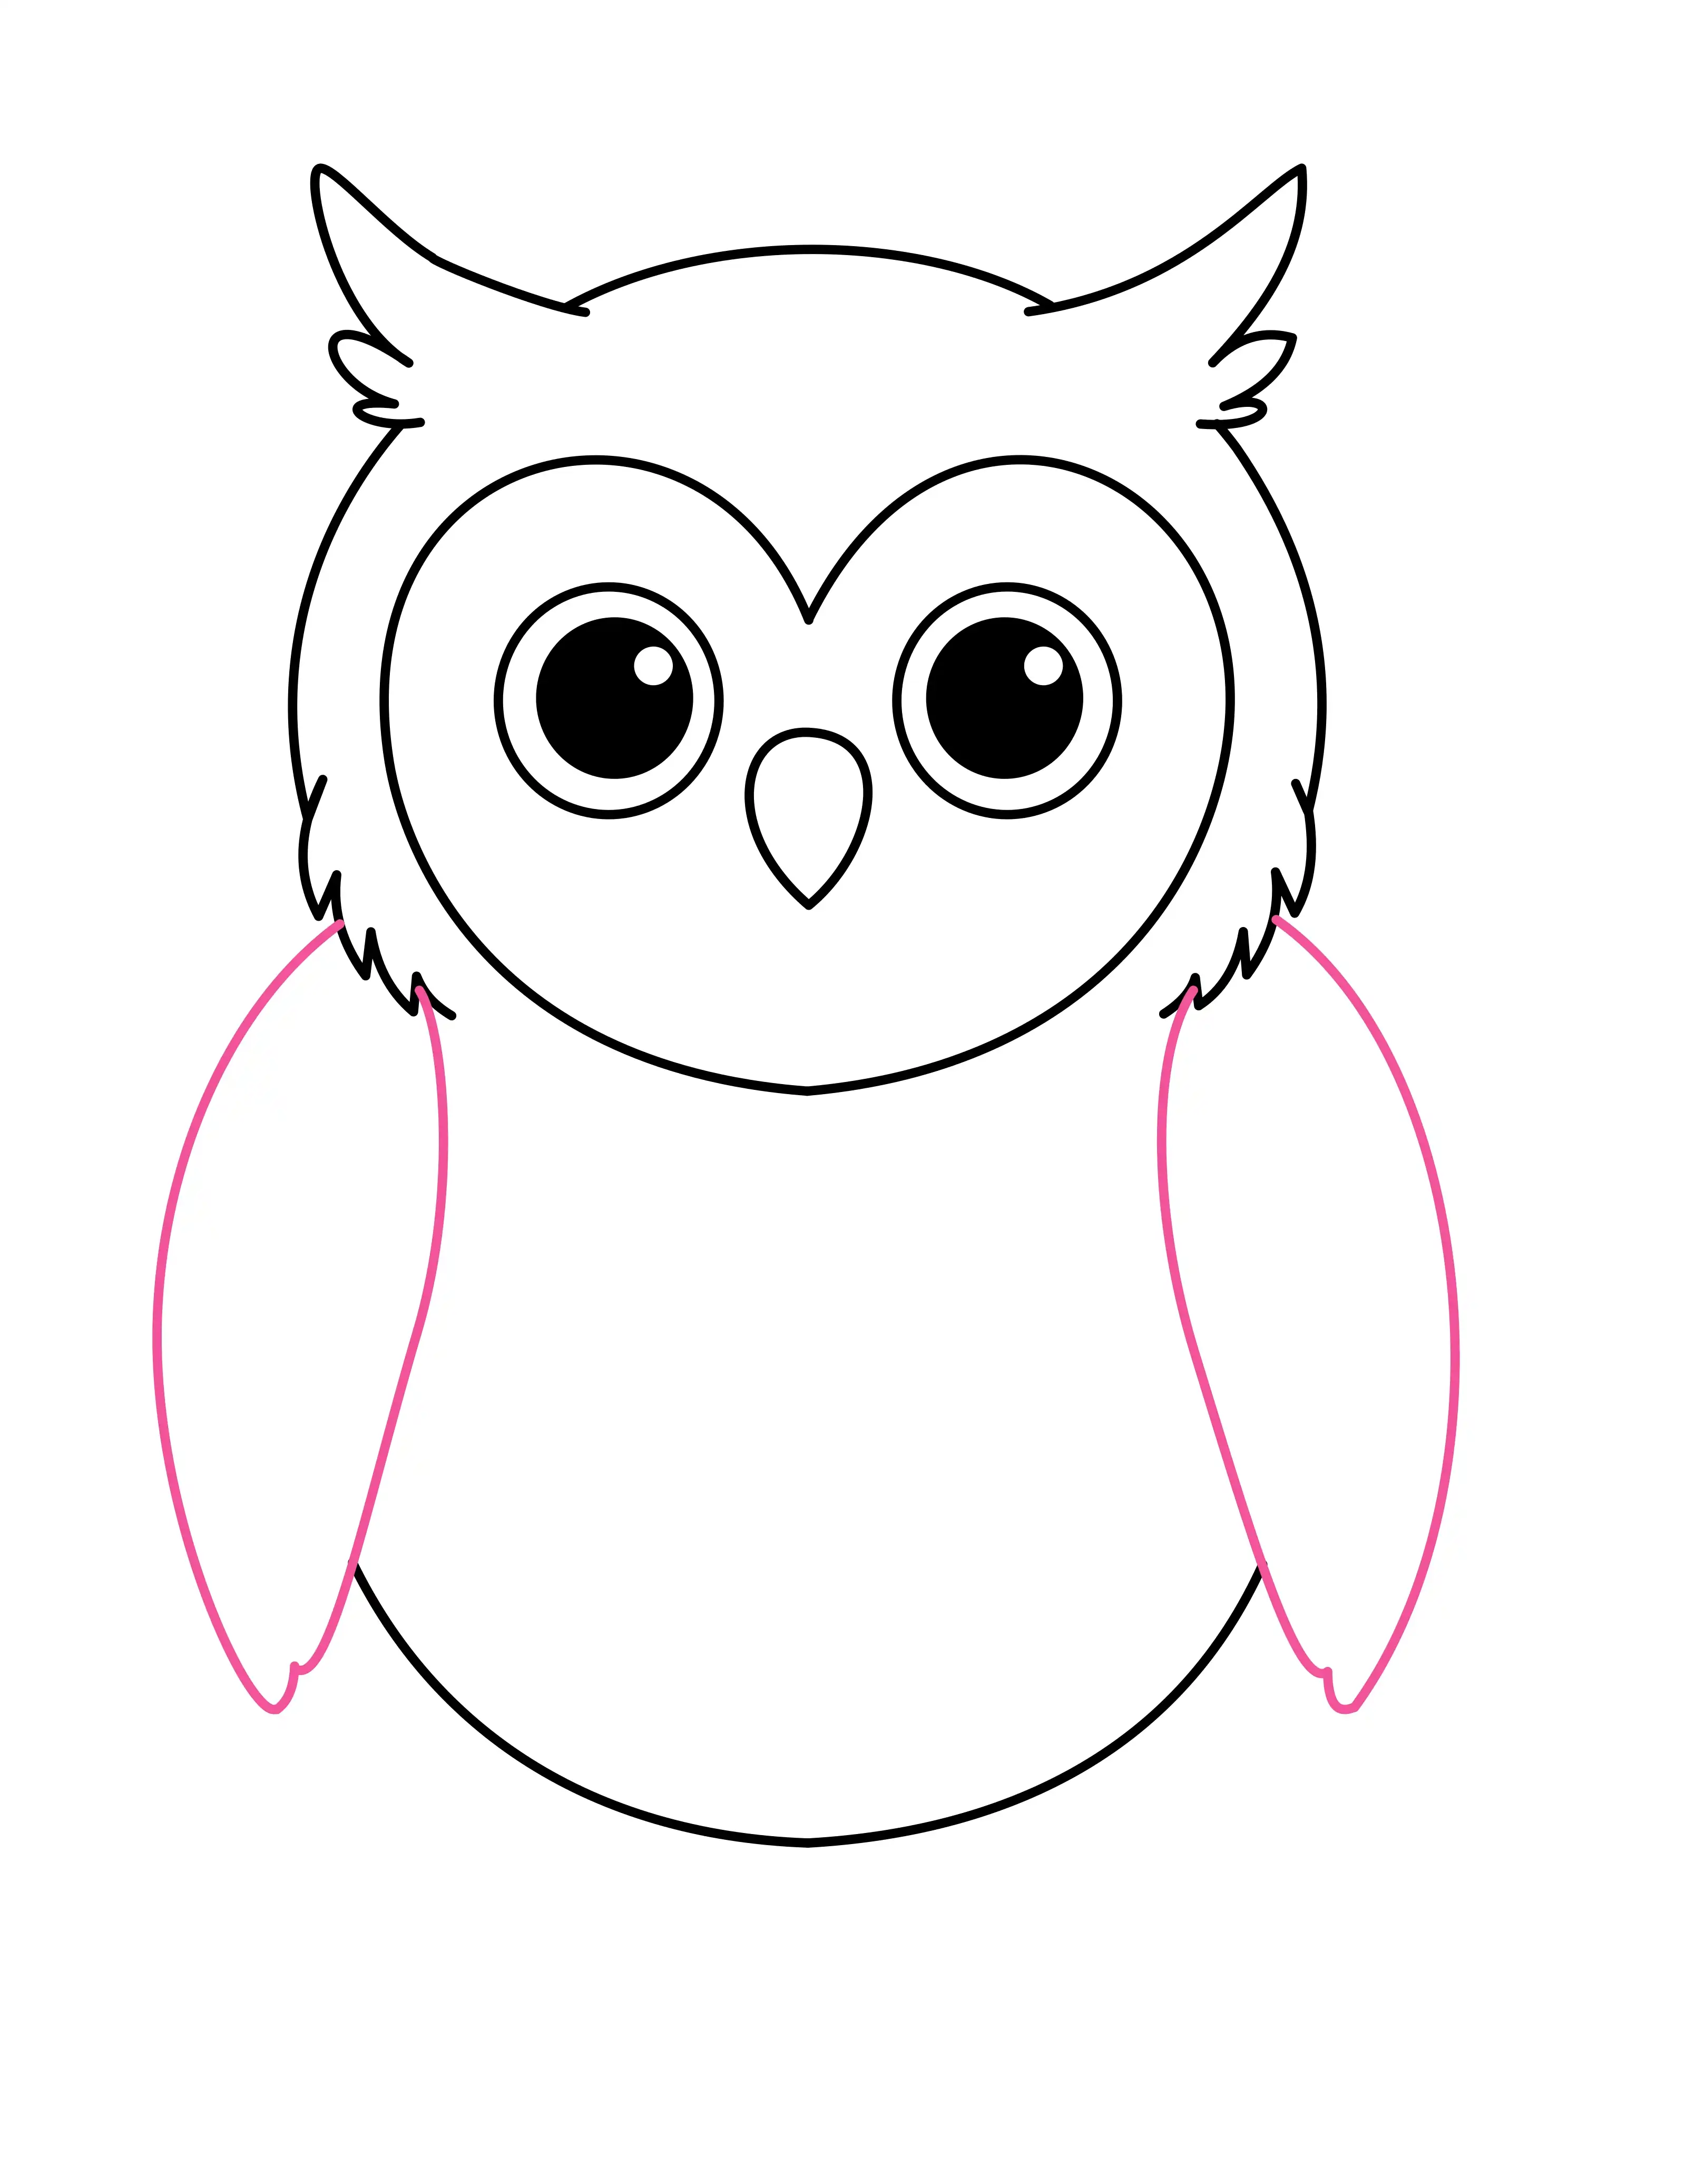
On each side of the body, draw a wing. Each wing is an elongated oval or leaf shape, slightly pointed at the bottom tip. The wings sit against the sides of the body and extend downward, resting naturally as if the owl is perched and relaxed. The top of each wing connects where the head meets the body.

5

Draw the Feet and Talons

Step 5: Draw the Feet and Talons

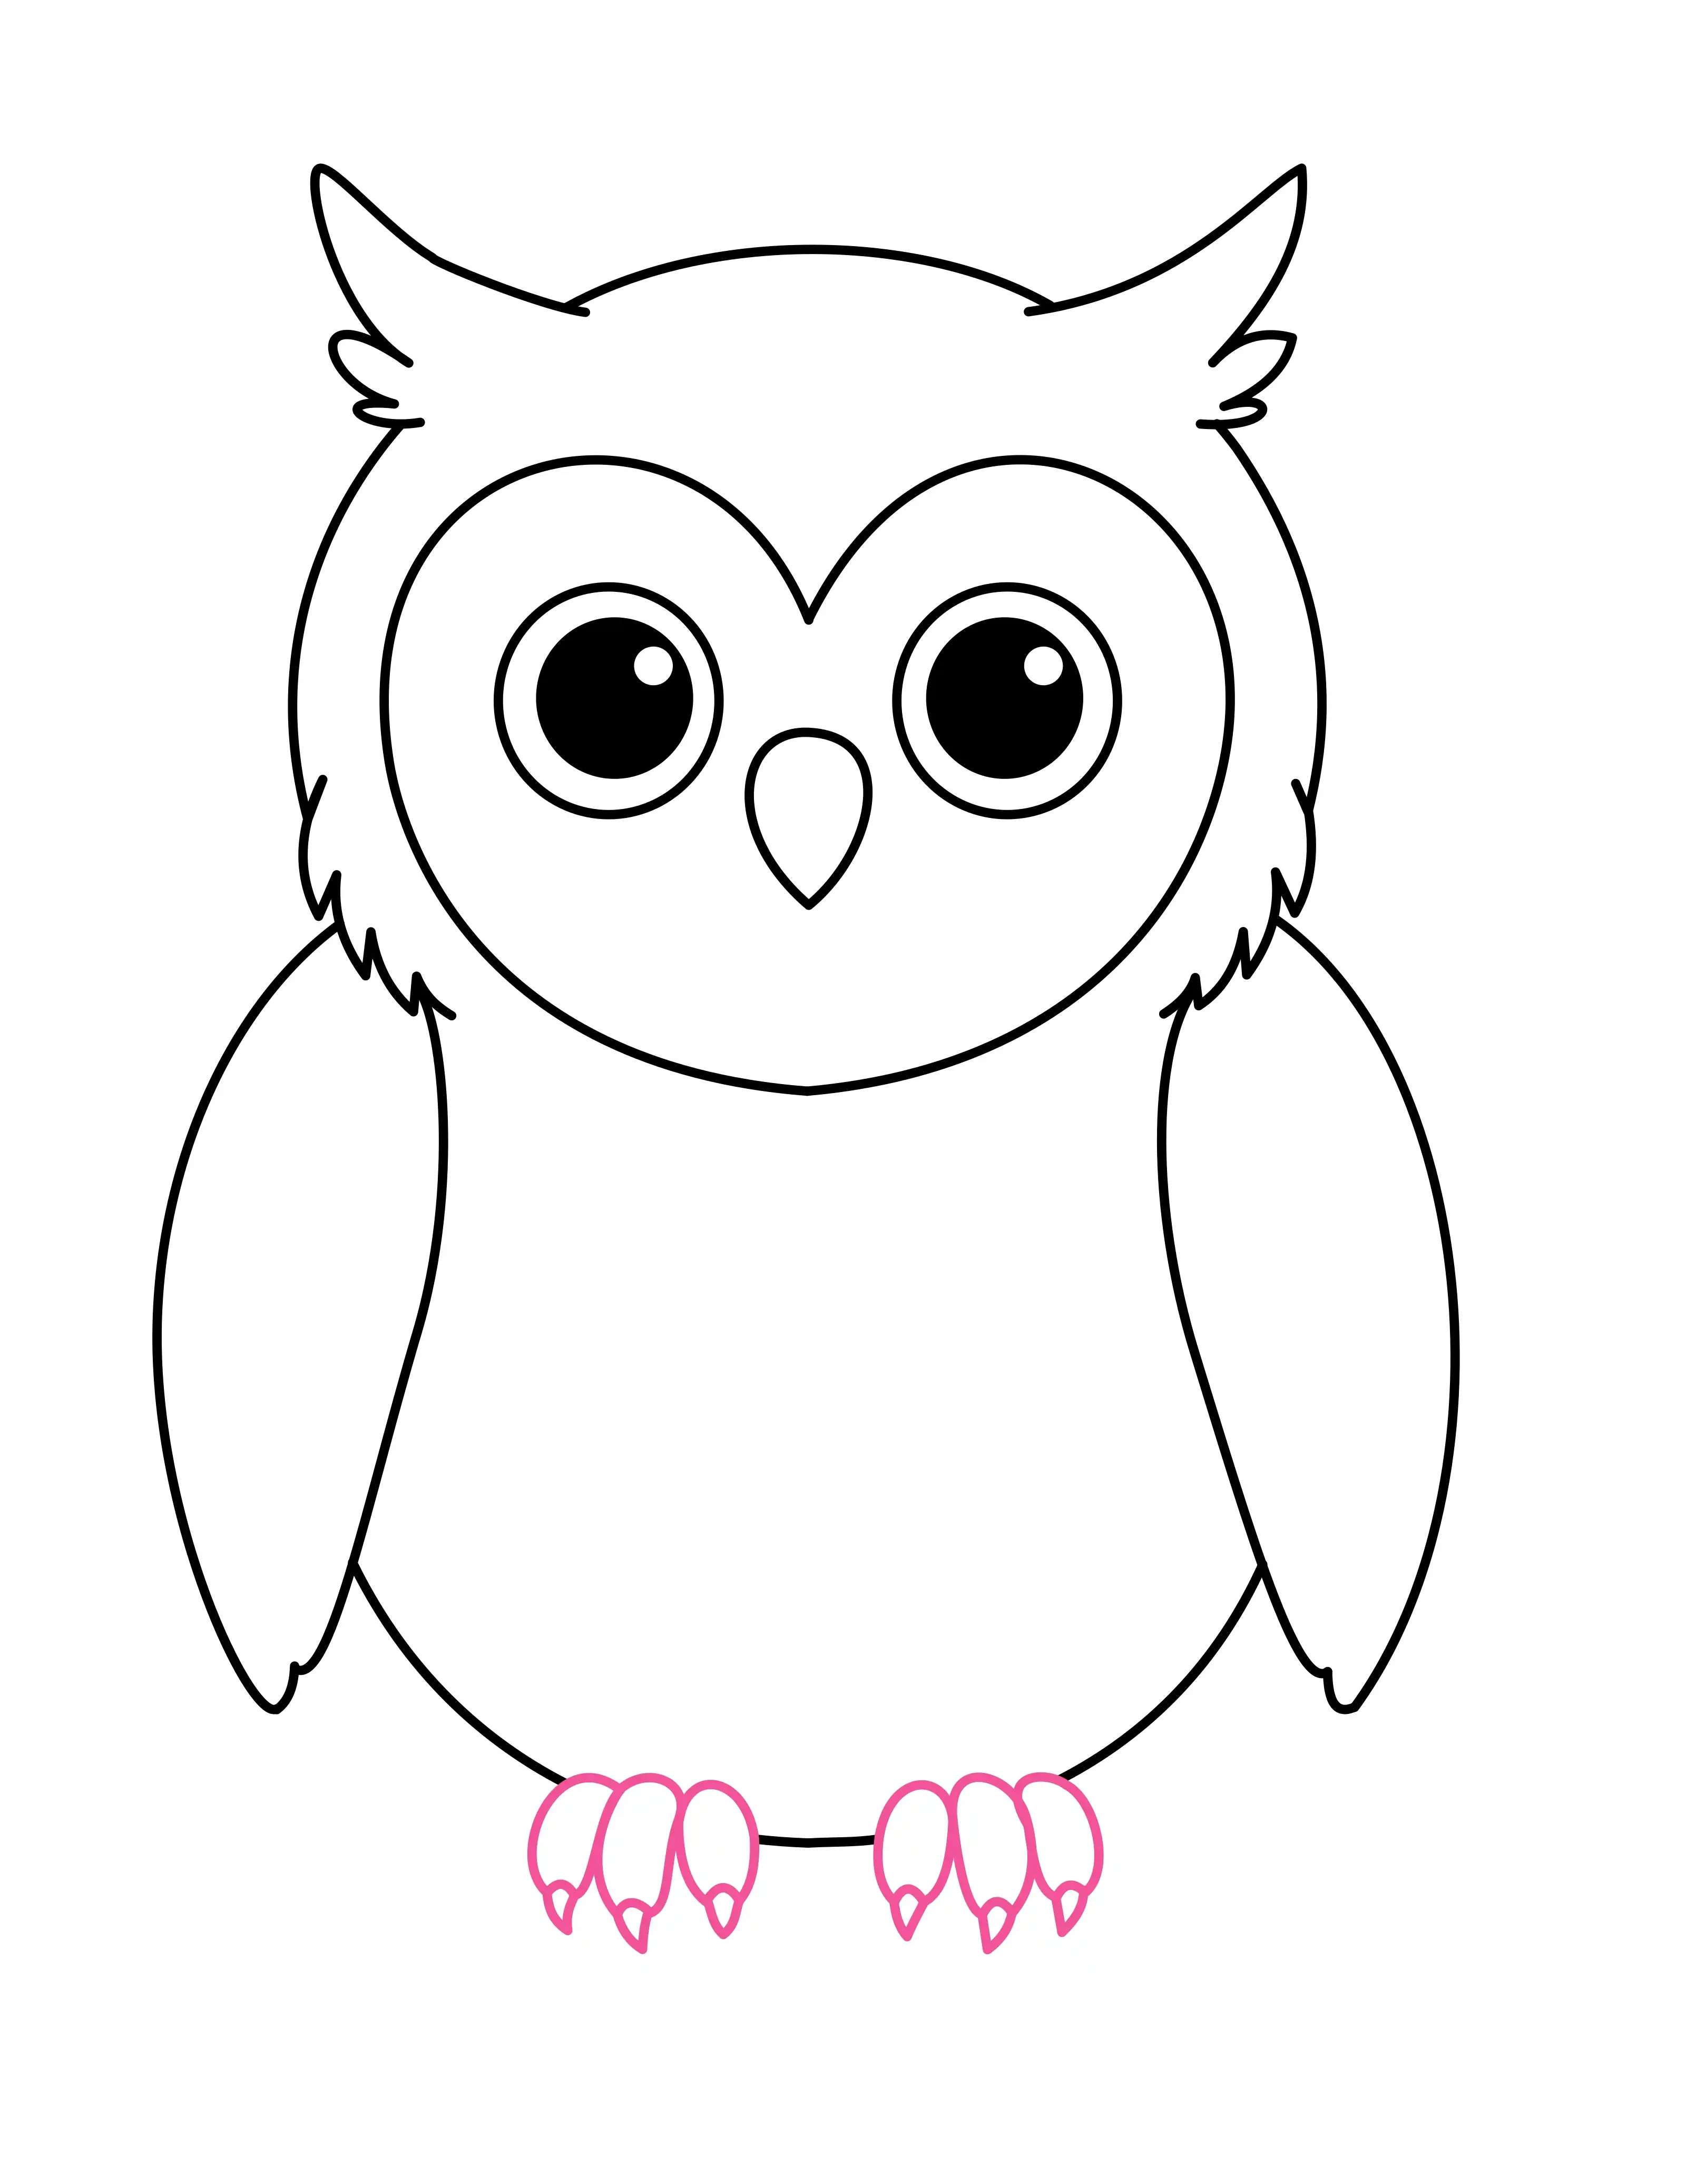
At the bottom of the body, draw two small feet. Each foot has three forward-facing talons — draw them as small rounded claw shapes, slightly curved at the tips. Add a short horizontal line connecting the two feet to show the owl is gripping something. These little talons will rest right on top of the branch you will draw next.

6

Add the Branch

Step 6: Add the Branch

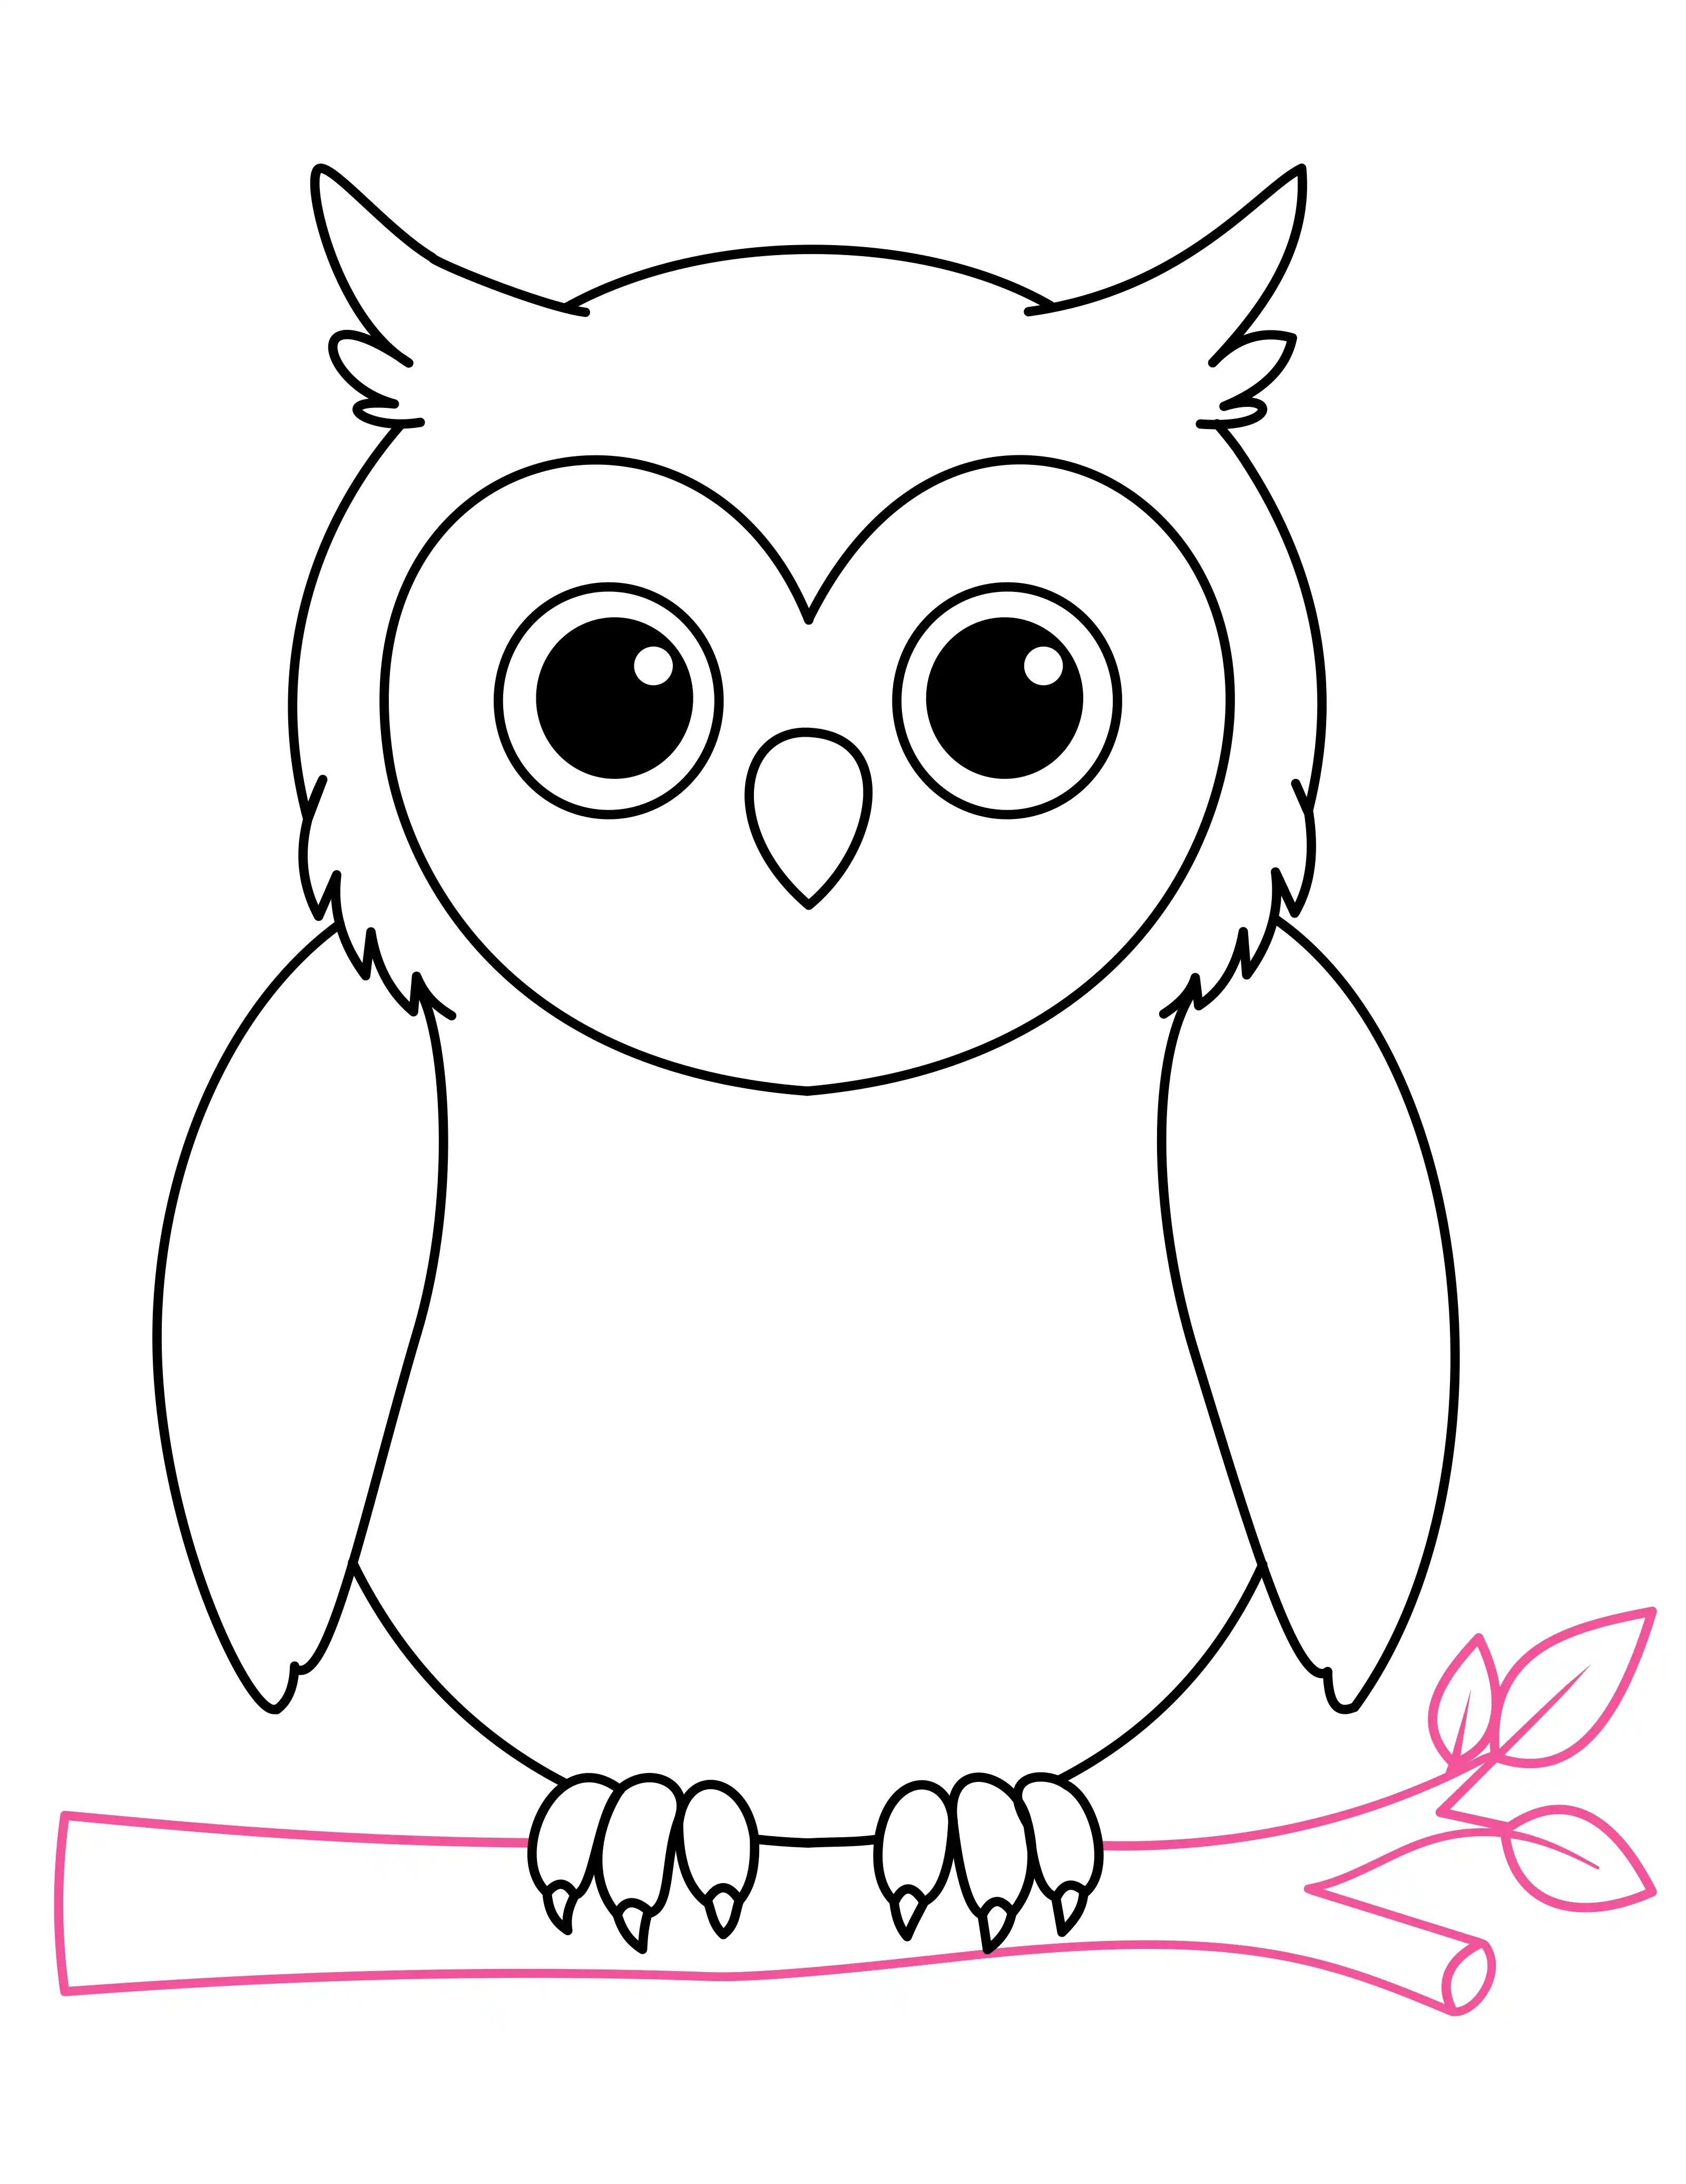
Draw a long, thick horizontal branch running beneath the owl's feet. The branch should be slightly uneven and textured — not a perfectly straight line — to look natural. On the right end of the branch, add a small twig with two or three simple leaf shapes branching off it. This finishing detail makes the whole scene feel alive and complete.

7

Add Feather Details and Texture

Step 7: Add Feather Details and Texture

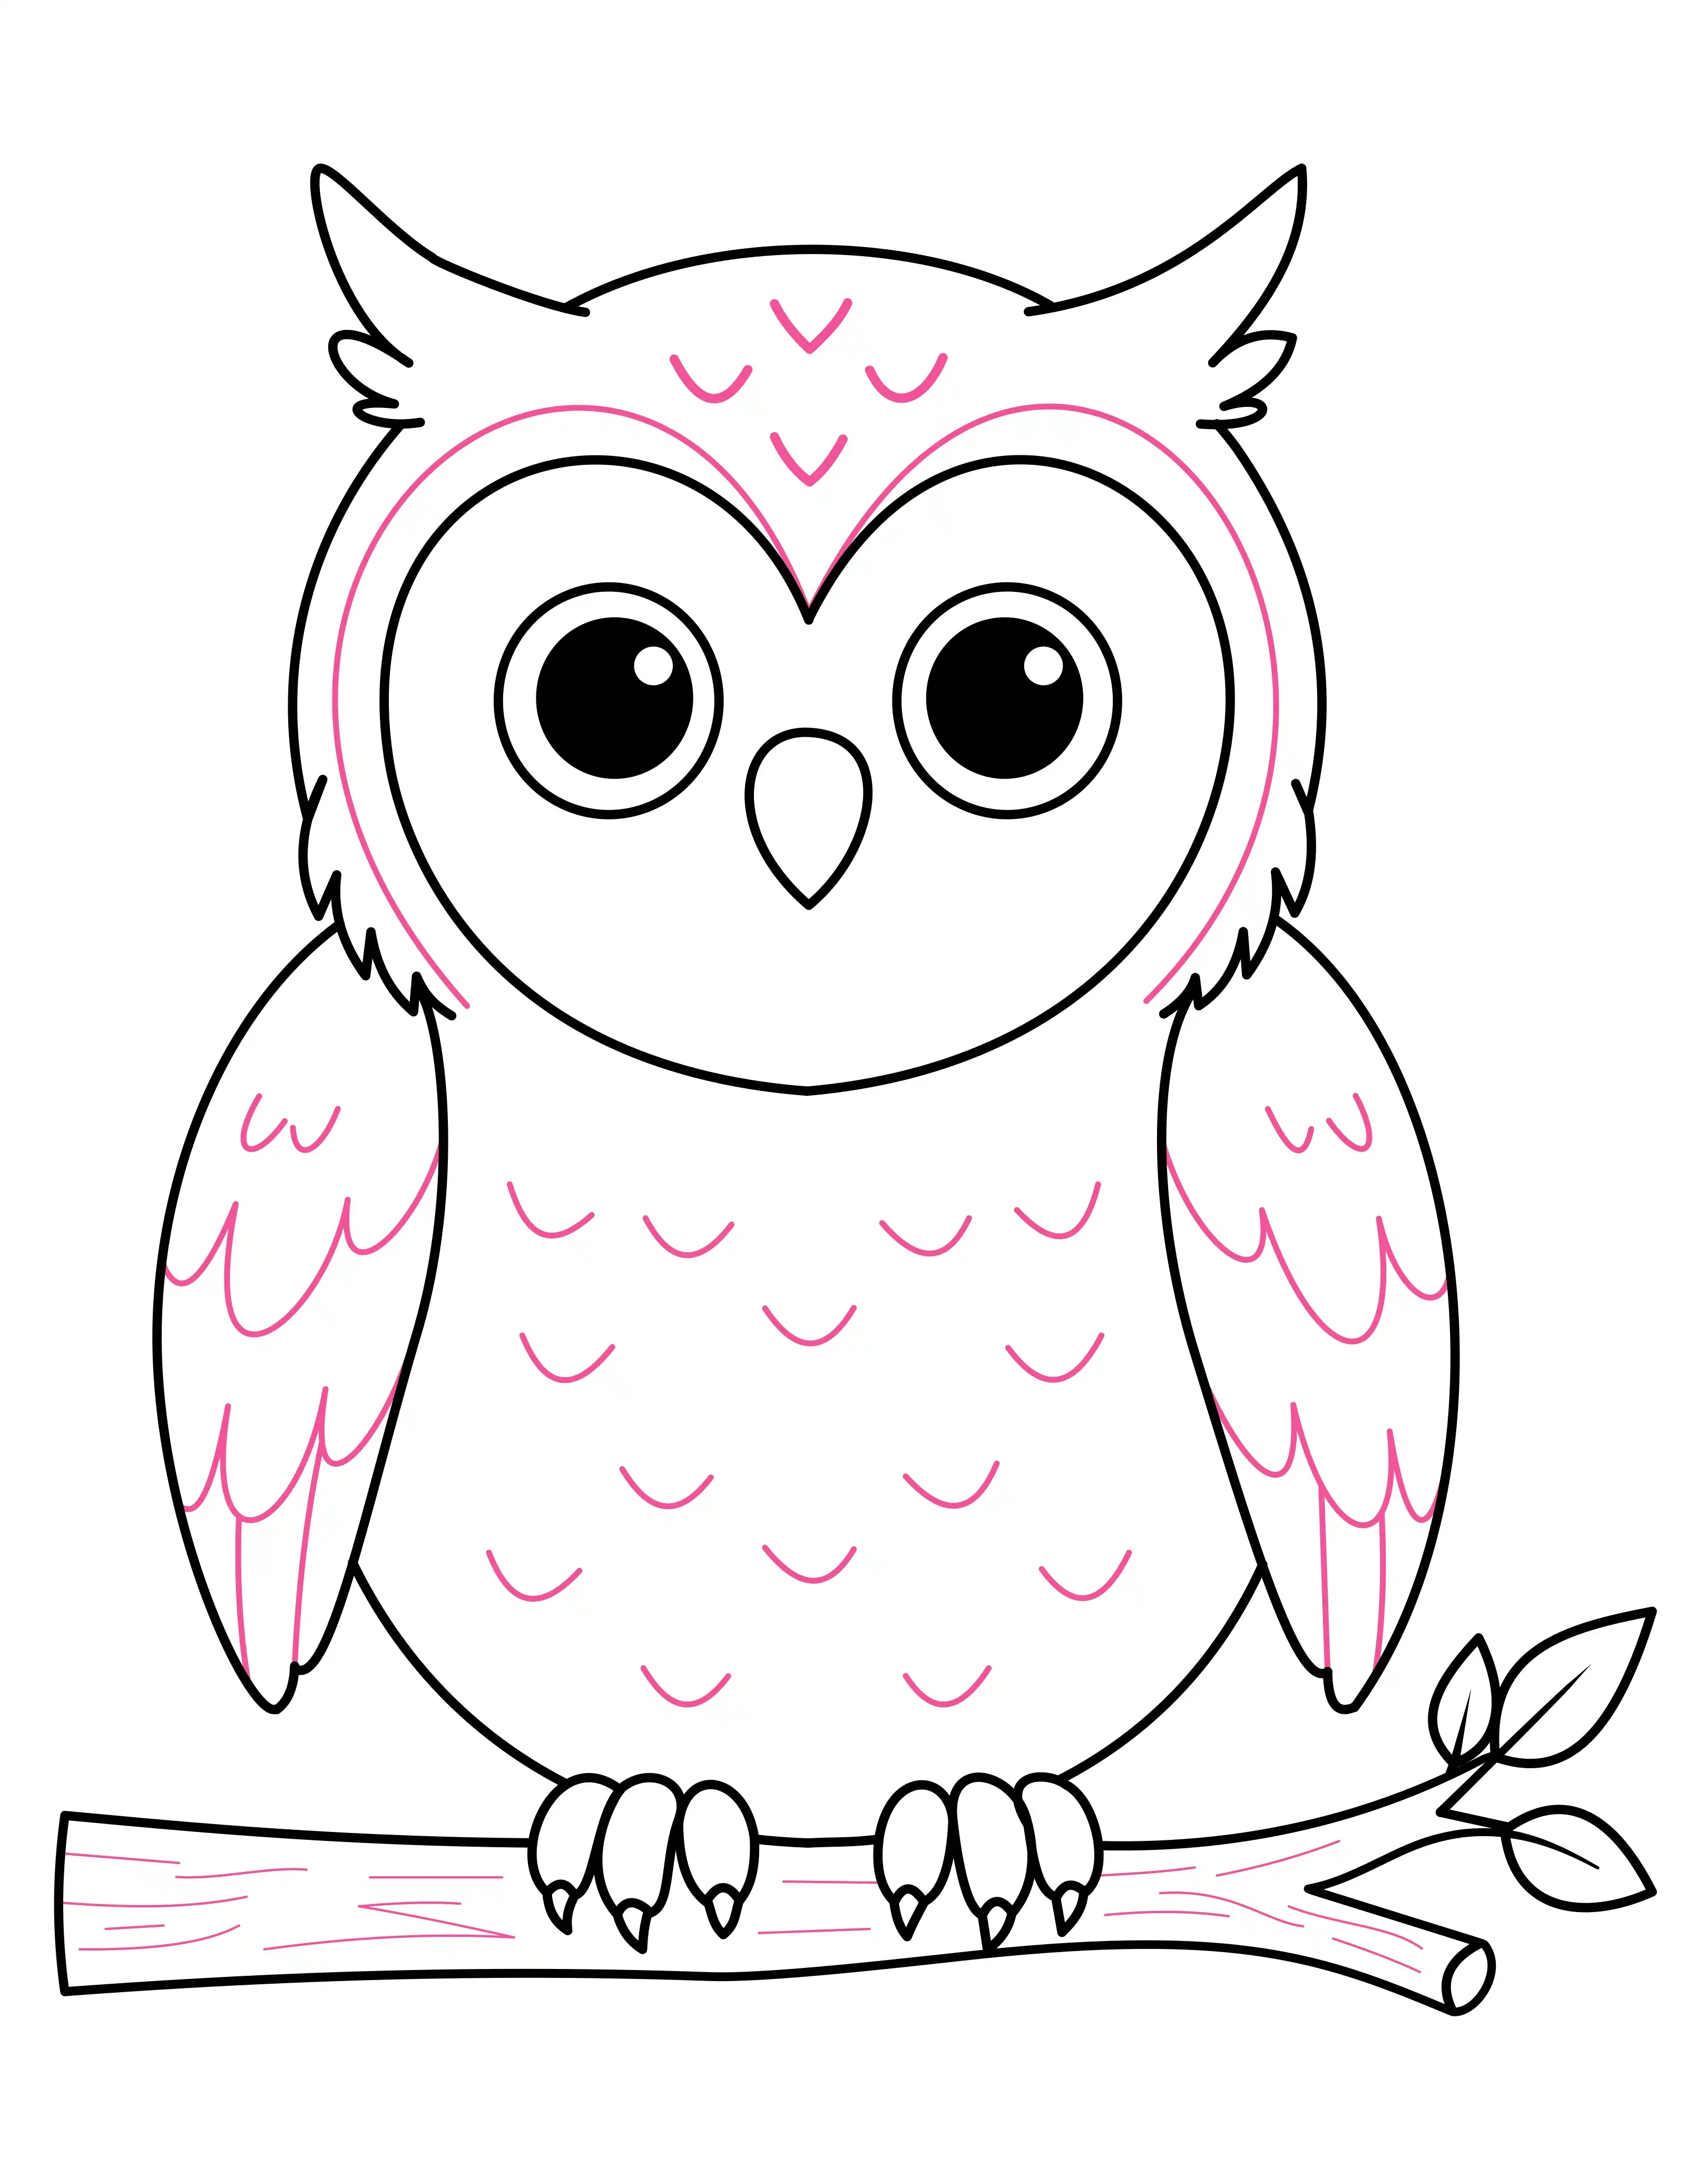
Now go back over your drawing and add all the small details that make this owl look truly special. On the top of the head between the ear tufts, draw two or three small curved V-shapes for head markings. Along the facial disc, add a slightly thicker inner line to make it stand out. On the wings, draw rows of small curved lines like overlapping feathers — starting from the top of the wing and working downward. Across the belly, add scattered small U-shaped curves to show the soft belly feathers. On the branch, draw short horizontal lines to show the wood grain texture.

8

Ink and Color Your Owl

Step 8: Ink and Color Your Owl

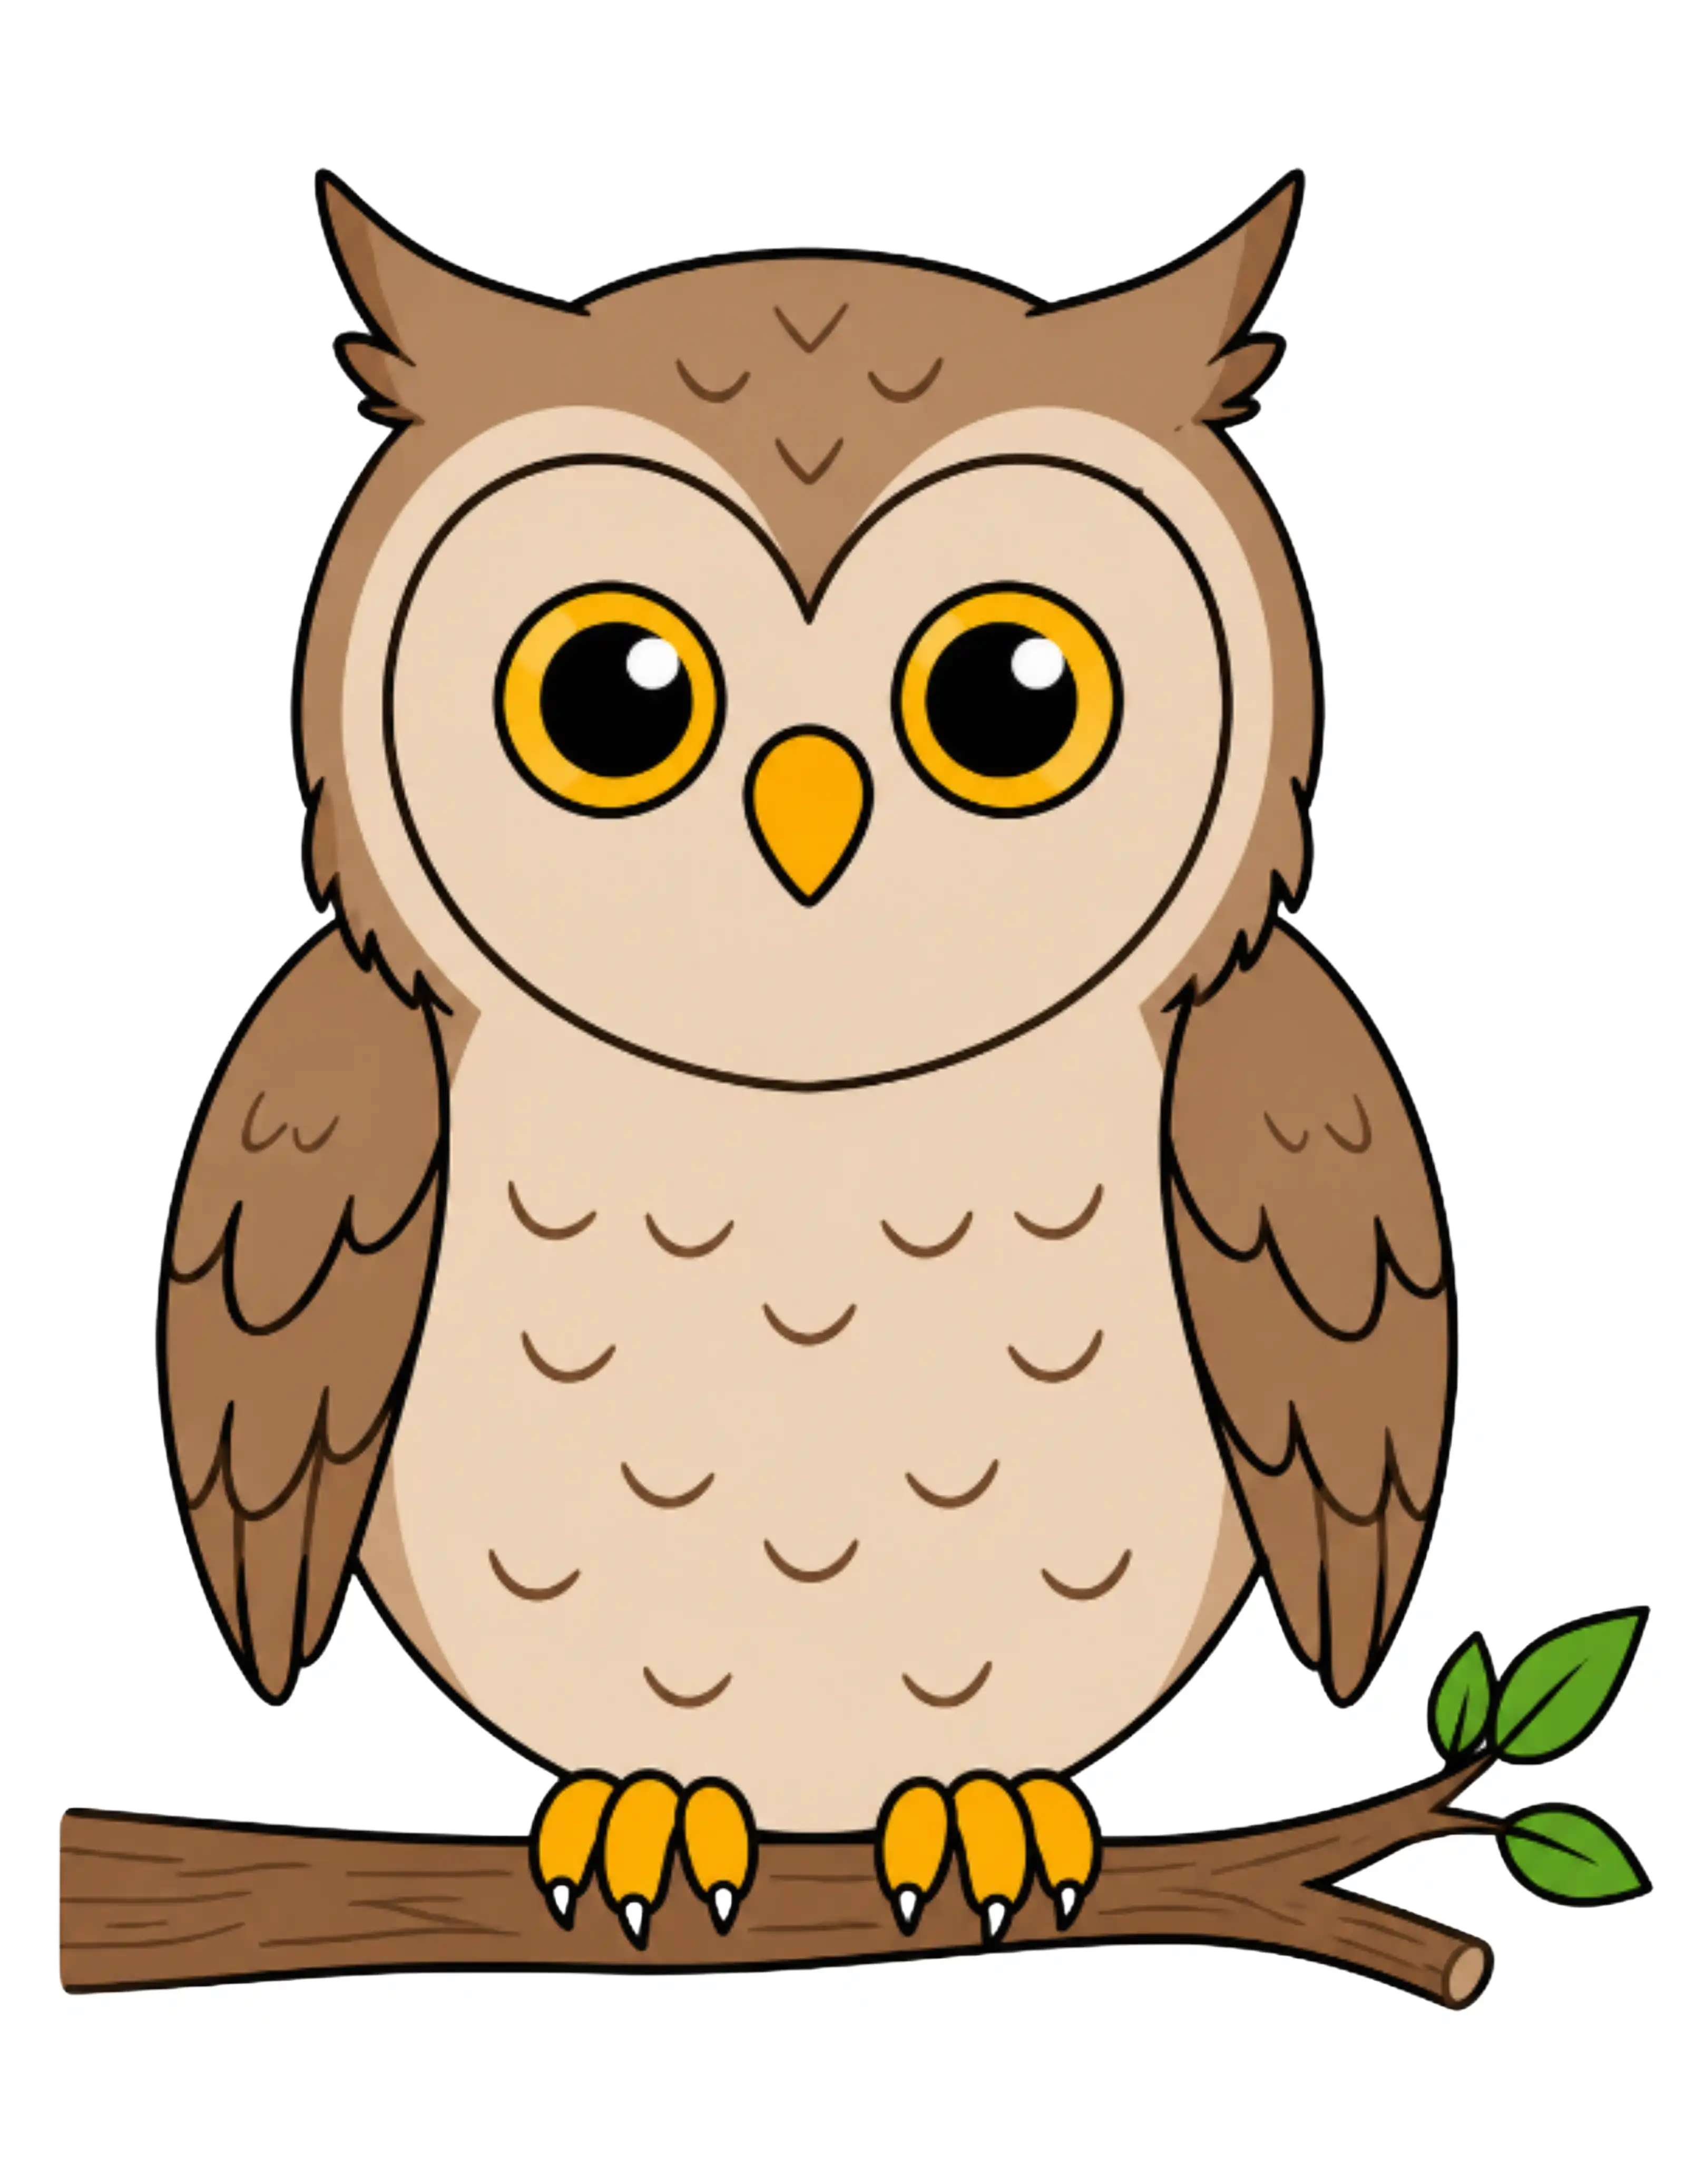
Trace all your final lines with a black marker and erase the pencil lines once dry. Now bring your owl to life with color:

  • Head and wings: Medium brown
  • Facial disc: Light cream or beige
  • Eyes: Bright golden yellow with black pupils and white highlights
  • Beak: Orange or golden yellow
  • Belly: Light cream or tan
  • Feather details: Slightly darker brown
  • Talons/feet: Orange or golden yellow with white claw tips
  • Branch: Dark brown with lighter brown grain lines
  • Leaves: Fresh green

Your beautiful owl drawing is complete!

Final Thoughts

Drawing an owl is a wonderful way to practice combining soft, round shapes with fine detail work. The big eyes and heart-shaped face make every owl drawing feel warm and expressive, while the feather details add a satisfying level of texture and depth. Once you have drawn this owl a couple of times, you will find it gets faster and more natural with every attempt.

Try experimenting with different eye colors — golden yellow, bright orange, or even striking amber all look amazing on a cartoon owl. Make it your own and enjoy every stroke! 🦉

More Drawing Tutorials

How to Draw a Cupcake

How to Draw a Cupcake

A cupcake topped with swirly frosting and colorful sprinkles is one of the most delightful things you can draw. It is sweet, cheerful, and surprisingly simple once you break it down into a few basic shapes. Learn how to draw it step-by-step!

9 Steps
Read
How to Draw a Cute Cow for Beginners

How to Draw a Cute Cow for Beginners

Want to learn how to draw a cute cow? This easy step-by-step tutorial will guide you through the whole process, from the very first line to the finished, colored artwork. Whether you are a complete beginner or a young artist looking for a fun project, this guide is made for you.

10 Steps
Read
How to Draw a Cute Duck for Beginners

How to Draw a Cute Duck for Beginners

There is something endlessly likable about a little duck — that round body, the curved neck, and a bill that always looks like it is mid-quack. It is also one of the friendliest animals to draw, since the whole shape comes together from one flowing neck line and a couple of soft, rounded blobs. Perfect for anyone who wants a satisfying result without needing to fuss over tricky proportions.

7 Steps
Read
How to Draw a Cute Parrot

How to Draw a Cute Parrot

A parrot is one of those animals that people tend to assume is too complicated to draw — all those overlapping feathers, the hooked beak, the layered wing, the long sweeping tail. But once you break it down, the whole bird is really just a rounded head, a teardrop-shaped body, and a handful of feather layers stacked on top of each other in a very predictable order. The beak is the one part that takes a little practice to get right, but once it clicks, you'll find yourself wanting to draw parrots in every color imaginable.

9 Steps
Read