

How to Draw a Rocket for Beginners

July 5, 2026
8 Steps
AR Drawing Logo

AR Drawing

Drawing Tutorials

There's something endlessly exciting about drawing a rocket — that sleek body angled toward the sky, the porthole window hinting at adventures inside, and those bold flames blasting out the back like the rocket is already halfway to the moon. What makes it even better is that the whole thing is essentially one big rounded body with a few satisfying details added on top. The body shape alone takes about twenty seconds, and everything else — the nose cone, the window, the fins, the fire — just snaps into place around it. It's one of those drawings that looks impressive when it's done but never actually felt hard to make. Let's get drawing!

How to Draw a Rocket for Beginners
What You Will Need
  • Pencil
  • Eraser
  • White paper
  • Black marker or fine-liner (optional)
  • Colored pencils, crayons, or markers
1

Draw the Rocket Body

Step 1: Draw the Rocket Body

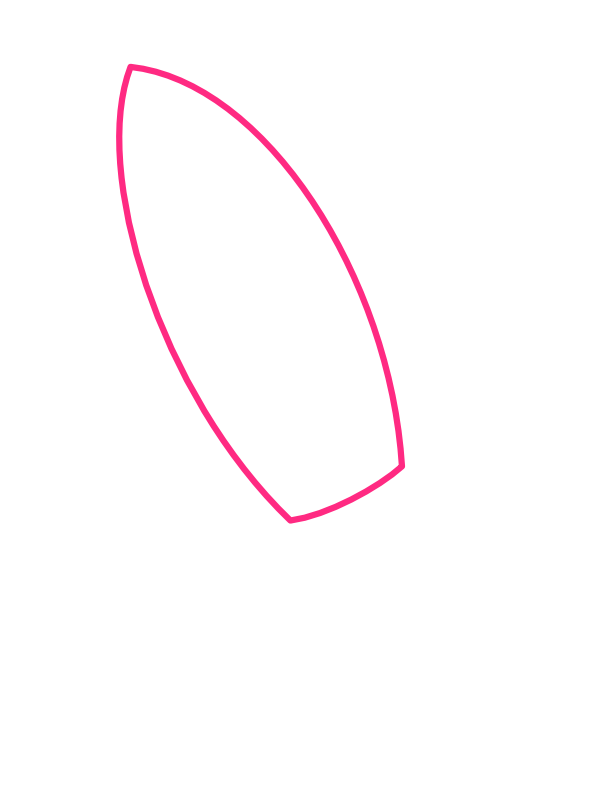
Start by drawing the main body of the rocket — a large, rounded shape a bit like a stretched oval or a rounded bullet, tilted diagonally on the page with the pointed tip aiming toward the upper left and the flat base sitting toward the lower right. The left edge should curve gently inward while the right edge bows out more generously, giving the body a slightly fuller right side that reads as a three-dimensional cylinder. The flat bottom edge closes the shape off at the base where the engine will sit. This one shape is the foundation of everything else, so take a moment to make sure it feels large enough to add detail inside before moving on.

2

Separate the Nose Cone

Step 2: Separate the Nose Cone

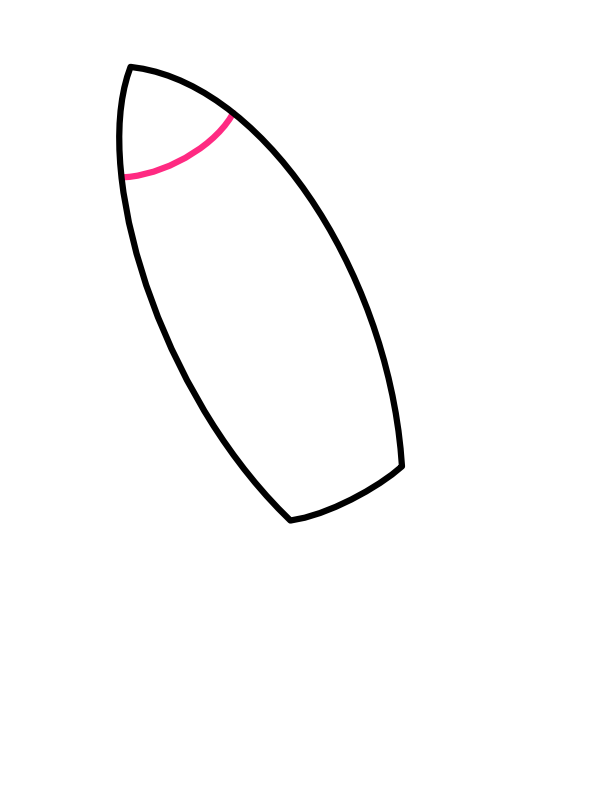
Inside the top portion of the body, draw a single curved arc that runs from the left edge to the right edge, cutting off the pointed tip. This line is the dividing line between the nose cone and the main fuselage, and it's one of those details that does a lot of visual work with very little effort — one simple curve is all it takes to make the rocket suddenly look far more finished and structured than the blank body shape from Step 1. Keep the nose cone section slightly shorter than it feels like it should be; a compact cone looks more powerful and purposeful than a long, gradual one.

3

Draw the Porthole Window

Step 3: Draw the Porthole Window

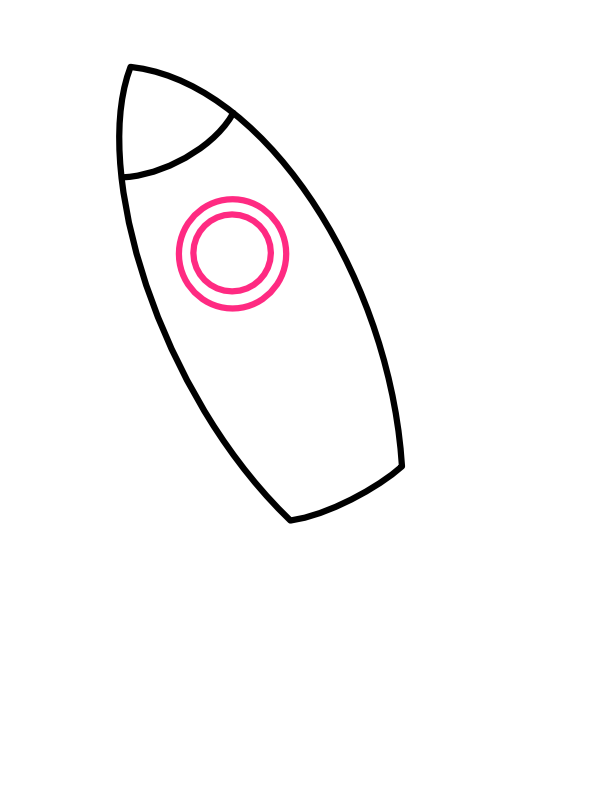
In the upper section of the body, below the nose cone line, draw two concentric circles — a smaller circle nested inside a slightly larger one. This double-ring porthole is the most recognizable detail on a cartoon rocket, the one small shape that tells the viewer immediately that there's something going on inside. Keep both circles centered within the body and make them large enough to fill the space confidently rather than appearing as a tiny dot lost in the middle of all that white space.

4

Add the Engine Band

Step 4: Add the Engine Band

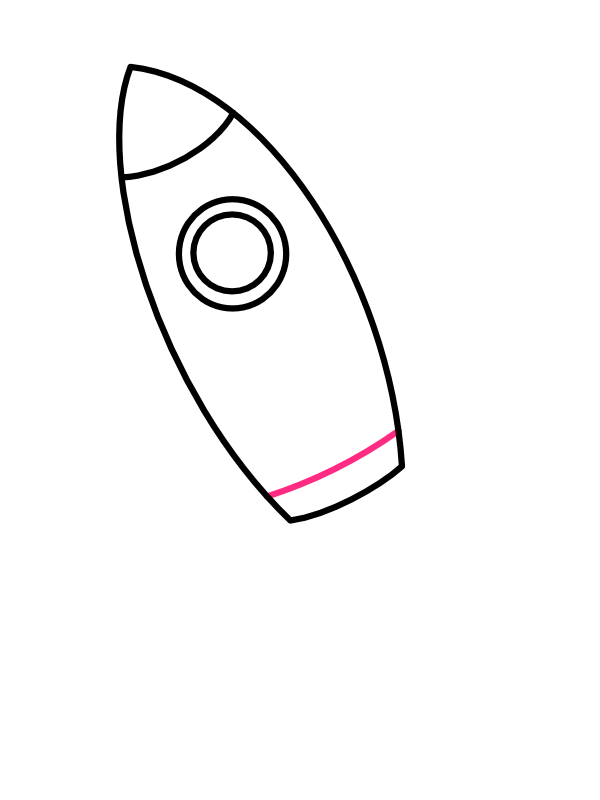
Near the lower end of the body, draw a horizontal curved line running from one edge of the rocket to the other to create a band or ring separating the main fuselage from the engine section below it. This engine band is a clean, simple detail that adds a lot of structural interest to the lower half of the rocket — it suggests a mechanical joint or a fuel collar, the kind of hardware detail that makes the whole craft look like it was actually engineered rather than just drawn. Keep it fairly narrow rather than making it a thick section; a slender band looks more precise and deliberate.

5

Draw the Side Fins

Step 5: Draw the Side Fins

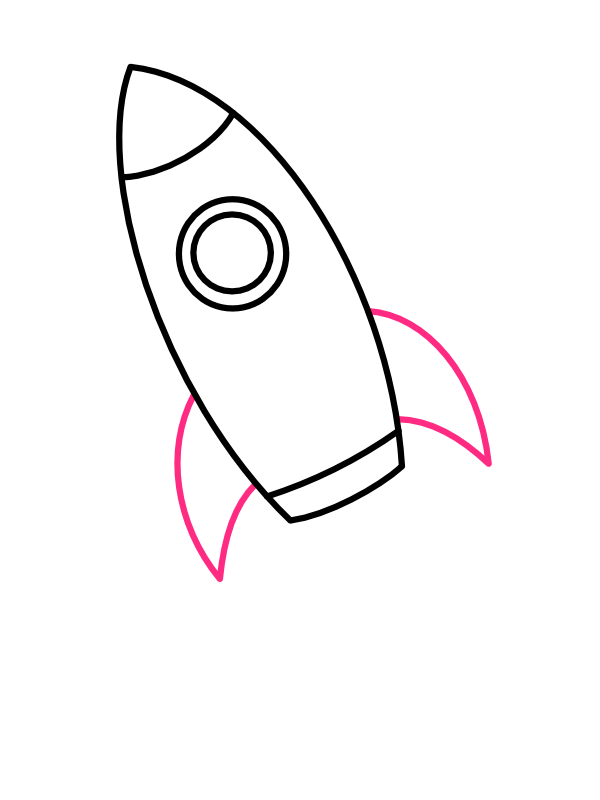
On either side of the lower body, just above the engine band, draw the swept-back fins — one on the left side and one on the right. Each fin should curve smoothly away from the body, starting at the fuselage and sweeping backward and outward to a pointed tip. Think of them as a pair of wings that have been folded back close to the body rather than spreading wide — they have a sleek, aerodynamic lean to them rather than sticking out at right angles. The two fins don't need to be perfectly symmetrical, but making sure they start at roughly the same height on the body will keep the rocket feeling balanced.

6

Add the Engine Nozzle

Step 6: Add the Engine Nozzle

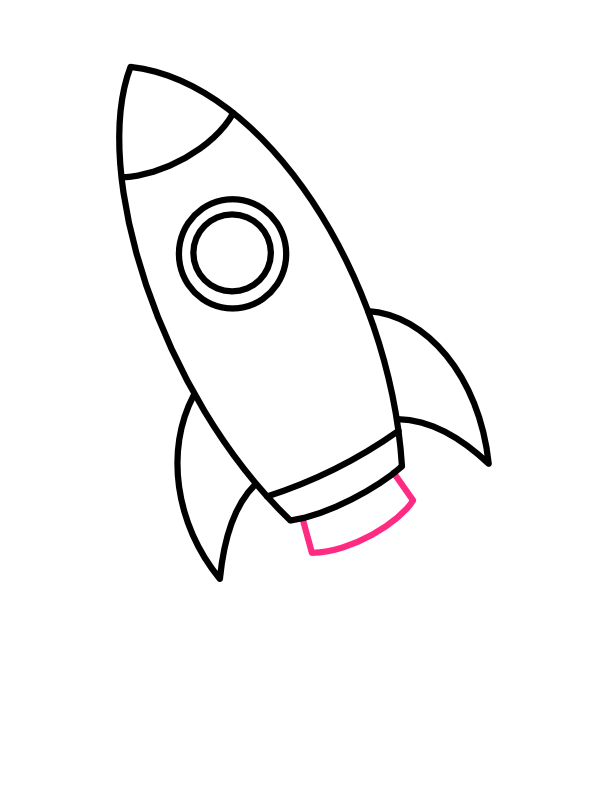
Directly below the engine band at the very base of the rocket, draw a short, slightly flared rectangular or trapezoidal shape — wider at the top where it connects to the band and very slightly narrower at the open bottom end. This is the engine nozzle, the part the exhaust flame shoots out of, and it's a compact little shape that gives the base of the rocket a finished, mechanical look. Even though it's one of the smallest parts of the drawing, it's the piece that separates a rocket with a believable propulsion system from one that just has fire appearing out of nowhere.

7

Draw the Rocket Flames

Step 7: Draw the Rocket Flames

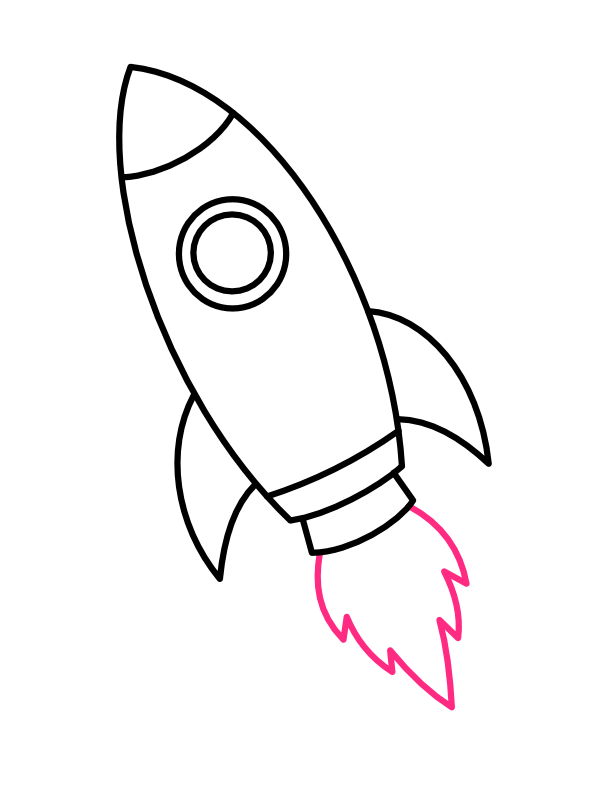
Beneath the open end of the nozzle, draw the exhaust flames — a large, wild, jagged shape that billows outward below the rocket. Let the flames spread wider than the nozzle itself, with a series of pointed, irregular spikes along the bottom edge like a flickering fire rather than a uniform shape. Some spikes should be taller, some shorter, and a couple of them can curl slightly to the side as if they're being blown by the force of liftoff. The messiness is the point — perfectly even flames look like a decoration, but varied, chaotic ones look like the rocket is actually burning.

8

Color Your Rocket

Step 8: Color Your Rocket

Now for the most satisfying part!

  • Nose cone: Bold red, with a slightly darker red along the left edge for shading
  • Main body: Light grey or off-white, with a pale grey streak down the left side to suggest the curve of the cylinder
  • Nose cone dividing line area: Clean white where it meets the body, matching the fuselage
  • Porthole ring: Dark grey or charcoal
  • Porthole glass: Bright sky blue with a small white highlight dot in the upper portion to suggest a glossy surface
  • Engine band: Dark navy blue
  • Side fins: Cobalt blue, with a slightly lighter blue highlight near the front edge of each fin
  • Engine nozzle: Red, matching the nose cone
  • Flames: Bright orange on the outside edges, fading to warm yellow toward the center, with a small white-hot core right at the nozzle opening

Once the color goes on, that classic red-white-and-blue palette alongside the orange fire makes the rocket look like it jumped straight off a retro space poster — and it's ready to blast off the page. 🚀

Final Thoughts

The thing that makes this rocket so satisfying to draw is the clear visual progress at every single step. The body starts as a simple shape, but by the time the nose cone line is added in Step 2, it already looks like a rocket. The porthole and engine band in Steps 3 and 4 give it structure and detail; the fins in Step 5 give it that aerodynamic attitude; and the flames in Step 7 are the payoff the whole drawing has been building toward. If any step feels tricky, it's the fins — getting both of them to match in angle and size takes a second attempt more often than not, but it's worth the patience.

Once you're comfortable with this diagonal launch pose, try drawing the rocket facing straight up toward the top of the page, or sketch it from a slightly lower angle as if you're looking up at it as it blasts overhead.