


How to Draw a Dolphin

July 12, 2026
7 Steps
AR Drawing Logo

AR Drawing

Drawing Tutorials

There's a reason dolphins show up in so much beach and ocean-themed art — that sleek, curved body caught mid-leap just radiates energy and joy, like it's genuinely having the time of its life jumping out of the waves. What makes this drawing so satisfying is that the entire pose comes from one long, sweeping curve, and everything else — the friendly face, the fins, the tail — clips onto that curve in a handful of quick, simple steps. By the end, you've got a dolphin that looks like it's frozen mid-jump, water splashing somewhere just out of frame. Let's get drawing!

How to Draw a Dolphin
What You Will Need
  • Pencil
  • Eraser
  • White paper
  • Black marker or fine-liner (optional)
  • Colored pencils, crayons, or markers
1

Draw the Body Outline

Step 1: Draw the Body Outline

Starting on the left side of your page, draw a short curved snout that hooks slightly upward, then let the line flow up and over into a long, smooth arc sweeping down and to the right, curving all the way toward the bottom of the page. This single flowing line captures the dolphin's entire leaping pose in one motion — the rounded forehead, the arched back, and the long downward curve toward the tail — so take your time getting that sweep to feel graceful rather than choppy.

2

Add the Face

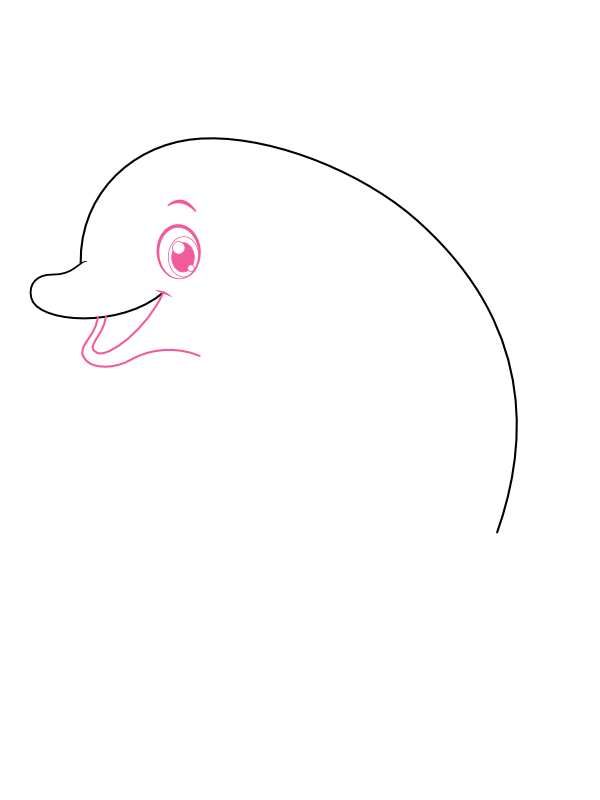
Step 2: Add the Face

On the head, just above the snout, draw a rounded eye with a smaller circle inside for the pupil and a tiny white highlight left uncolored for that lively, alert look. Add a short curved eyebrow just above it, angled slightly, which instantly gives the dolphin a cheerful, curious expression. Below the eye, draw a curved line for the open, smiling mouth, with a small tongue shape tucked just inside — that little upward curl at the corner of the mouth is what makes the dolphin look like it's genuinely grinning rather than just baring its teeth.

3

Draw the Dorsal Fin

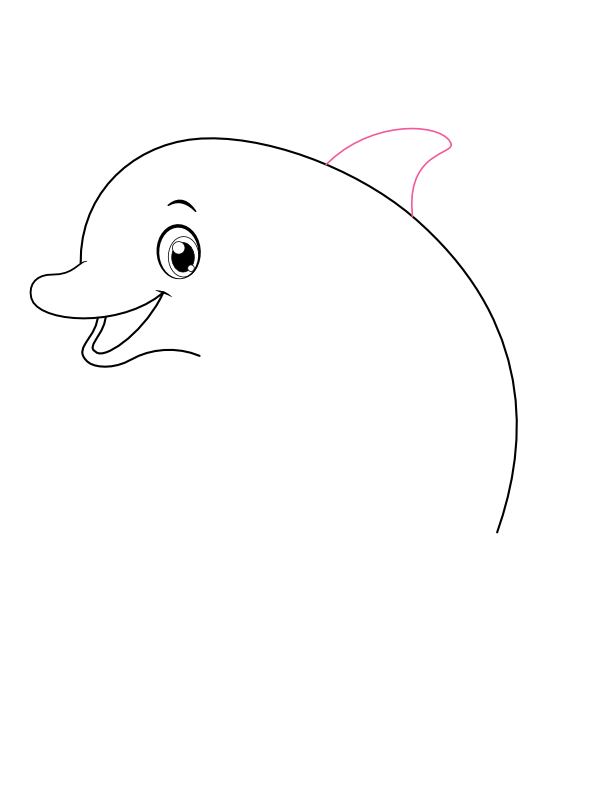
Step 3: Draw the Dorsal Fin

Along the top of the back, roughly midway between the head and where the body will eventually curve down toward the tail, draw a curved triangular fin pointing upward and slightly backward. Give the fin a gently curving front edge and a straighter back edge, tapering to a rounded point at the top. This dorsal fin is one of the most recognizable features on any dolphin, and it's a quick, simple shape to add once the main body curve is already in place.

4

Add the Pectoral Fin and Belly Curve

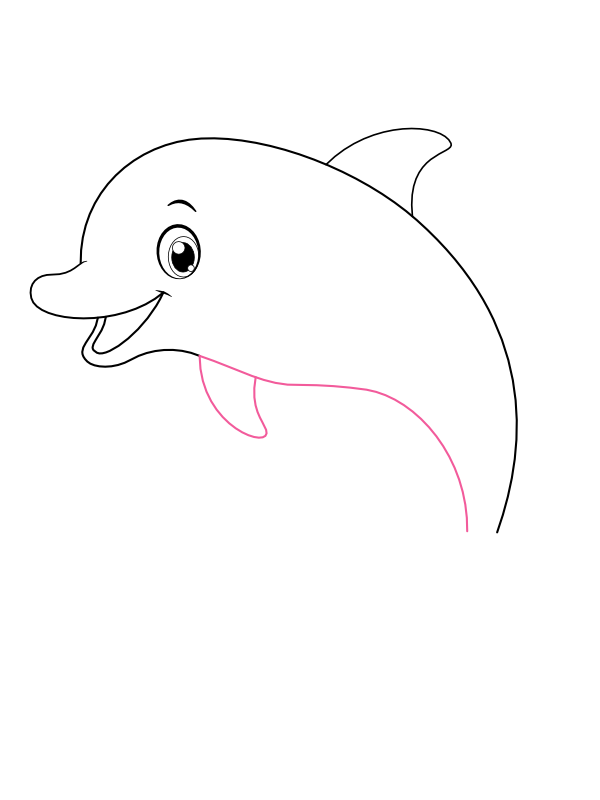
Step 4: Add the Pectoral Fin and Belly Curve

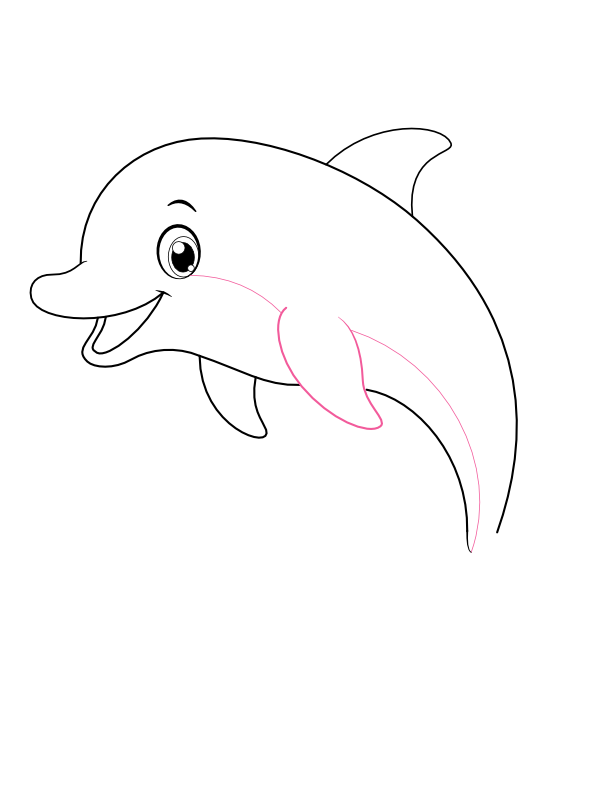
Below the head, roughly where the chin meets the underside of the body, draw a small rounded fin pointing downward and slightly back — this is the pectoral fin dolphins use for steering. From near the base of this fin, draw a long curved line running along the underside of the body, roughly parallel to the main outline from Step 1, to begin separating the belly from the back.

5

Refine the Belly Line

Step 5: Refine the Belly Line

Continue that belly curve further down the body, letting it run closer to the main outline as it approaches the tail, so the space between the two lines narrows gradually. This second curve is what will eventually let you shade the belly a different, paler color from the back in the coloring step, which is one of the most recognizable features of a dolphin's coloring in real life.

6

Draw the Tail Fluke

Step 6: Draw the Tail Fluke

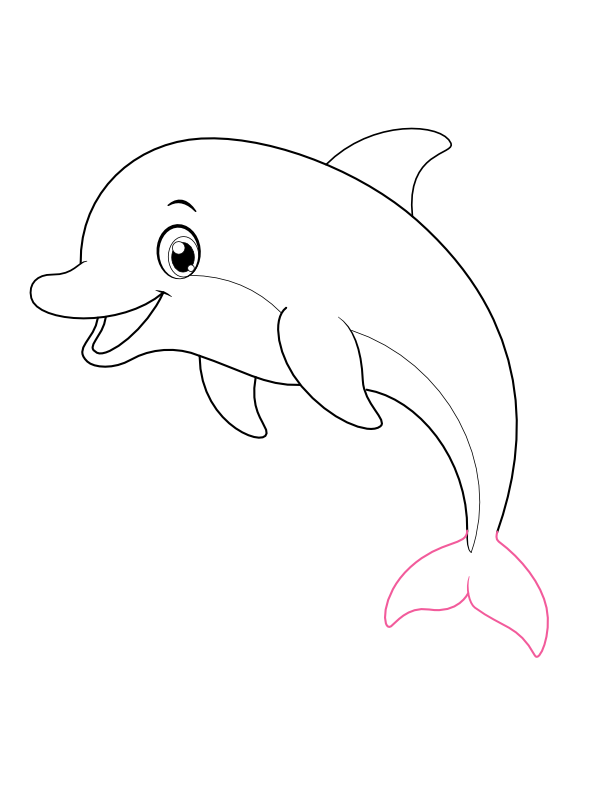
At the bottom end of the main body curve, draw the tail fin spreading outward into two flattened, curved lobes meeting at a gentle notch in the middle, like a wide, horizontal letter M lying on its side. Unlike a fish's tail, which stands vertically, a dolphin's tail fluke is flattened horizontally, since that's what lets it power itself up out of the water in that iconic leaping motion.

7

Color Your Dolphin

Step 7: Color Your Dolphin

Now for the most satisfying part!

  • Back and upper body: Bright, cheerful blue, covering the head, back, dorsal fin, pectoral fin, and tail fluke
  • Belly (below the curved line from Steps 4 and 5): Soft pale blue or near-white, creating that classic two-tone dolphin coloring
  • Mouth interior: Soft pink, with the small tongue shape a slightly deeper pink
  • Eye: Solid black pupil with a small white highlight dot, set inside a thin dark outline
  • Fins and tail: The same bright blue as the back, with a slightly darker blue along the edges for a touch of shading

Once the color goes on, that bright blue back fading into a soft pale belly gives the dolphin an energetic, sun-drenched look — like it just burst out of the waves mid-leap. 🐬

Final Thoughts

The part of this drawing most people spend the longest getting right is Step 1 — that single sweeping body curve everything else depends on. Because it's one continuous line covering the head, back, and tail all at once, it's worth sketching it a couple of times lightly before committing, since a curve that feels too stiff or too rounded early on will carry through the whole rest of the drawing. Once that main arc feels right, every step after it — the face, the fins, the tail — is quick and forgiving, since they're all small shapes clipped onto a foundation you've already nailed.

Once this dolphin feels comfortable, try drawing two of them leaping side by side at slightly different heights, as if they're jumping together — it reuses the exact same body curve technique while adding a nice sense of movement and playfulness to the scene.